Scanning with the SL Sensor
Once the structured light patterns have been uploaded, you can start to scan.
- Initialise Versavis camera stream
roslaunch versavis dual_bf_mono_sls_versavis_run_versavis.launch - In a separate terminal, start a reconstruction pipeline
roslaunch sl_sensor XXX.launch
Where XXX can be the following (horizontal->left cam used, vertical-> top cam used):
- 2p1_tpu_horizontal
- 2p1_tpu_horizontal_motion_compensation
- 2p1_tpu_vertical
- 2p1_tpu_vertical_motion_compensation
- psp_tpu_horizontal
- psp_tpu_horizontal_motion_compensation
- psp_tpu_vertical
- psp_tpu_vertical_motion_compensation
- psp_tpu_both (uses top cam, can only be used using SW trigger)
- sl_sensor_pattern_switching (option to toggle between scanning with left and top cam, point clouds will be in the top cam's frame)
For colour scanning we use the top cam for triangulation and points are reprojected to the left cam's image to obtain rgb information.
- Initialise Versavis camera stream (left cam rgb mode, top cam monochrome mode)
roslaunch versavis dual_bf_colour_sls_versavis_run_versavis.launch - In a separate terminal, start the colour reconstruction pipeline
roslaunch sl_sensor 2p1_tpu_vertical_colour.launch
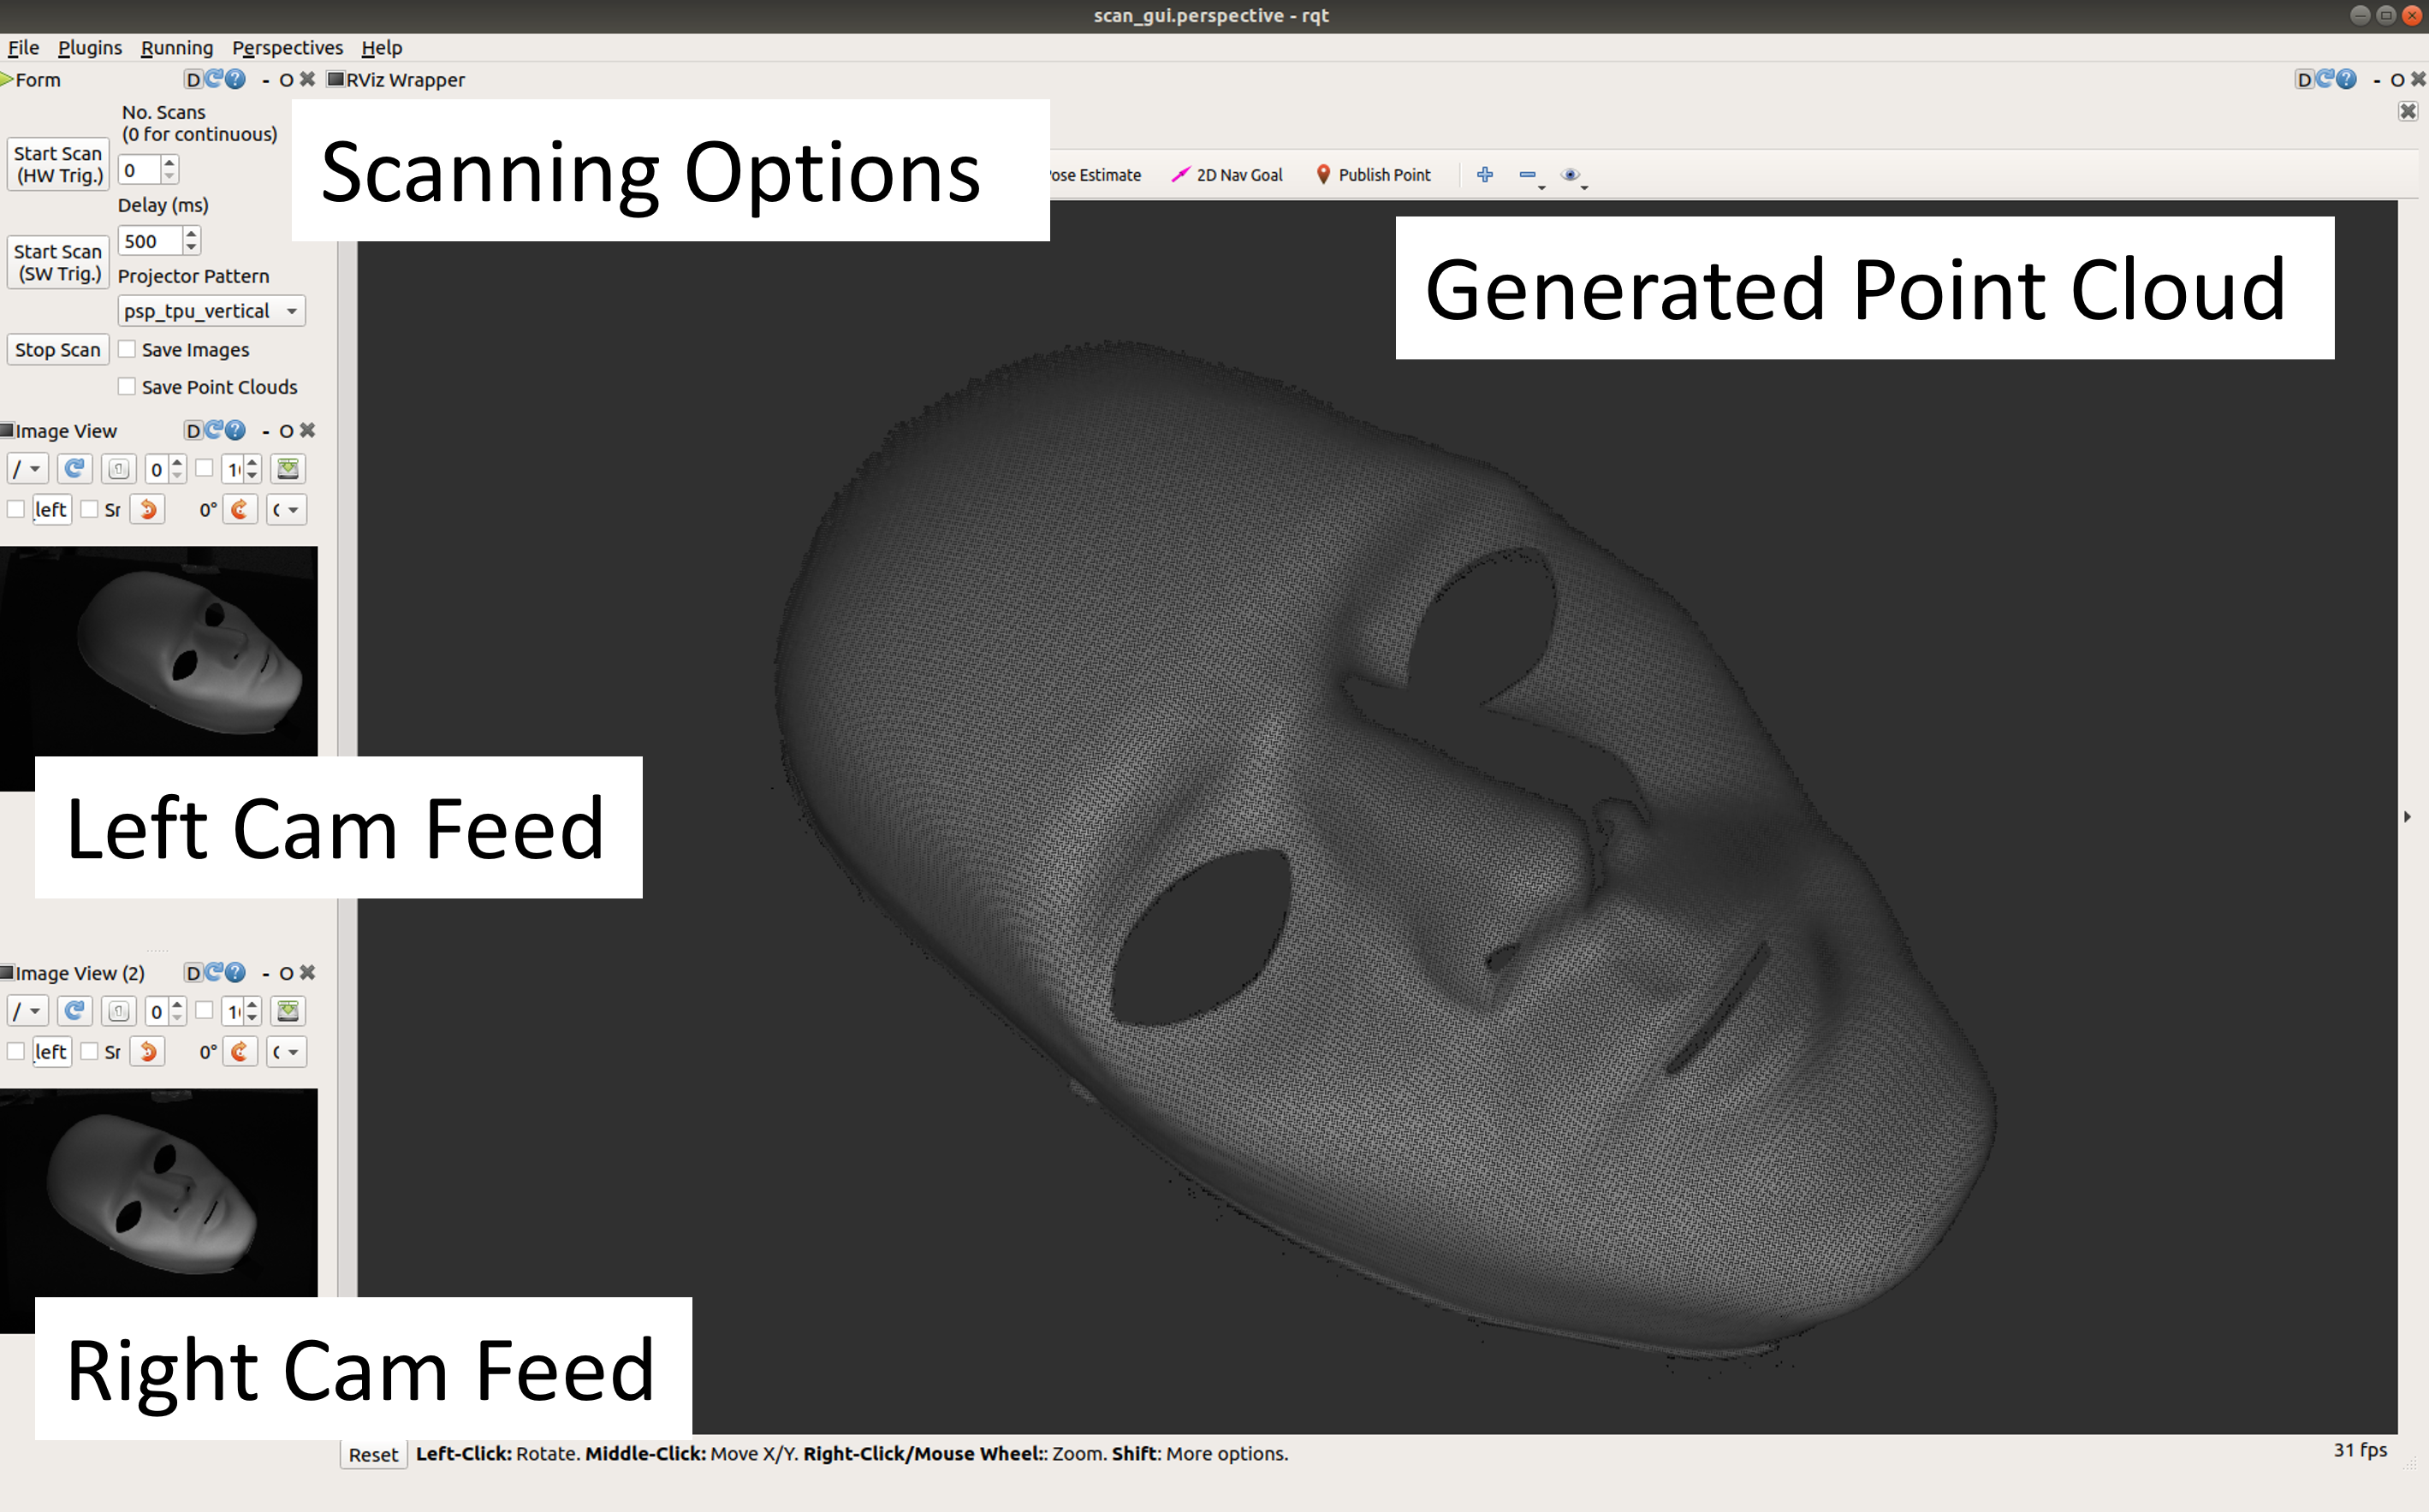
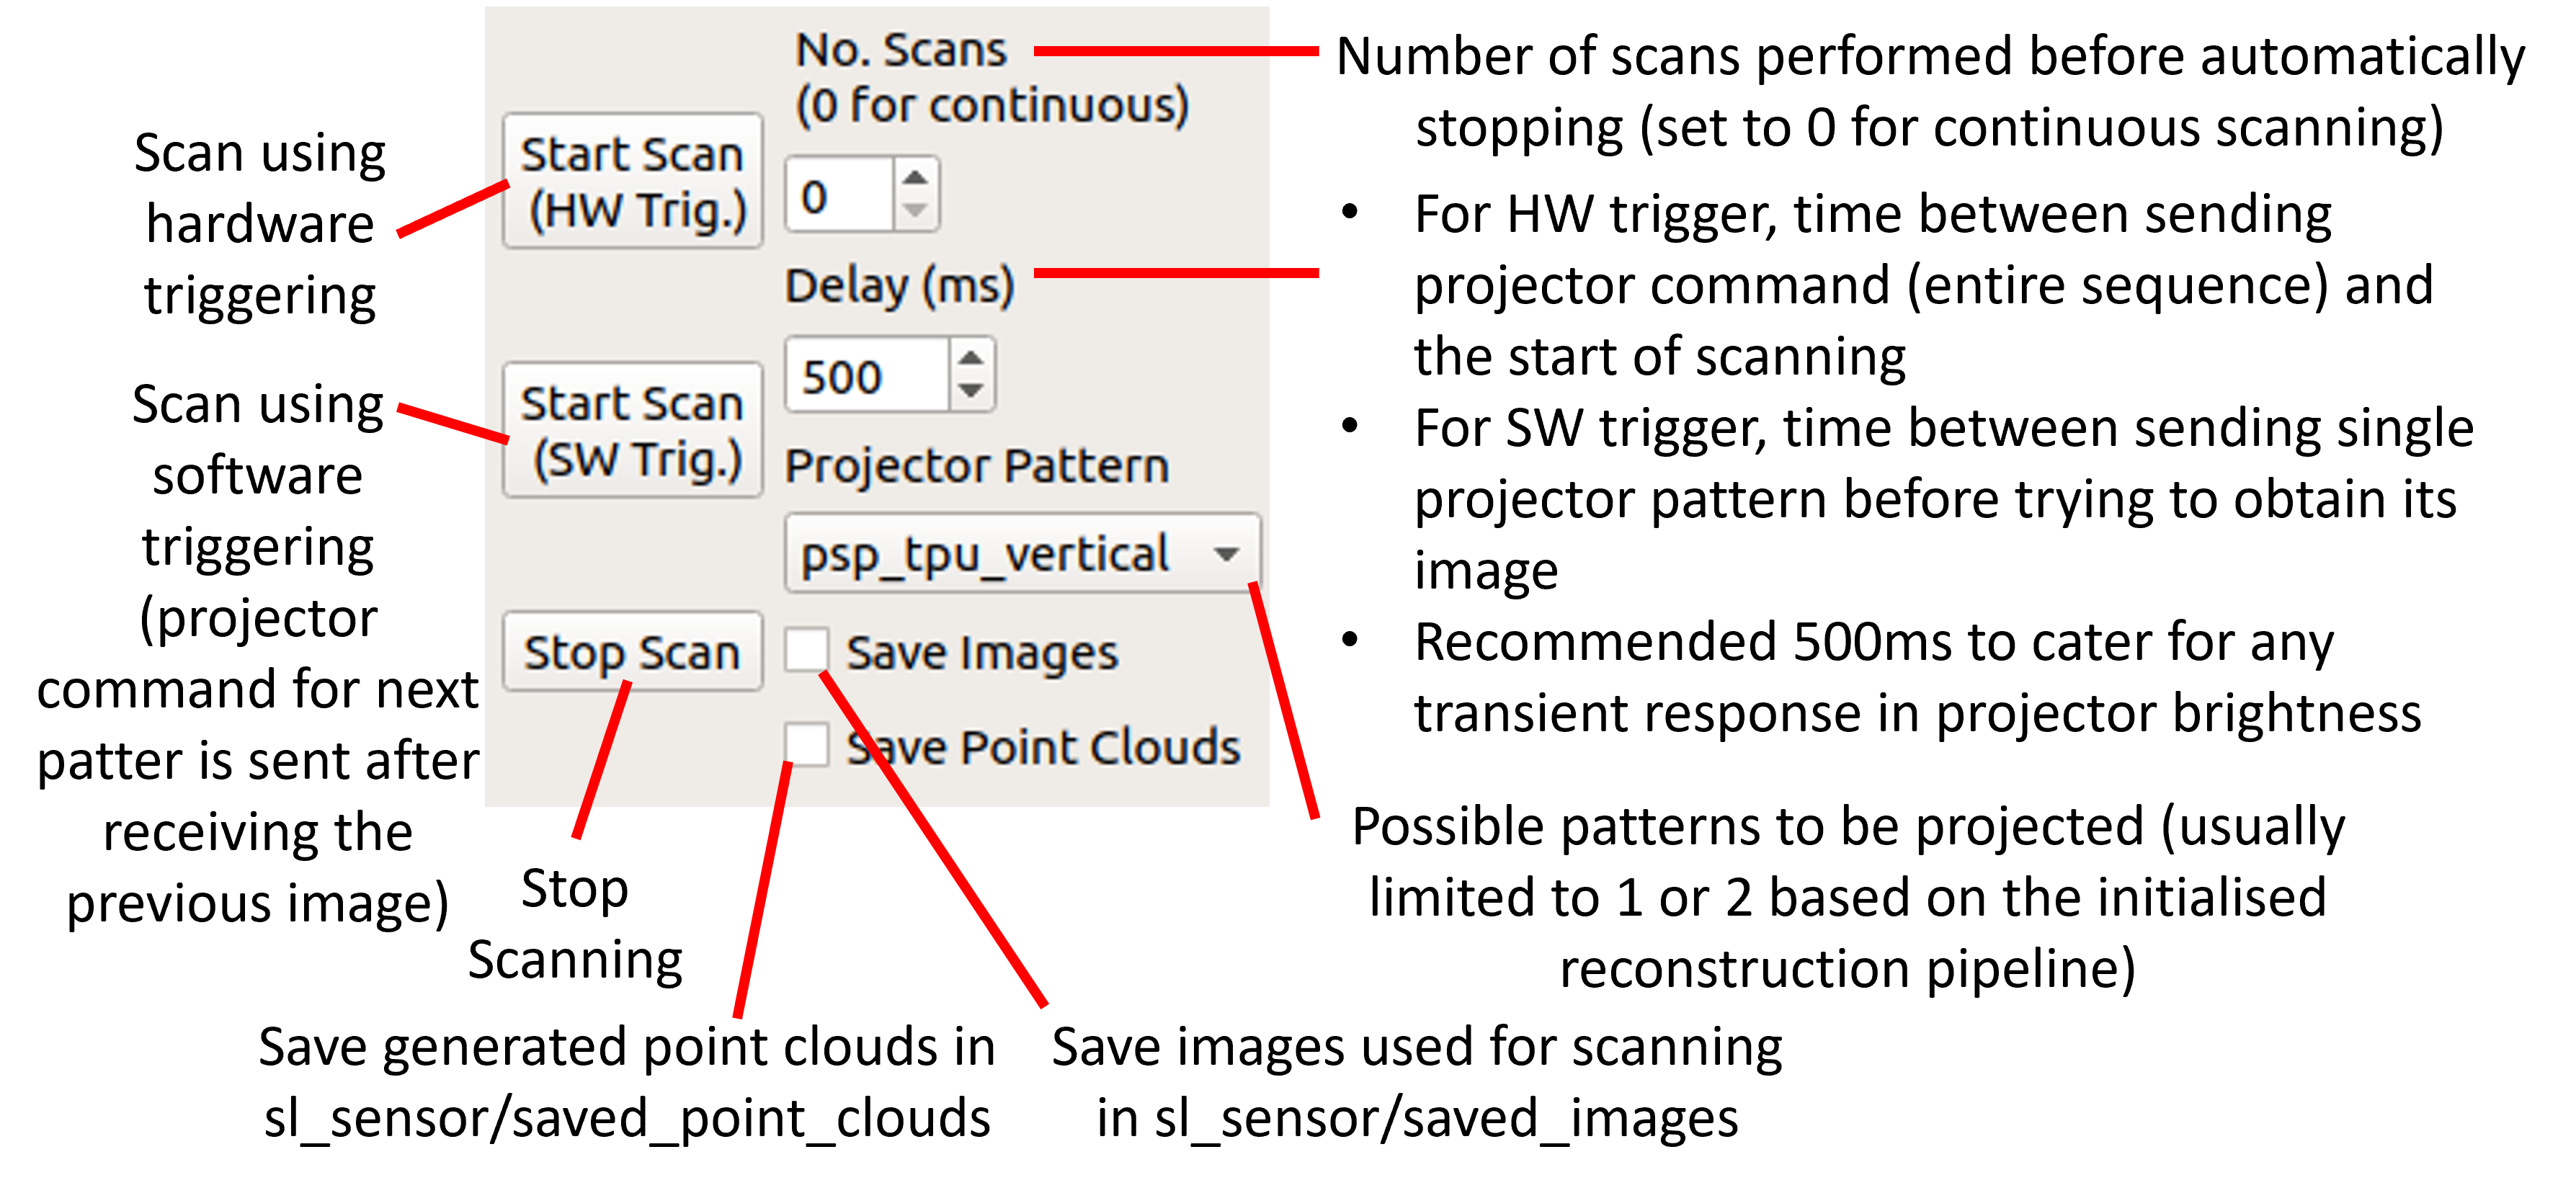
Running the above launch files will automatically start the RQT Scanning GUI so you can control the SL Sensor and also visualise the results.