Initial Software Setup
We need to upload the correct firmware onto the Versavis trigger board and Lightcrafter 4500 before it is operational. For the steps below, connect the the SL Sensor to a USB3 port on your computer.
If your computer cannot detect the cameras, Versavis trigger board or projector, a possible problem is that you have not set up the udev rules for the devices.
- For the camera, the Spinnaker installation should create the udev rule file.
- For the Versavis, its README (which you will do in the next section) has steps to create the udev rule file.
- For the Lightcrafter, we provide the udev file. It can be found in the udev_rules folder. Copy 99-lightcrafter.rules into the /etc/udev/rules.d folder of your computer.
In the case of any issues, we provide sample udev files for the 3 devices that work for our system. Copy them into the /etc/udev/rules.d folder of your computer and then reboot your system for the changes to take effect.
- Follow the instructions on the Versavis README, including uploading versavis.ino onto the board. In the devel/sl_sensor branch, the versavis_configuration.h has been specifically modified for the SL Sensor. Furthermore, we have changed a bit of the source code such that there is no handshaking ROS-Versavis performed if the topic name has "projector" in it since we are not expecting any images from the projector
- Go to dual_bf_mono_sls_versavis_run_versavis.launch and dual_bf_colour_sls_versavis_run_versavis.launch and modify the fields cam1_serial and cam2_serial with the serial number of your FLIR cameras (you can obtain this using the Spinview app that comes with your Spinnaker installation). cam1 refers to the left camera while cam2 refers to the top camera
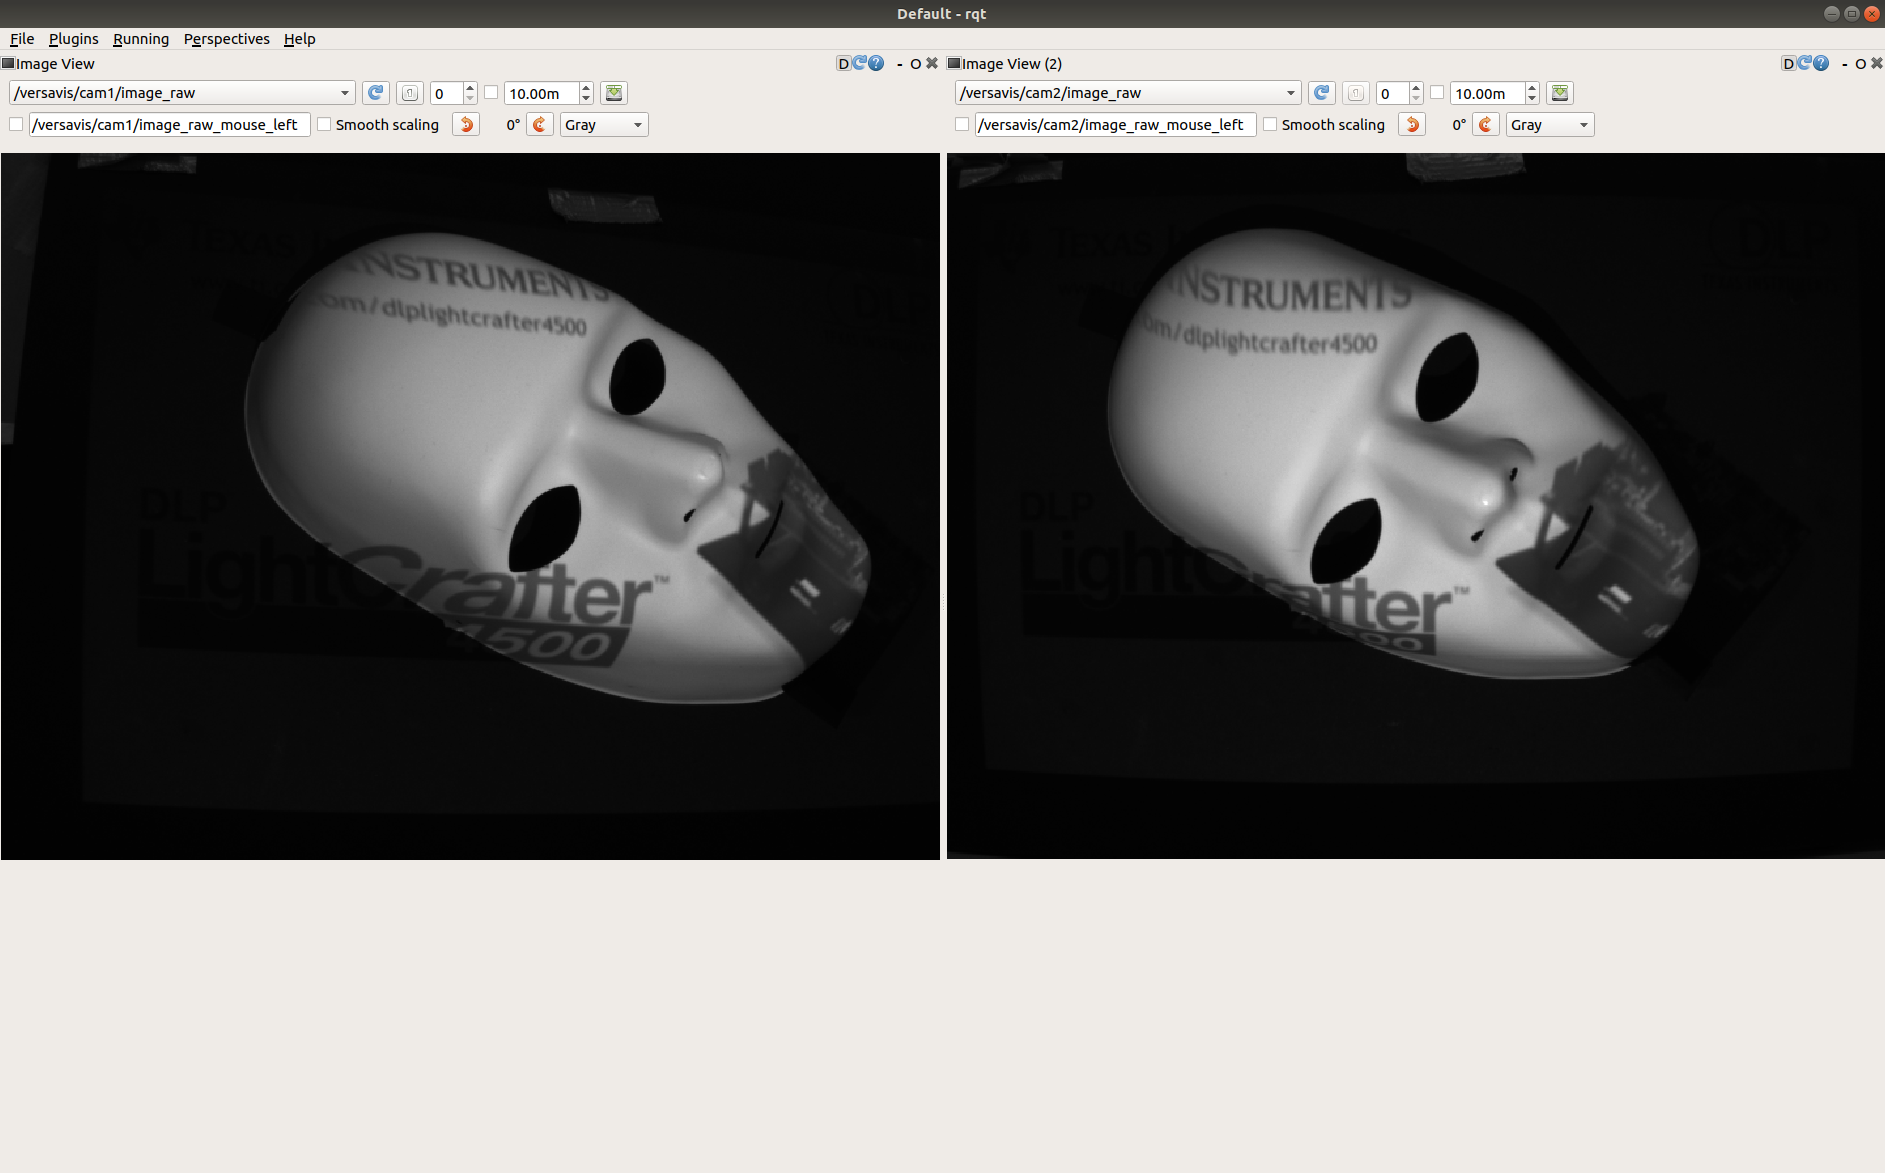
- To test that we have a proper camera stream from both cameras, on a terminal run
roslaunch versavis dual_bf_mono_sls_versavis_run_versavis.launch. Wait for around 30 seconds for Versavis to initialise. A successful initialisation is indicated by a terminal output similar to "[INFO] [timestamp]: Received first IMU message.". You can now open runrqtin a separate terminal and using the Visualization -> Image Viewer plugin see the image streams from both cameras
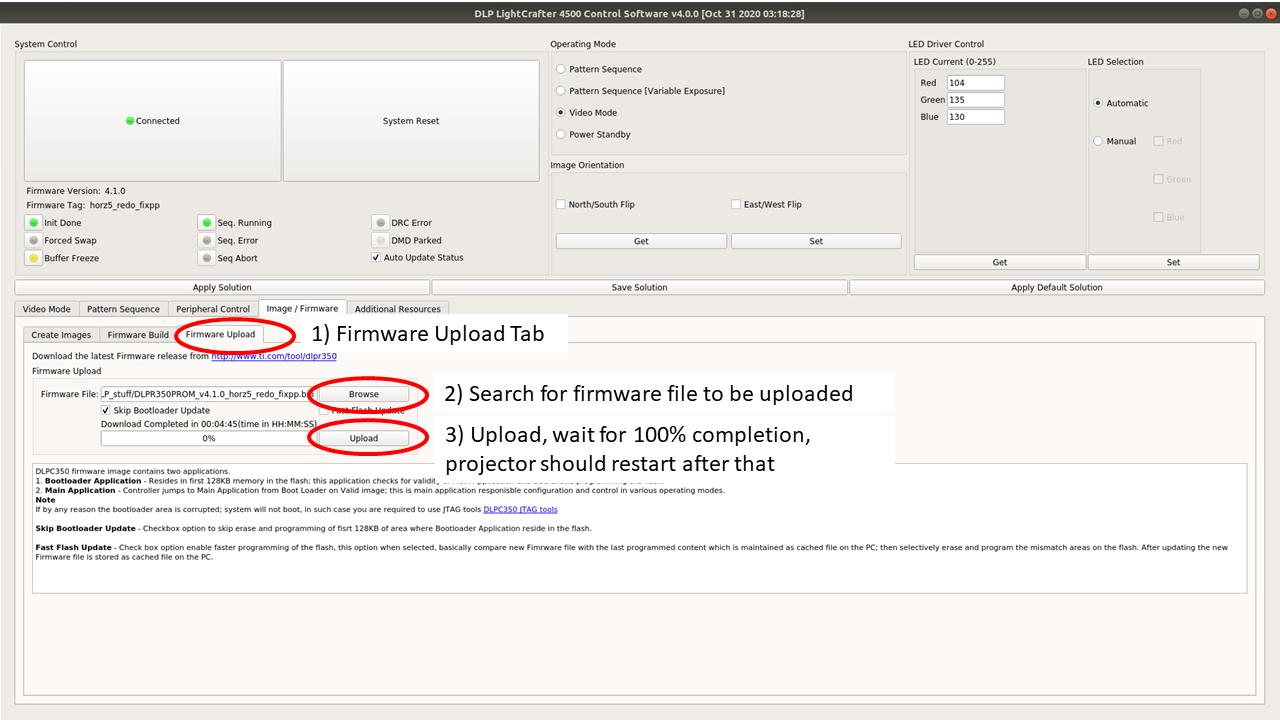
- Install the Lightcrafter 4500 GUI from here, instructions provided in the README.
- Upload the DLPR350PROM_v4.1.0_with_calibration_patterns_25x16.bin file located in the firmware folder. It contains the patterns required to perform calibration of the sensor.