📚 This guide explains how to train your own custom dataset with YOLOv5 🚀. See YOLOv5 Docs for additional details. UPDATED 13 April 2023.
To understand the code head to this video where i am Describing Drowsiness Detection Android App's Code.
Clone repo and install requirements.txt in a Python>=3.7.0 environment, including PyTorch>=1.7. Models and datasets download automatically from the latest YOLOv5 release.
git clone https://github.com/ultralytics/yolov5  # clone
cd yolov5
pip install -r requirements.txt  # install

Creating a custom model to detect your objects is an iterative process of collecting and organizing images, labeling your objects of interest, training a model, deploying it into the wild to make predictions, and then using that deployed model to collect examples of edge cases to repeat and improve.
YOLOv5 models must be trained on labelled data in order to learn classes of objects in that data. There are two options for creating your dataset before you start training:
Your model will learn by example. Training on images similar to the ones it will see in the wild is of the utmost importance. Ideally, you will collect a wide variety of images from the same configuration (camera, angle, lighting, etc.) as you will ultimately deploy your project.
If this is not possible, you can start from a public dataset. to train your initial model and then sample images from the wild during inference to improve your dataset and model iteratively.
Once you have collected images, you will need to annotate the objects of interest to create a ground truth for your model to learn from.
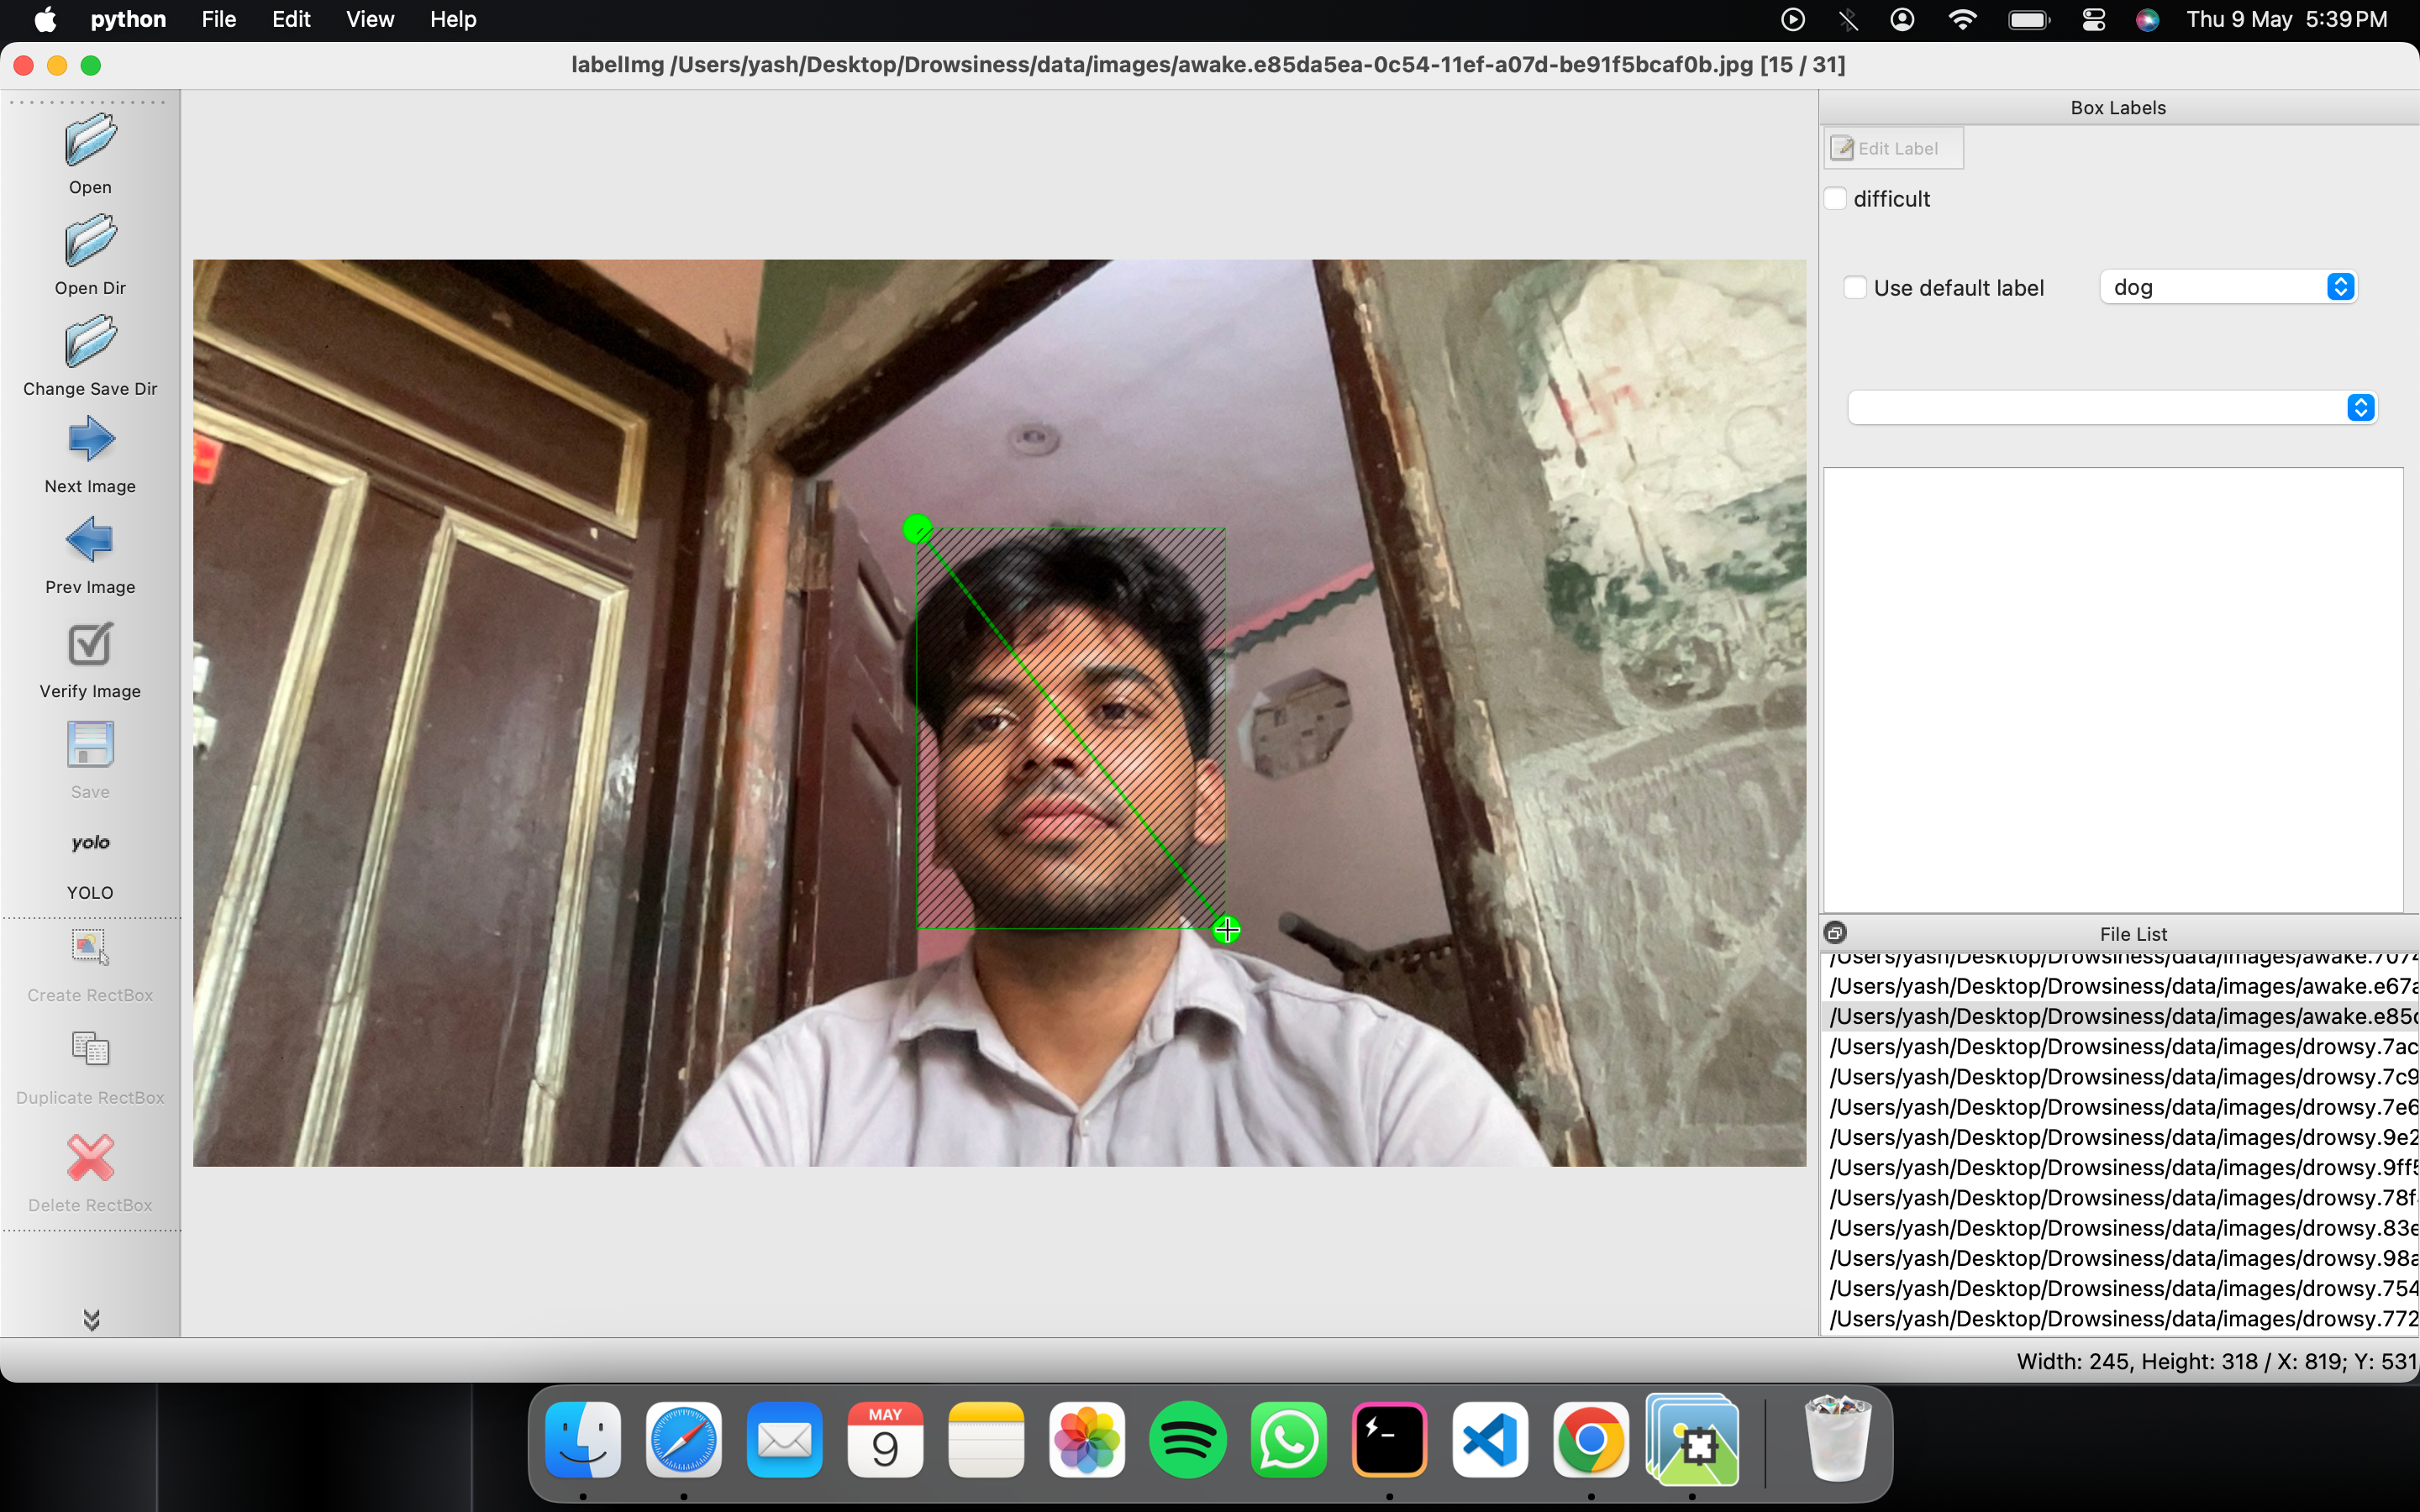
LabelImg is a graphical image annotation tool.
It is written in Python and uses Qt for its graphical interface.
Annotations are saved as XML files in PASCAL VOC format, the format used by ImageNet. Besides, it also supports YOLO and CreateML formats.
This is the simplest (one-command) install method on modern Linux distributions such as Ubuntu and Fedora.
    pip3 install labelImg
    labelImg
    labelImg [IMAGE_PATH] [PRE-DEFINED CLASS FILE]
Linux/Ubuntu/Mac requires at least Python 2.6 and has been tested with PyQt 4.8. However, Python3 or above and PyQt5 are strongly recommended.
Python 3 + Qt5
    sudo apt-get install pyqt5-dev-tools
    sudo pip3 install -r requirements/requirements-linux-python3.txt
    make qt5py3
    python3 labelImg.py
    python3 labelImg.py [IMAGE_PATH] [PRE-DEFINED CLASS FILE]
Python 3 + Qt5
    brew install qt  # Install qt-5.x.x by Homebrew
    brew install libxml2

    or using pip

    pip3 install pyqt5 lxml # Install qt and lxml by pip

    make qt5py3
    python3 labelImg.py
    python3 labelImg.py [IMAGE_PATH] [PRE-DEFINED CLASS FILE]
Install Python, PyQt5 and install lxml.
Open cmd and go to the labelImg directory
    pyrcc4 -o libs/resources.py resources.qrc
    For pyqt5, pyrcc5 -o libs/resources.py resources.qrc

    python labelImg.py
    python labelImg.py [IMAGE_PATH] [PRE-DEFINED CLASS FILE]
You can pull the image which has all of the installed and required dependencies. Watch a demo video
1. Build and launch using the instructions above.
2. Click 'Change default saved annotation folder' in Menu/File
3. Click 'Open Dir'
4. Click 'Create RectBox'
5. Click and release left mouse to select a region to annotate the rect
box
6. You can use right mouse to drag the rect box to copy or move it
The annotation will be saved to the folder you specify.
You can refer to the below hotkeys to speed up your workflow.
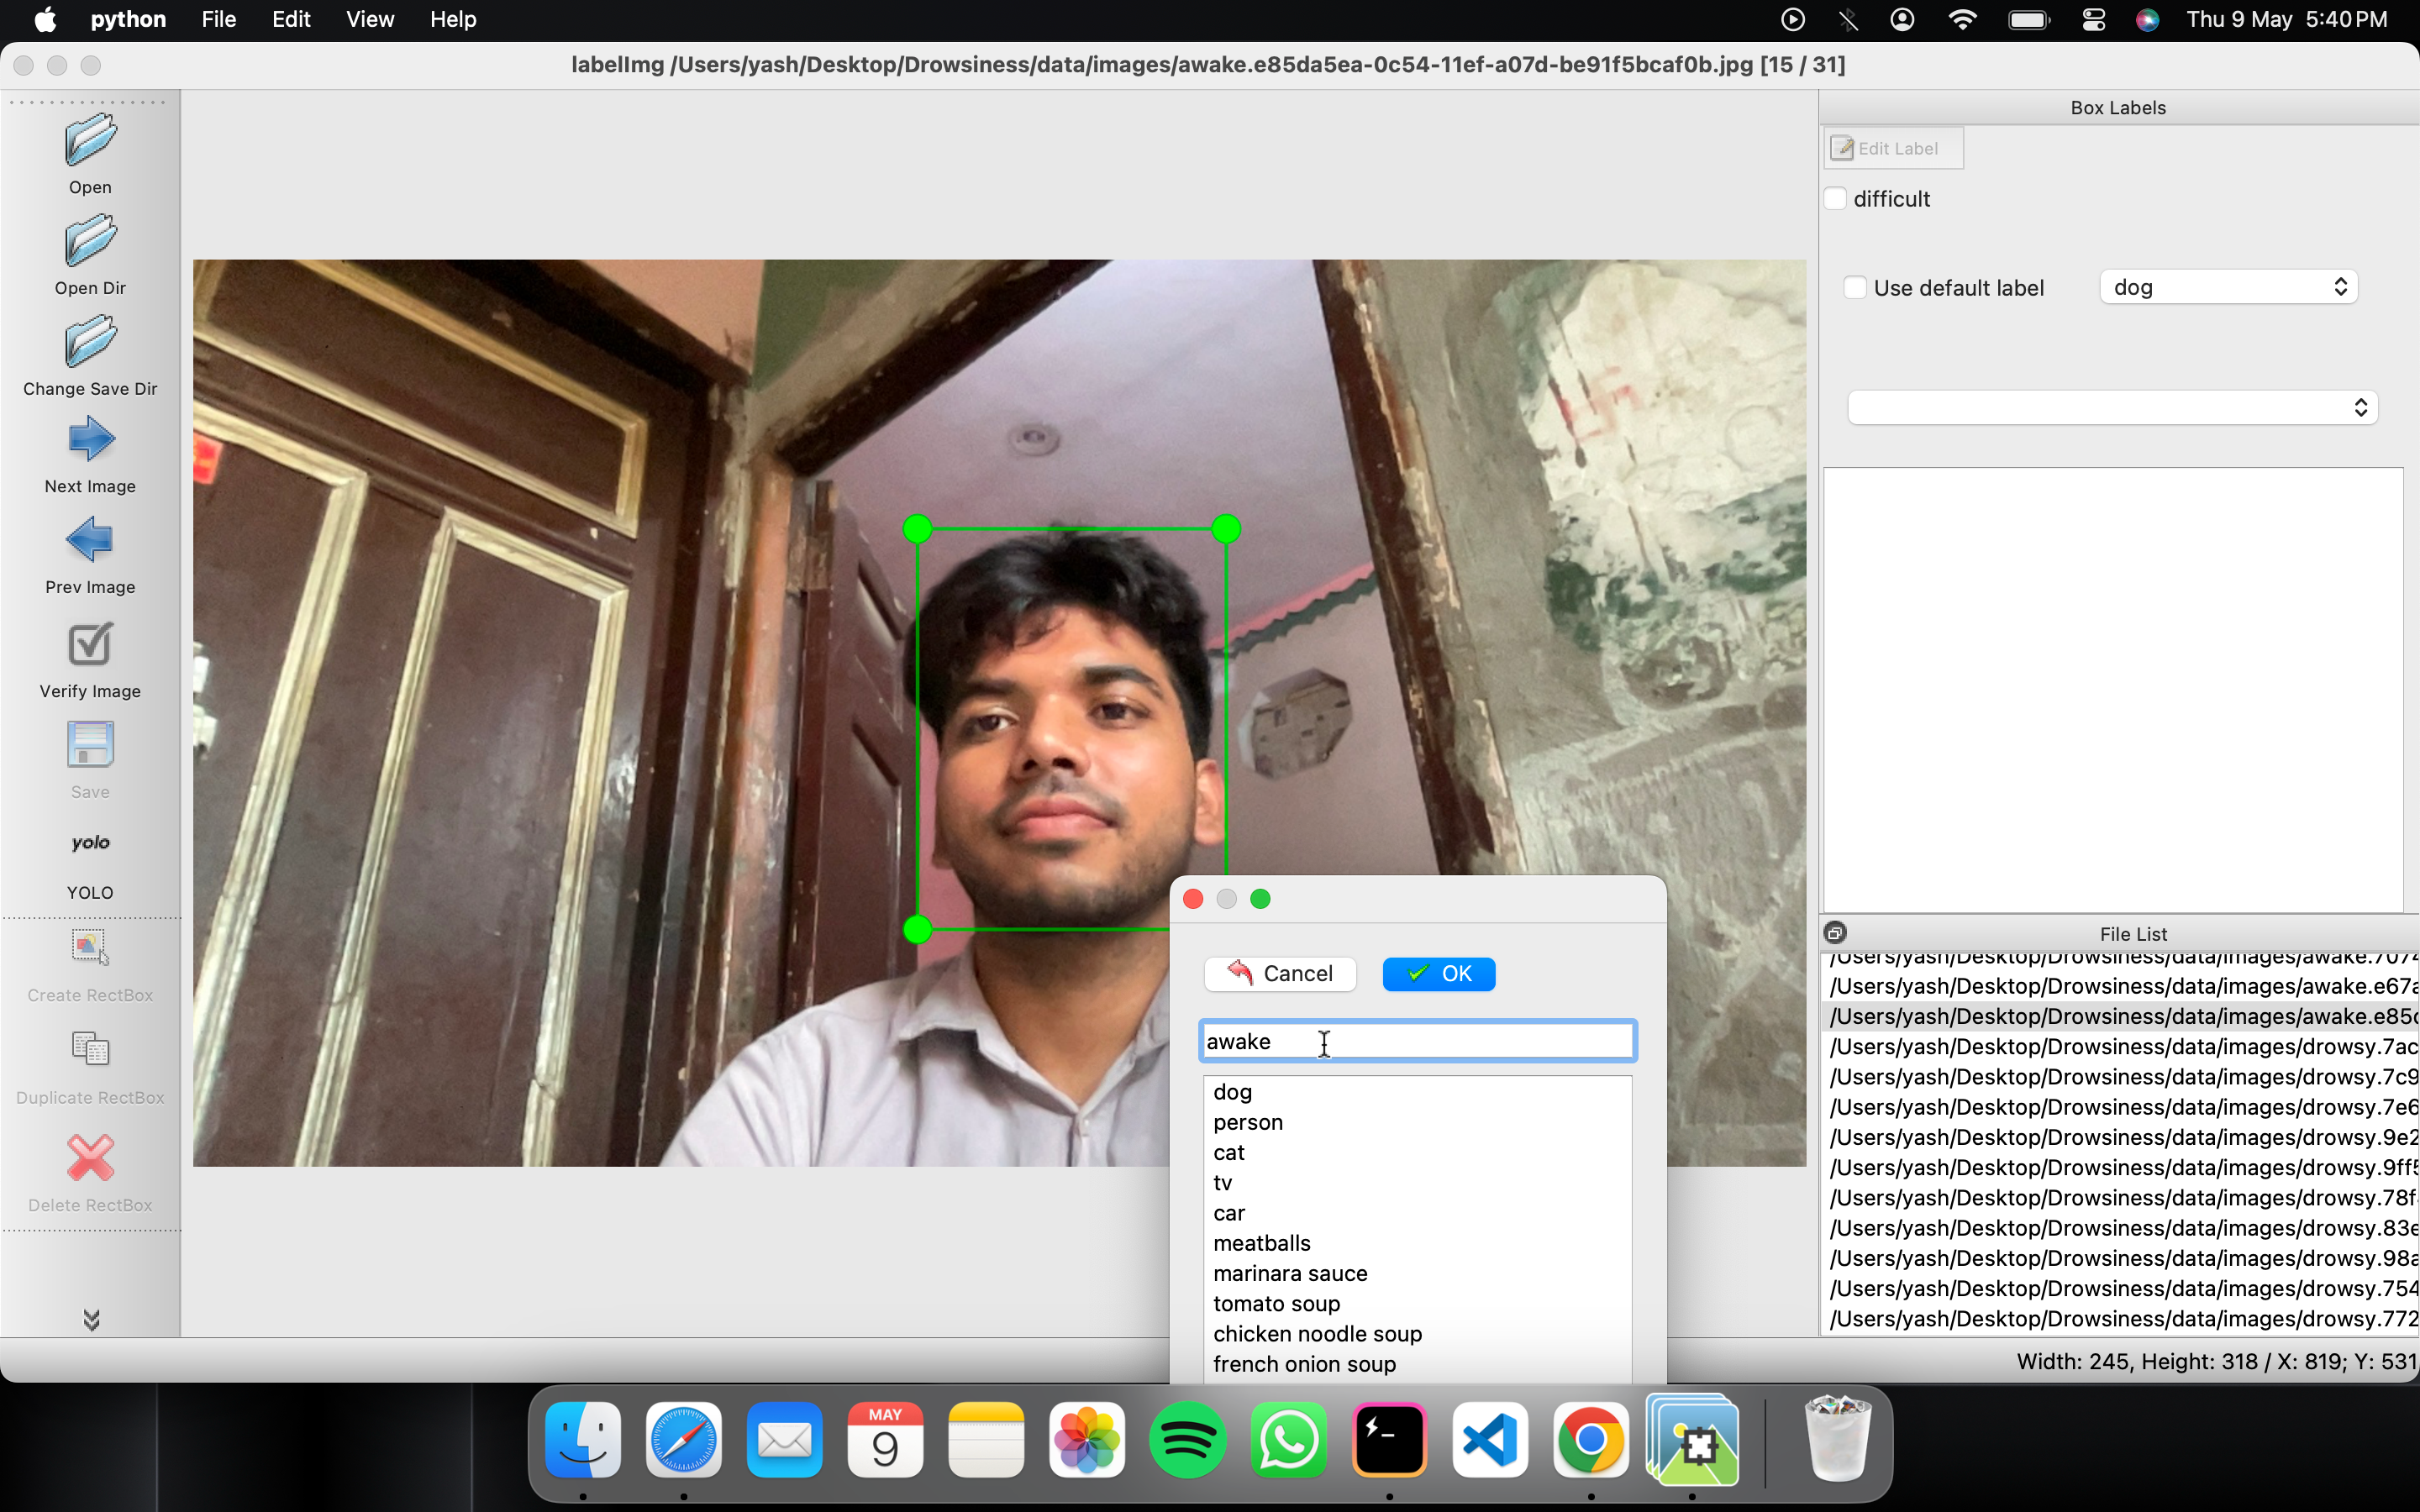
1. In ``data/predefined_classes.txt`` define the list of classes that will be used for your training.

2. Build and launch using the instructions above.

3. Right below "Save" button in the toolbar, click "PascalVOC" button to switch to YOLO format.

4. You may use Open/OpenDIR to process single or multiple images. When finished with a single image, click save.
A txt file of YOLO format will be saved in the same folder as your image with same name. A file named "classes.txt" is saved to that folder too. "classes.txt" defines the list of class names that your YOLO label refers to.
Note:
-
Your label list shall not change in the middle of processing a list of images. When you save an image, classes.txt will also get updated, while previous annotations will not be updated.
-
You shouldn't use "default class" function when saving to YOLO format, it will not be referred.
-
When saving as YOLO format, "difficult" flag is discarded.
Select a pretrained model to start training from. Here we select YOLOv5s, the second-smallest and fastest model available. See our README table for a full comparison of all models.

Train a YOLOv5s model on COCO128 by specifying dataset, batch-size, image size and either pretrained --weights yolov5s.pt (recommended), or randomly initialized --weights '' --cfg yolov5s.yaml (not recommended). Pretrained weights are auto-downloaded from the latest YOLOv5 release.
# Train YOLOv5s on COCO128 for 3 epochs
$ python train.py --img 320  --batch 16 --epochs 100 --data dataset.yaml --weights yolov5s.pt
💡 ProTip: Add --cache ram or --cache disk to speed up training (requires significant RAM/disk resources).
💡 ProTip: Always train from a local dataset. Mounted or network drives like Google Drive will be very slow.
All training results are saved to runs/train/ with incrementing run directories, i.e. runs/train/exp2, runs/train/exp3 etc. For more details see the Training section of our tutorial notebook
model = torch.hub.load('ultralytics/yolov5', 'custom' , path='yolov5/runs/train/exp/weights/best.pt', force_reload= True)
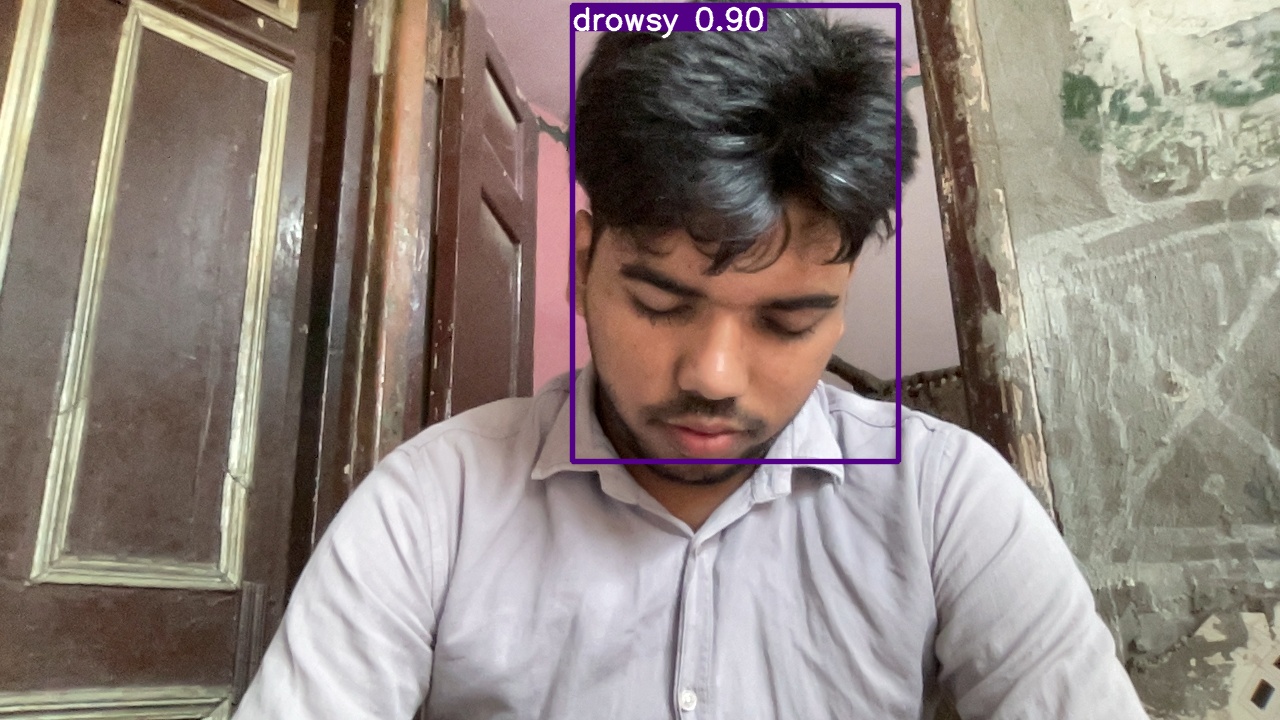
Images present in any particular folder will be tested and the result will store to the runs/detect/exp.
python detect.py --weights runs/train/exp/weights/best.pt --img 320 --conf 0.25 --source runs/train/exp/test_images
Images will be test on the notebook only.
$ img = os.path.join('data', 'images', 'awake.6ea0bcf6-0c54-11ef-bb9f-be91f5bcaf0b.jpg')
$ results = model(img)
$ results.print()
$ %matplotlib inline
$ plt.imshow(np.squeeze(results.render()))
$ plt.show()

cap = cv2.VideoCapture(0)
while cap.isOpened():
    ret, frame = cap.read()
    results = model(frame)
    cv2.imshow('YOLO', np.squeeze(results.render()))
    if cv2.waitKey(10) & 0xFF == ord('q'):
        break

cap.release()
cv2.destroyAllWindows()
# Convert weights to fp16 TFLite model
!cd yolov5 && python export.py --weights runs/train/exp/weights/best.pt --include tflite --img 320

#After running the above command, you will have best-fp16.tflite in runs\train\exp\weights folder

!cd yolov5 && python detect.py --weights runs/train/exp/weights/best-fp16.tflite --img 320 --conf 0.25 --source runs/train/exp/test_images
results will store in runs/detect/exp.
You must have android studio to integrate tflite Model with an Android App.
Now, download the android app's code from my github. Or you can find it inside the yolov5 folder in this repository.
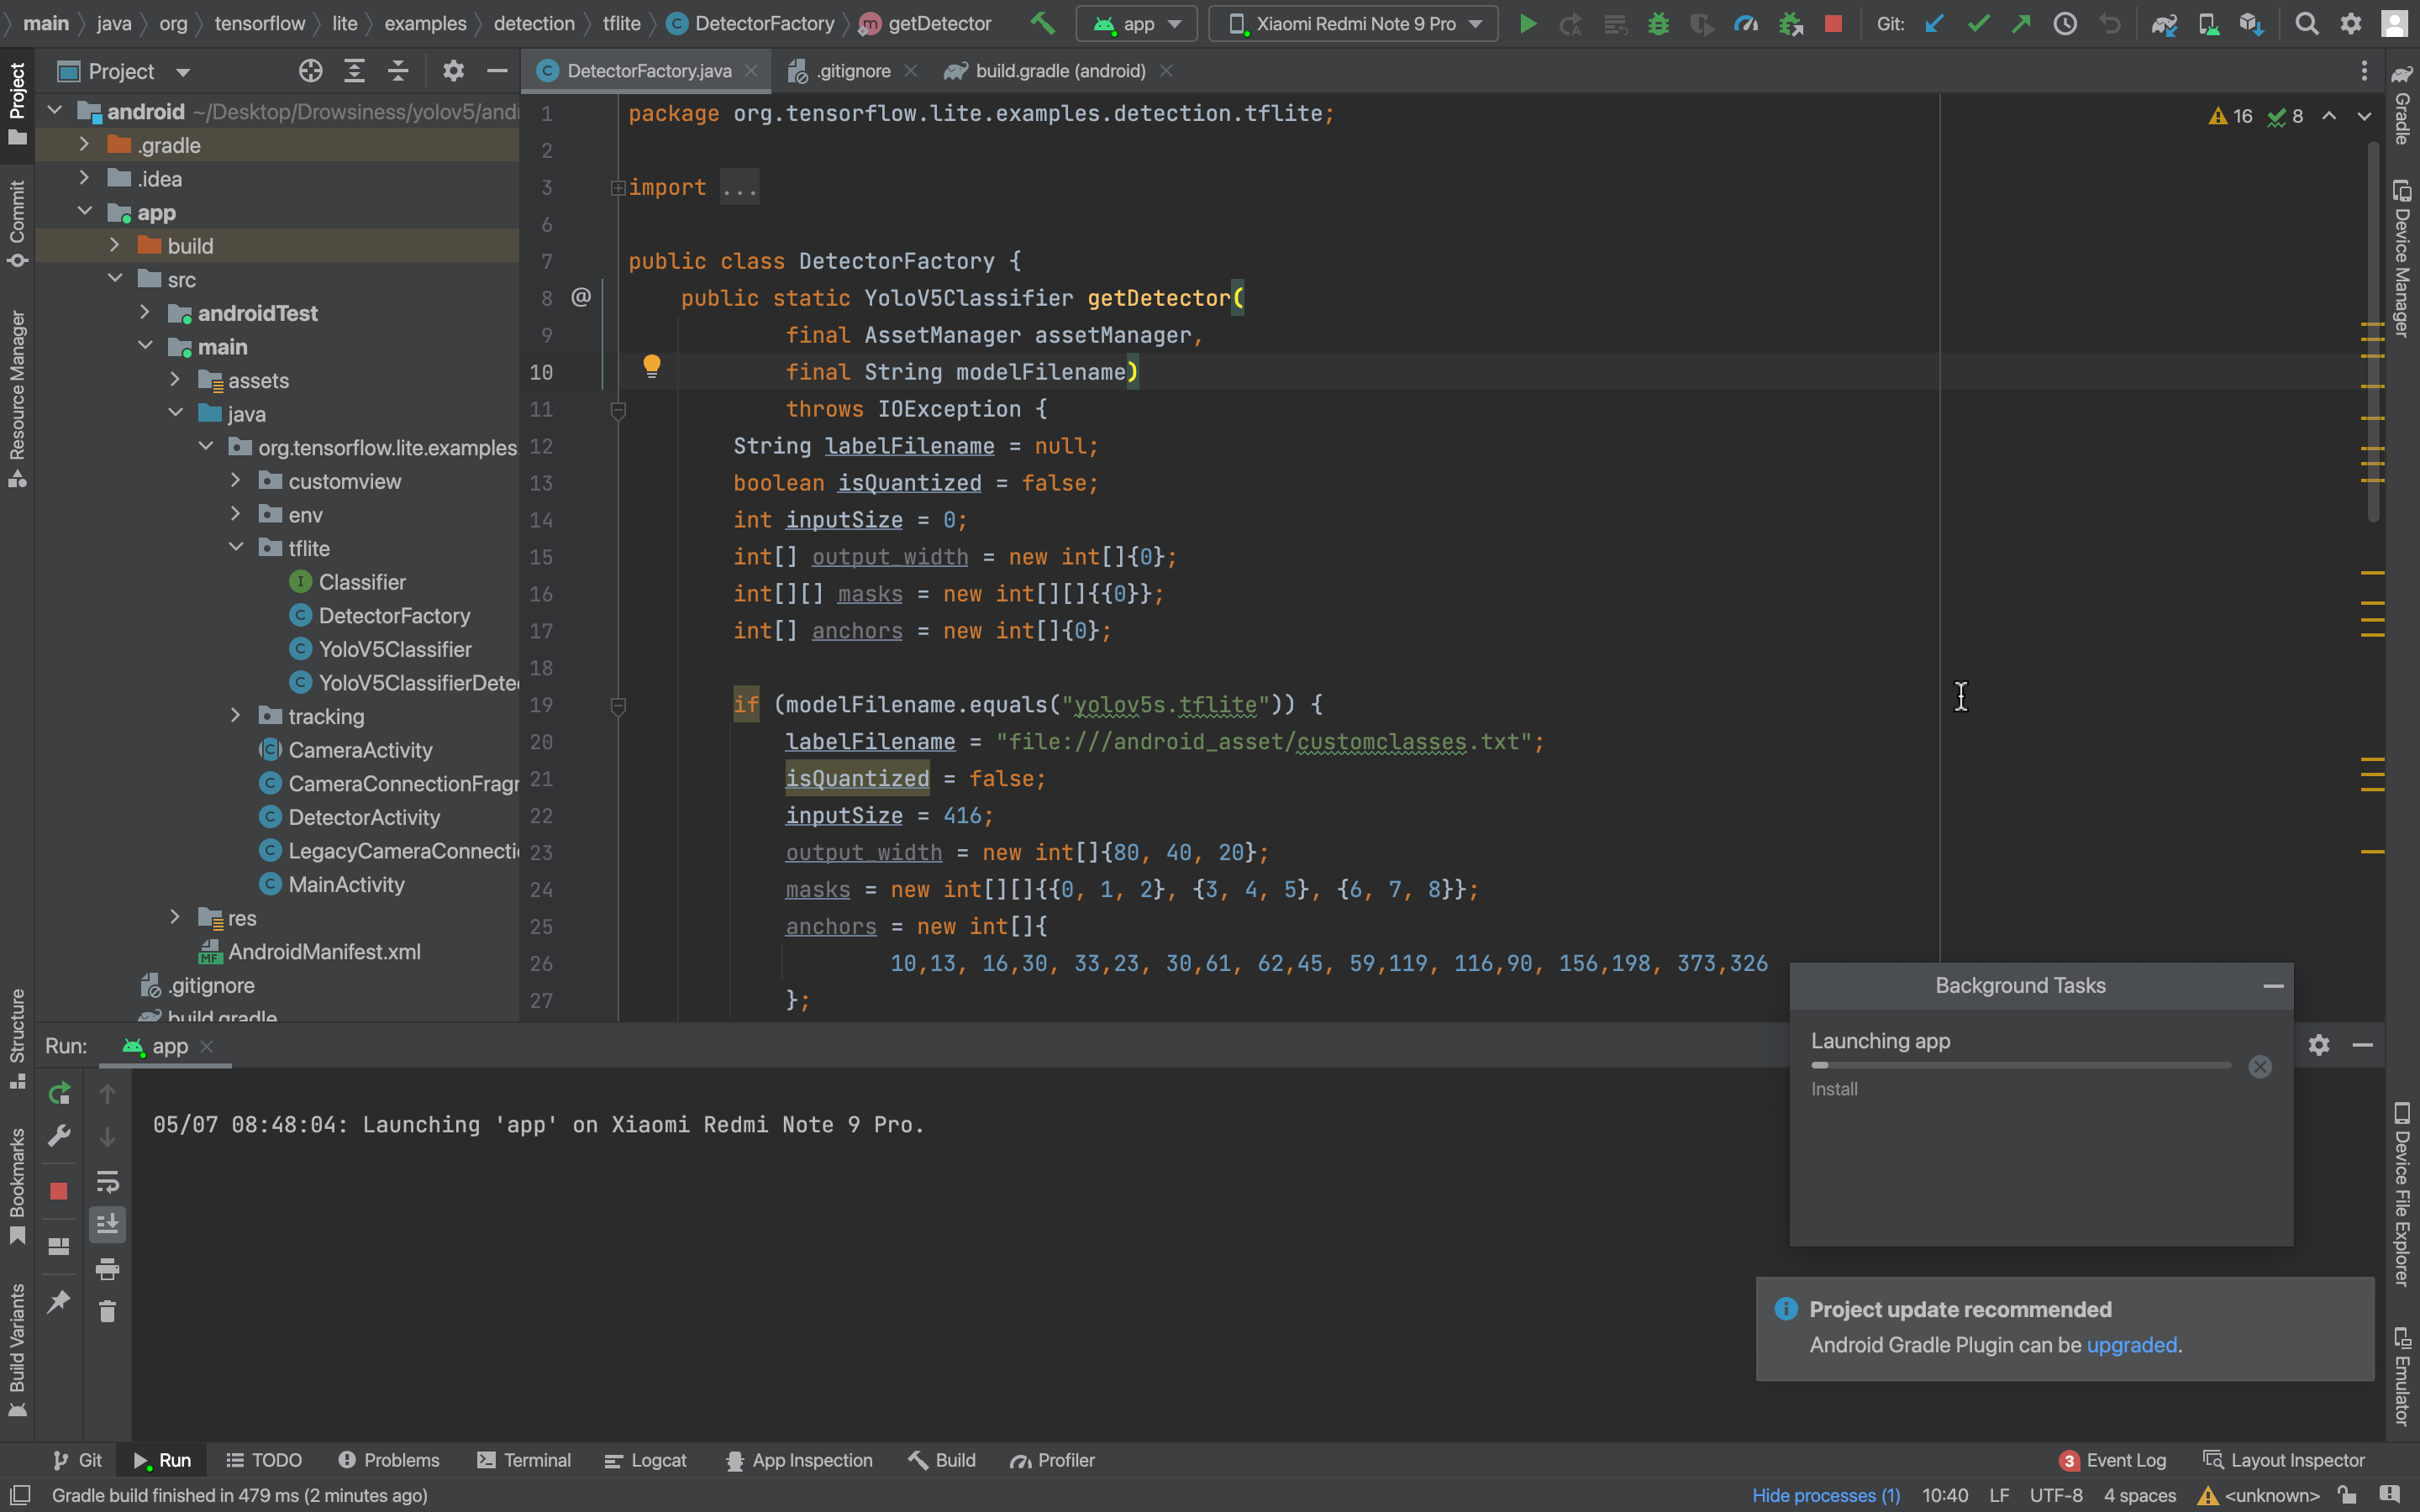
And then open android/app/src/main/java/org/tensorflow/lite/examples/detection/tflite/DetectorFactory.java
Do the following changes:
1. Change the inputSize of image as per your dataset.

2. Change labelFilename according to the classes of the model

3. Then run the program in Android Studio.
Go to android/app/src/main/java/org/tensorflow/lite/examples/detection/tflite/DetectorFactory.java and press run in android studio.

LinkedIn: yashh2417