Code Challenge Template
Project Setup
- Python Version: python>=3.9
- Create and activate a virtual environment - using Makefile or manual
- make venv or manual
- python3 -m venv venv
- source venv/bin/activate
- Set Django settings
- export DJANGO_SETTINGS_MODULE="code_challenge.settings"
- Apply Database Migrations
- python3 manage.py migrate please refer migrations.png for reference in Answers folder
Testcases
- Using Nosetests to run tests for the project:
- nosetests . Please refer nosetests.png in answers folder for reference
Data Ingestion
- Ingesting crop and weather data using following commands
- python3.9 manage.py import_weather_data
- python3.9 manage.py import_crop_data
- please see the screenshot - Dataingestion for crop and weatherdata.png for reference in Answers folder
Data Analysis
- Weather Stats are computed for pair of station_id and year possible using following command:
- python manage.py weather_analysis
- please see the screenshot - weather_analysis.png for reference in Answers folder
REST APIs
-
Flask REST Framework was used to develop the following 2 REST API GET endpoints with default pagination 10 records and filter arguments per assignment:
- /api/weather
- /api/weather/stats
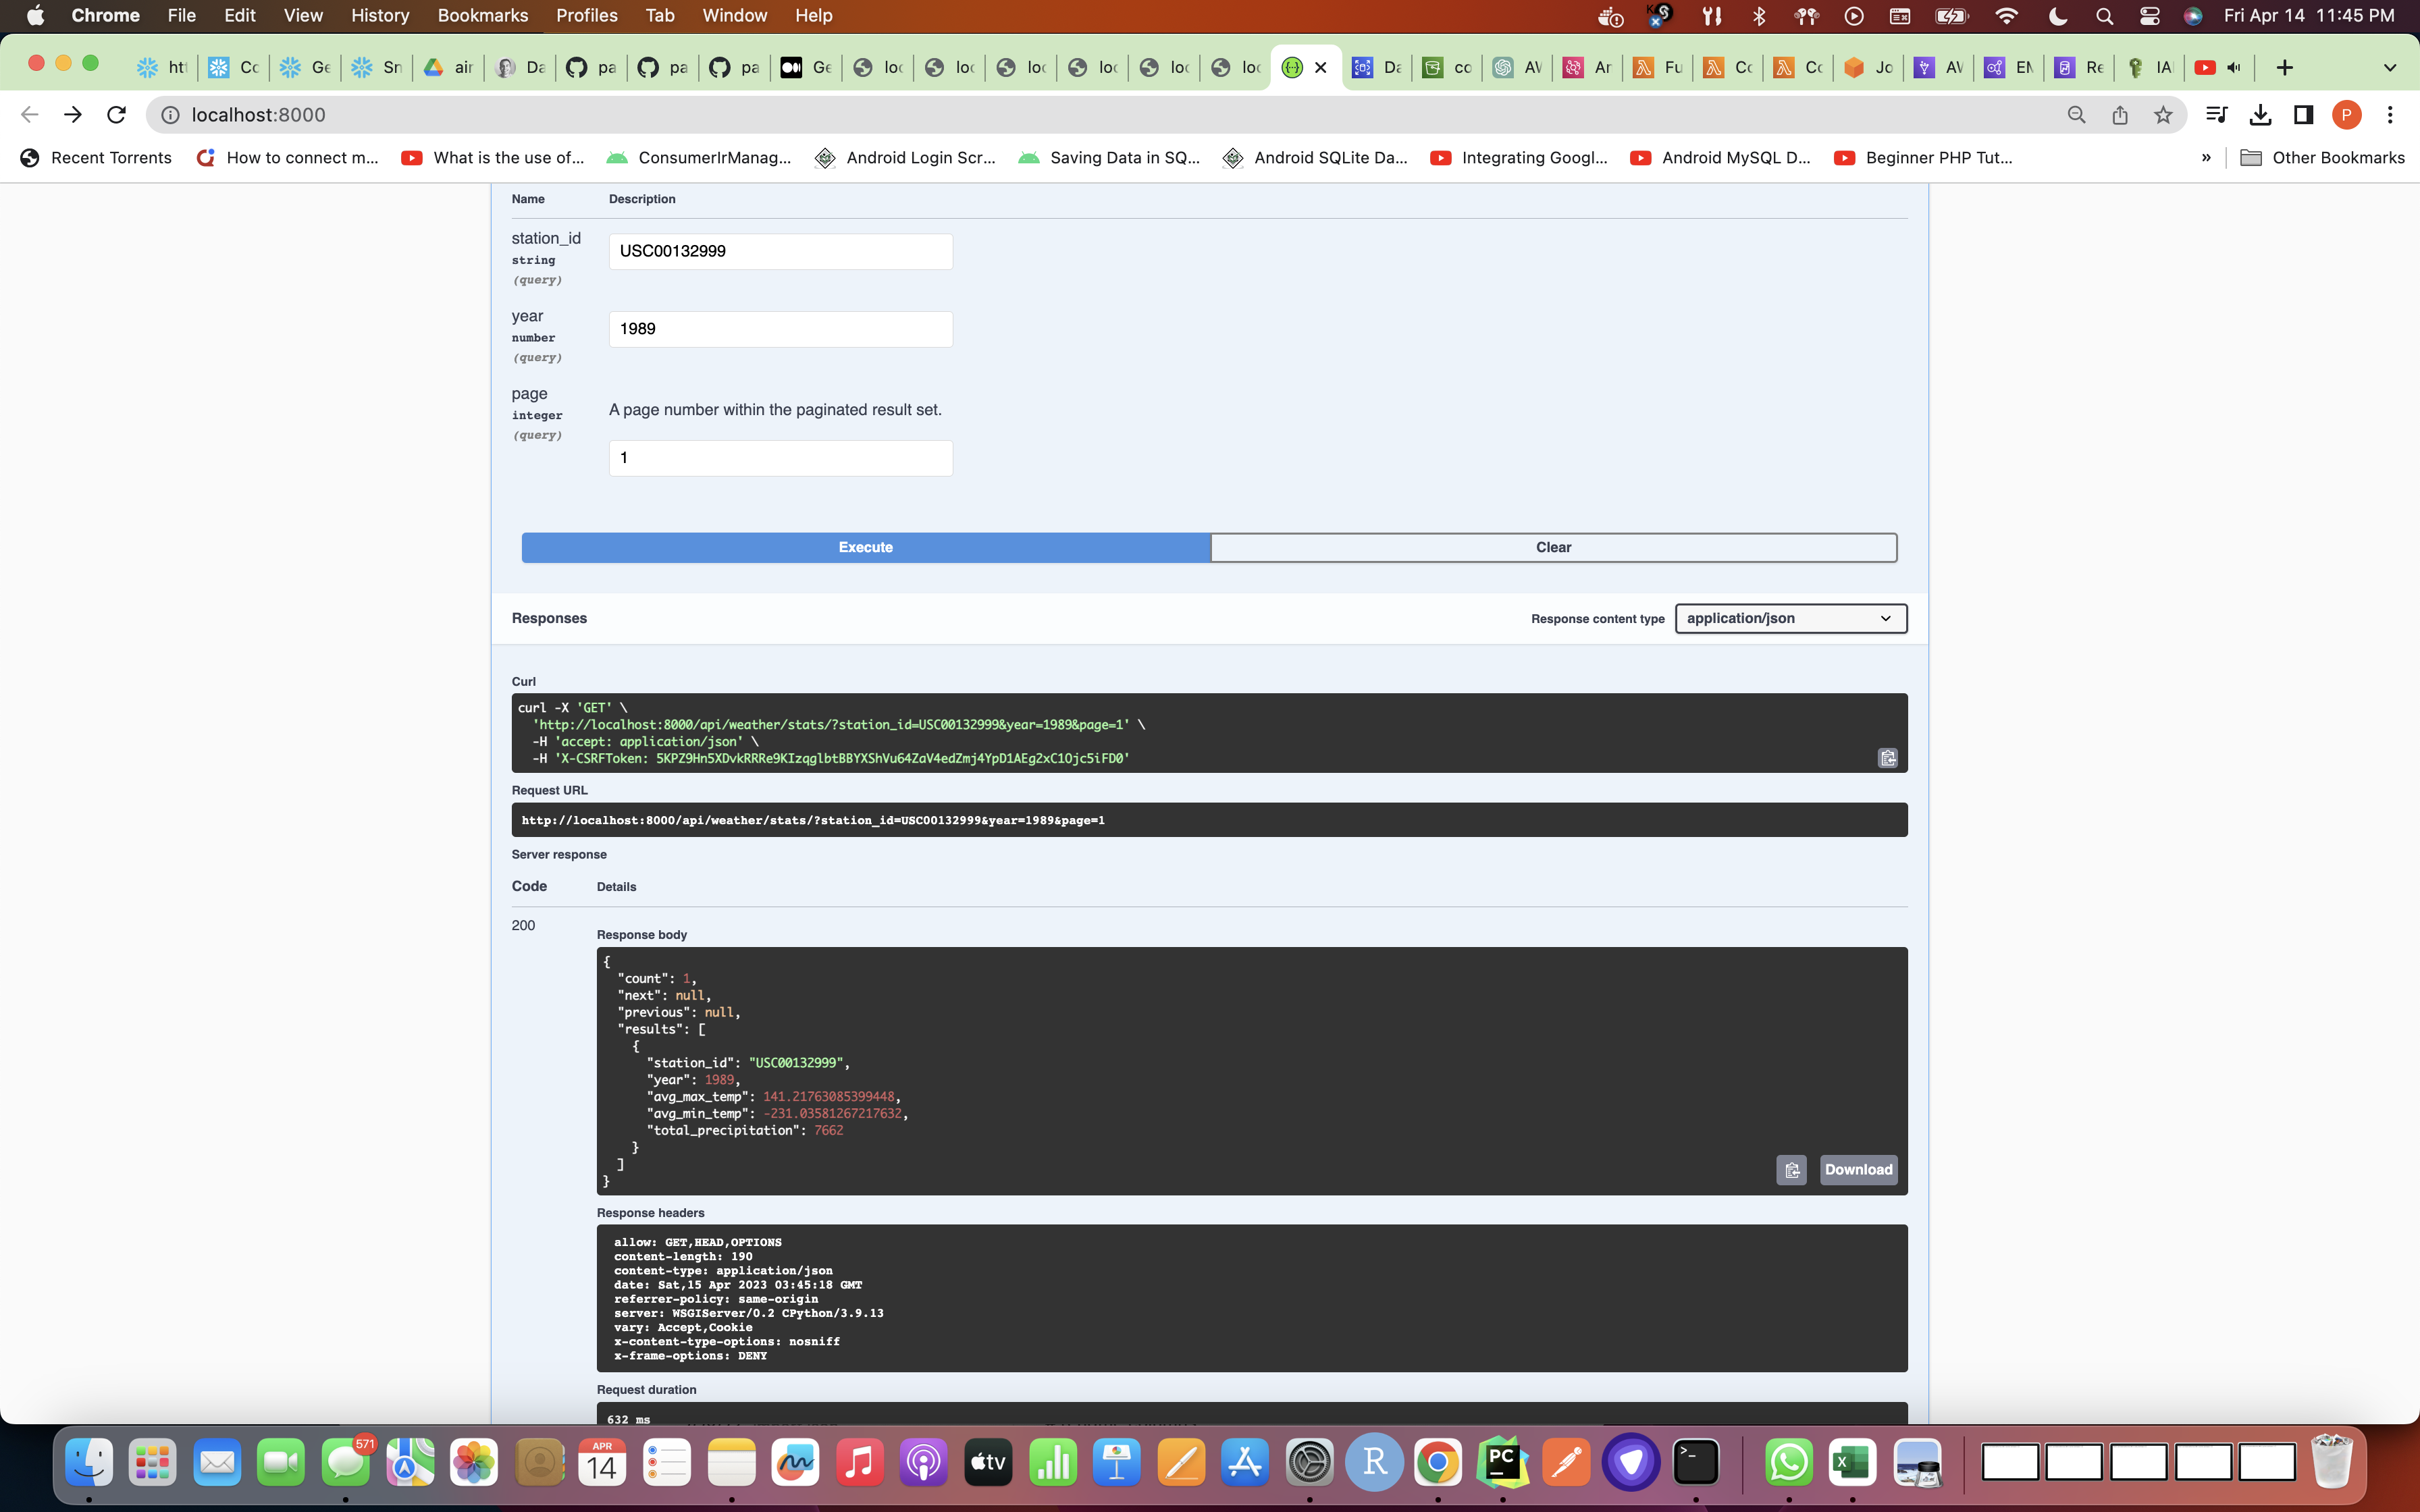
Examples below and refer api postman screenshots in Answers folder for the following GET api responses:
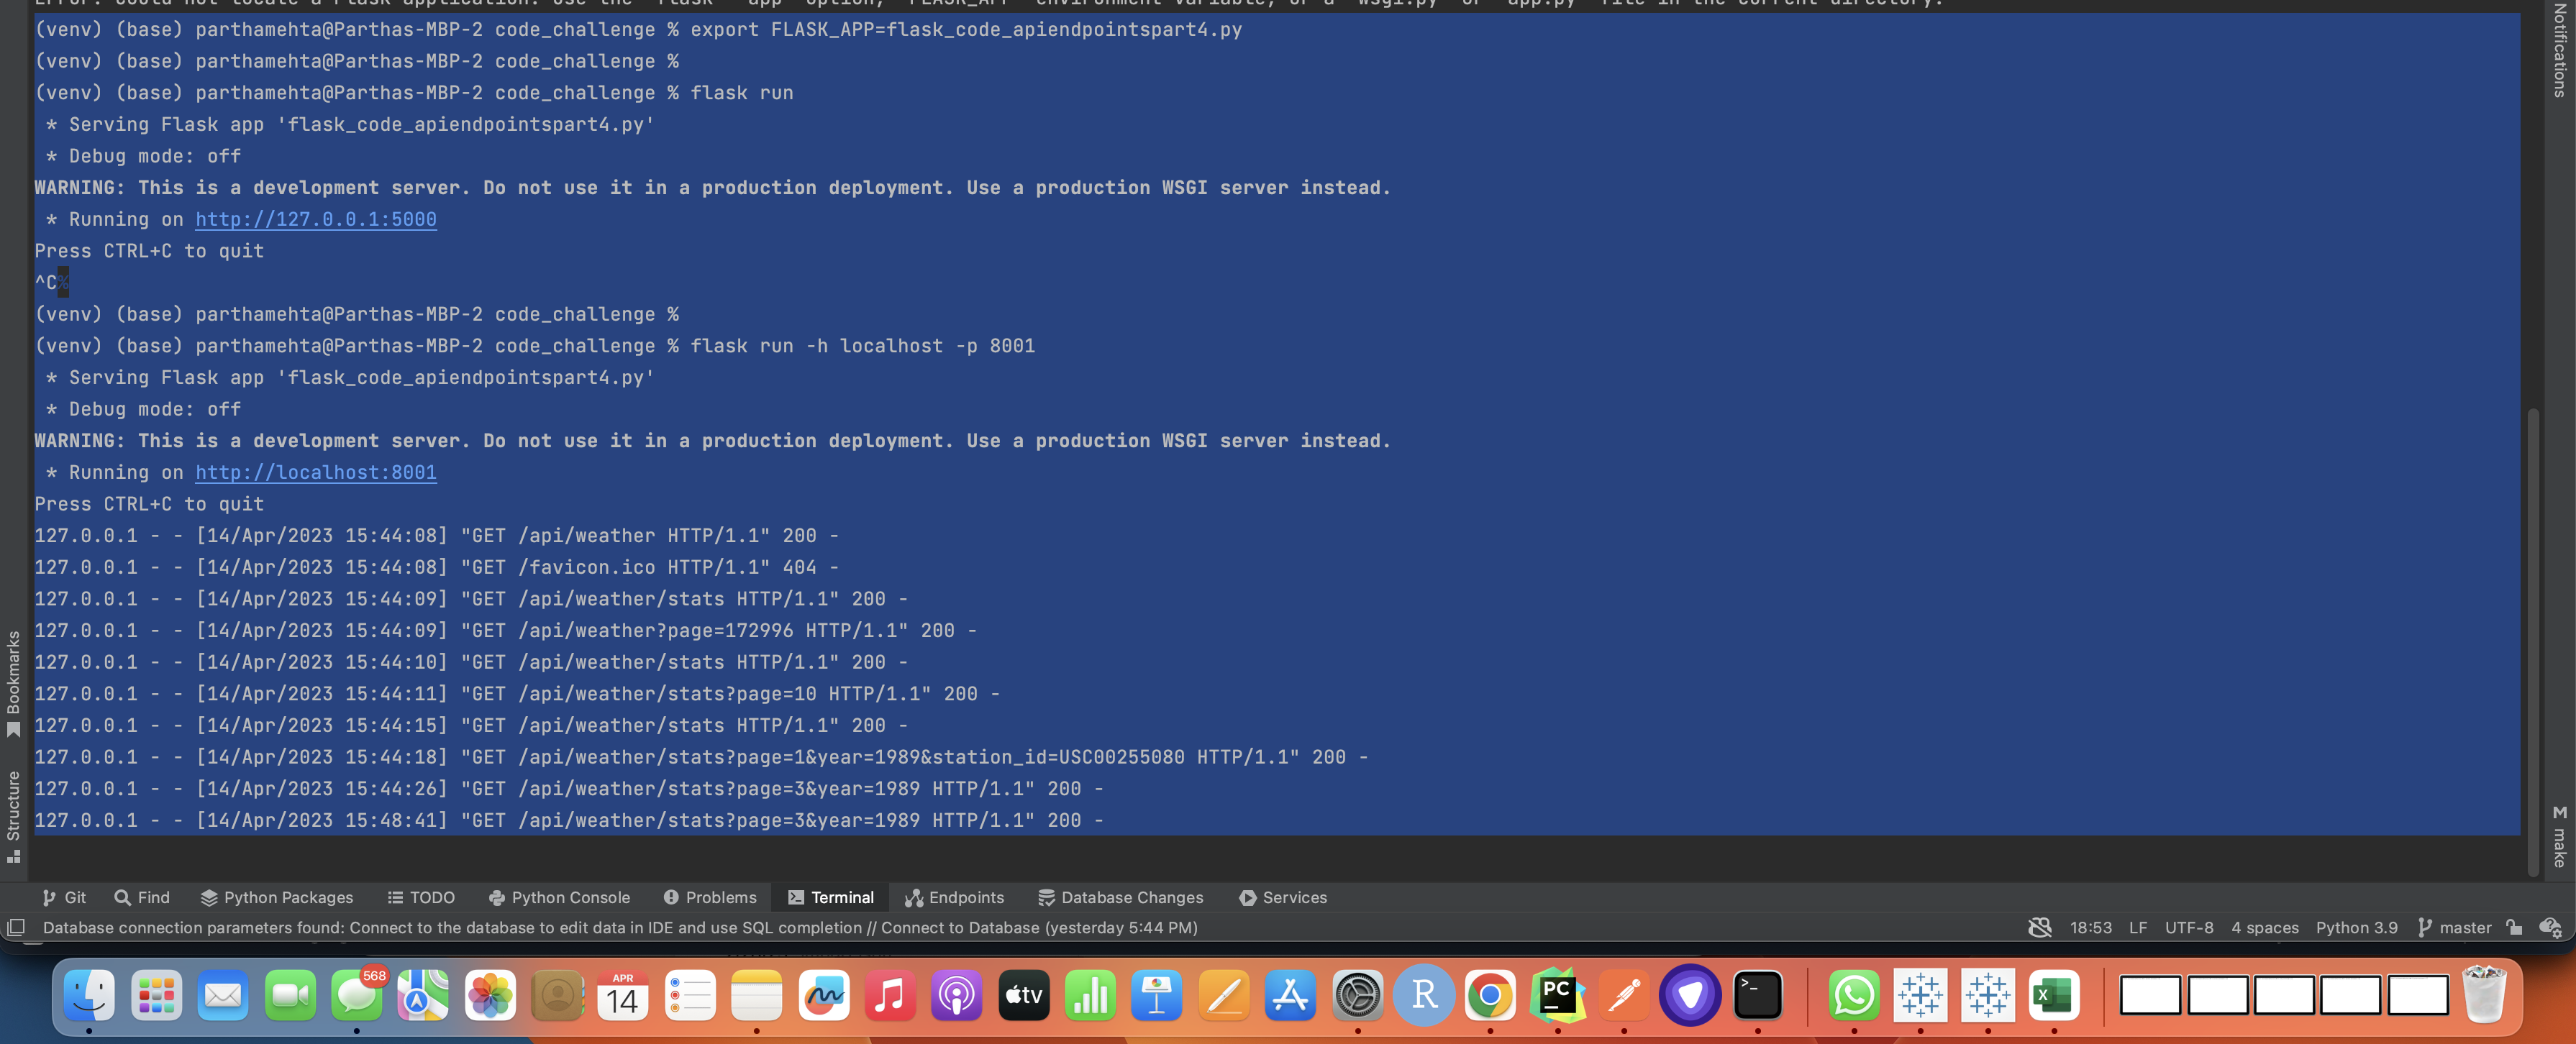
http://localhost:8001/api/weather http://localhost:8001/api/weather?page=172996 http://localhost:8001/api/weather/stats http://localhost:8001/api/weather/stats?page=10 http://localhost:8001/api/weather/stats?page=1&year=1989&station_id=USC00255080
To start the Flask Server, look for the commands in the below screenshot:
Download REST API Export I have done from the below link
Including a Swagger/OpenAPI endpoint that provides automatic documentation of your API.
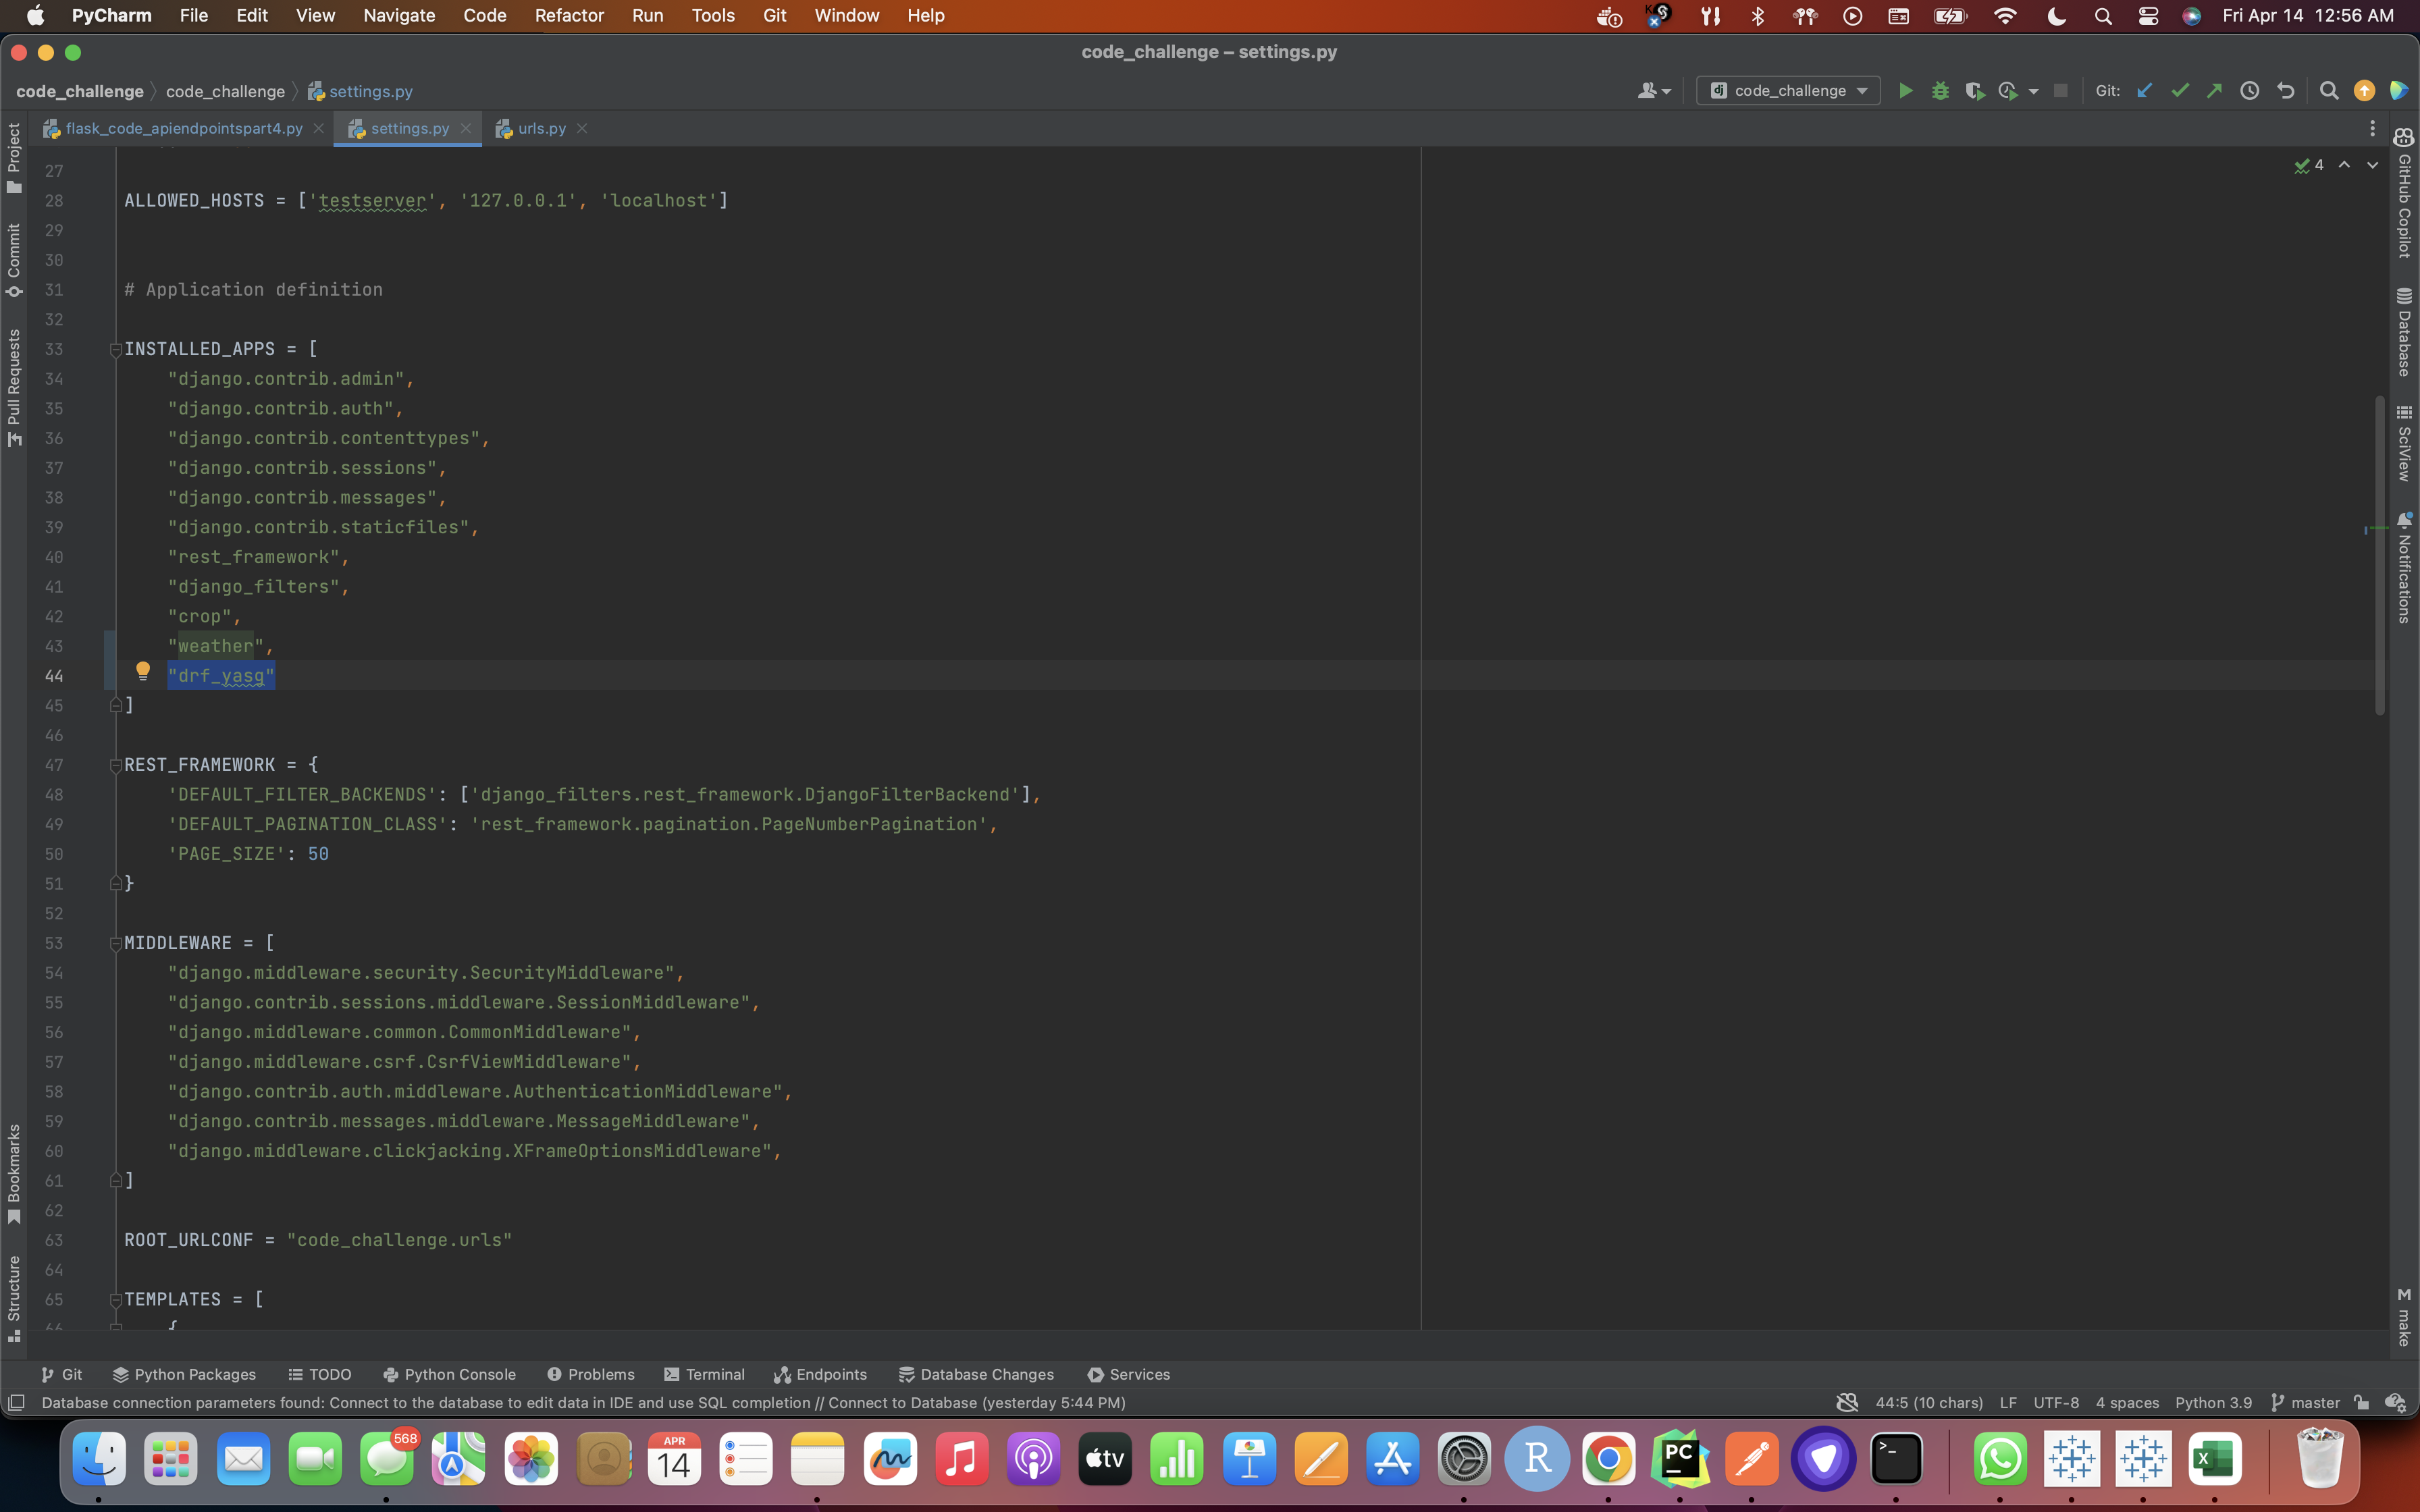
To include a Swagger/OpenAPI endpoint in a Django project, we have to use the drf-yasg library which provides an easy-to-use and customizable interface for generating API documentation. Here are the steps:
- Install the drf-yasg library using pip:
pip install drf-yasg
- Add the drf_yasg app to the list of installed apps in your Django project's settings.py file:
INSTALLED_APPS = [ # other apps 'drf_yasg', ]
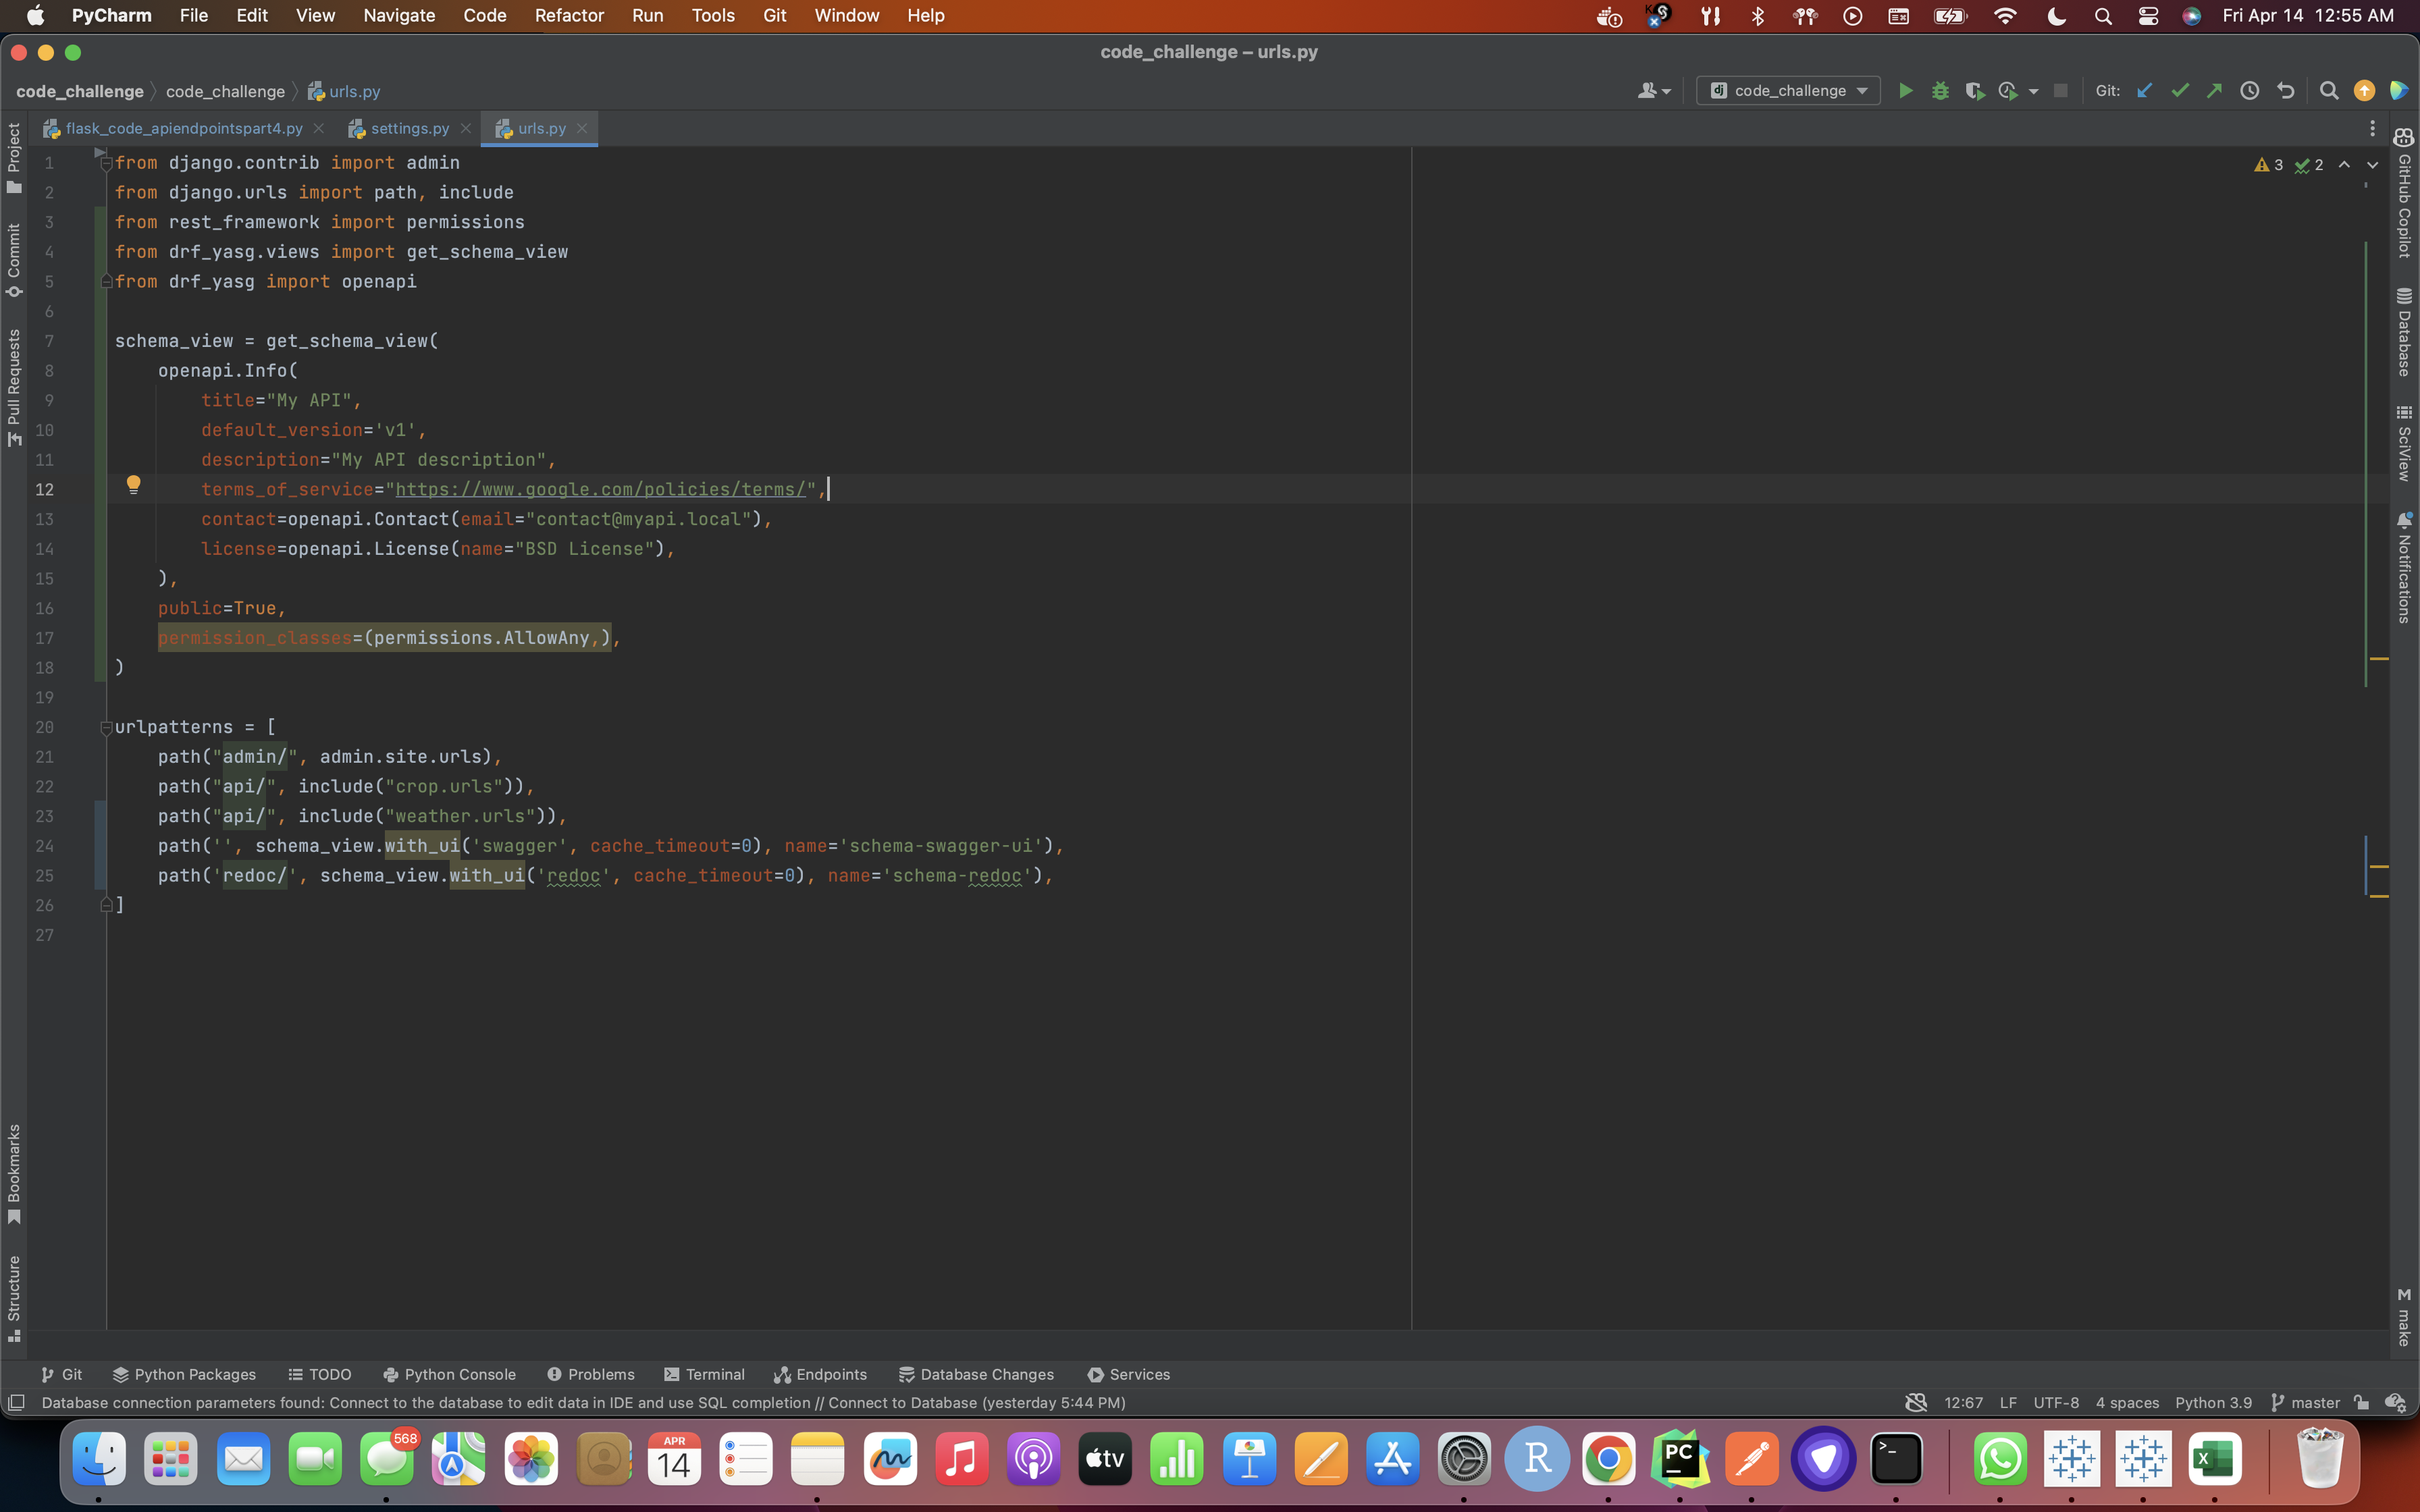
- Adding the drf_yasg.views and rest_framework URLs to the project's urls.py file: (Here we add the code for the Swagger endpoint to "code_challenge/code_challenge/urls.py". This file is the main URL configuration for our project, so it's a good place to add any additional URL patterns.
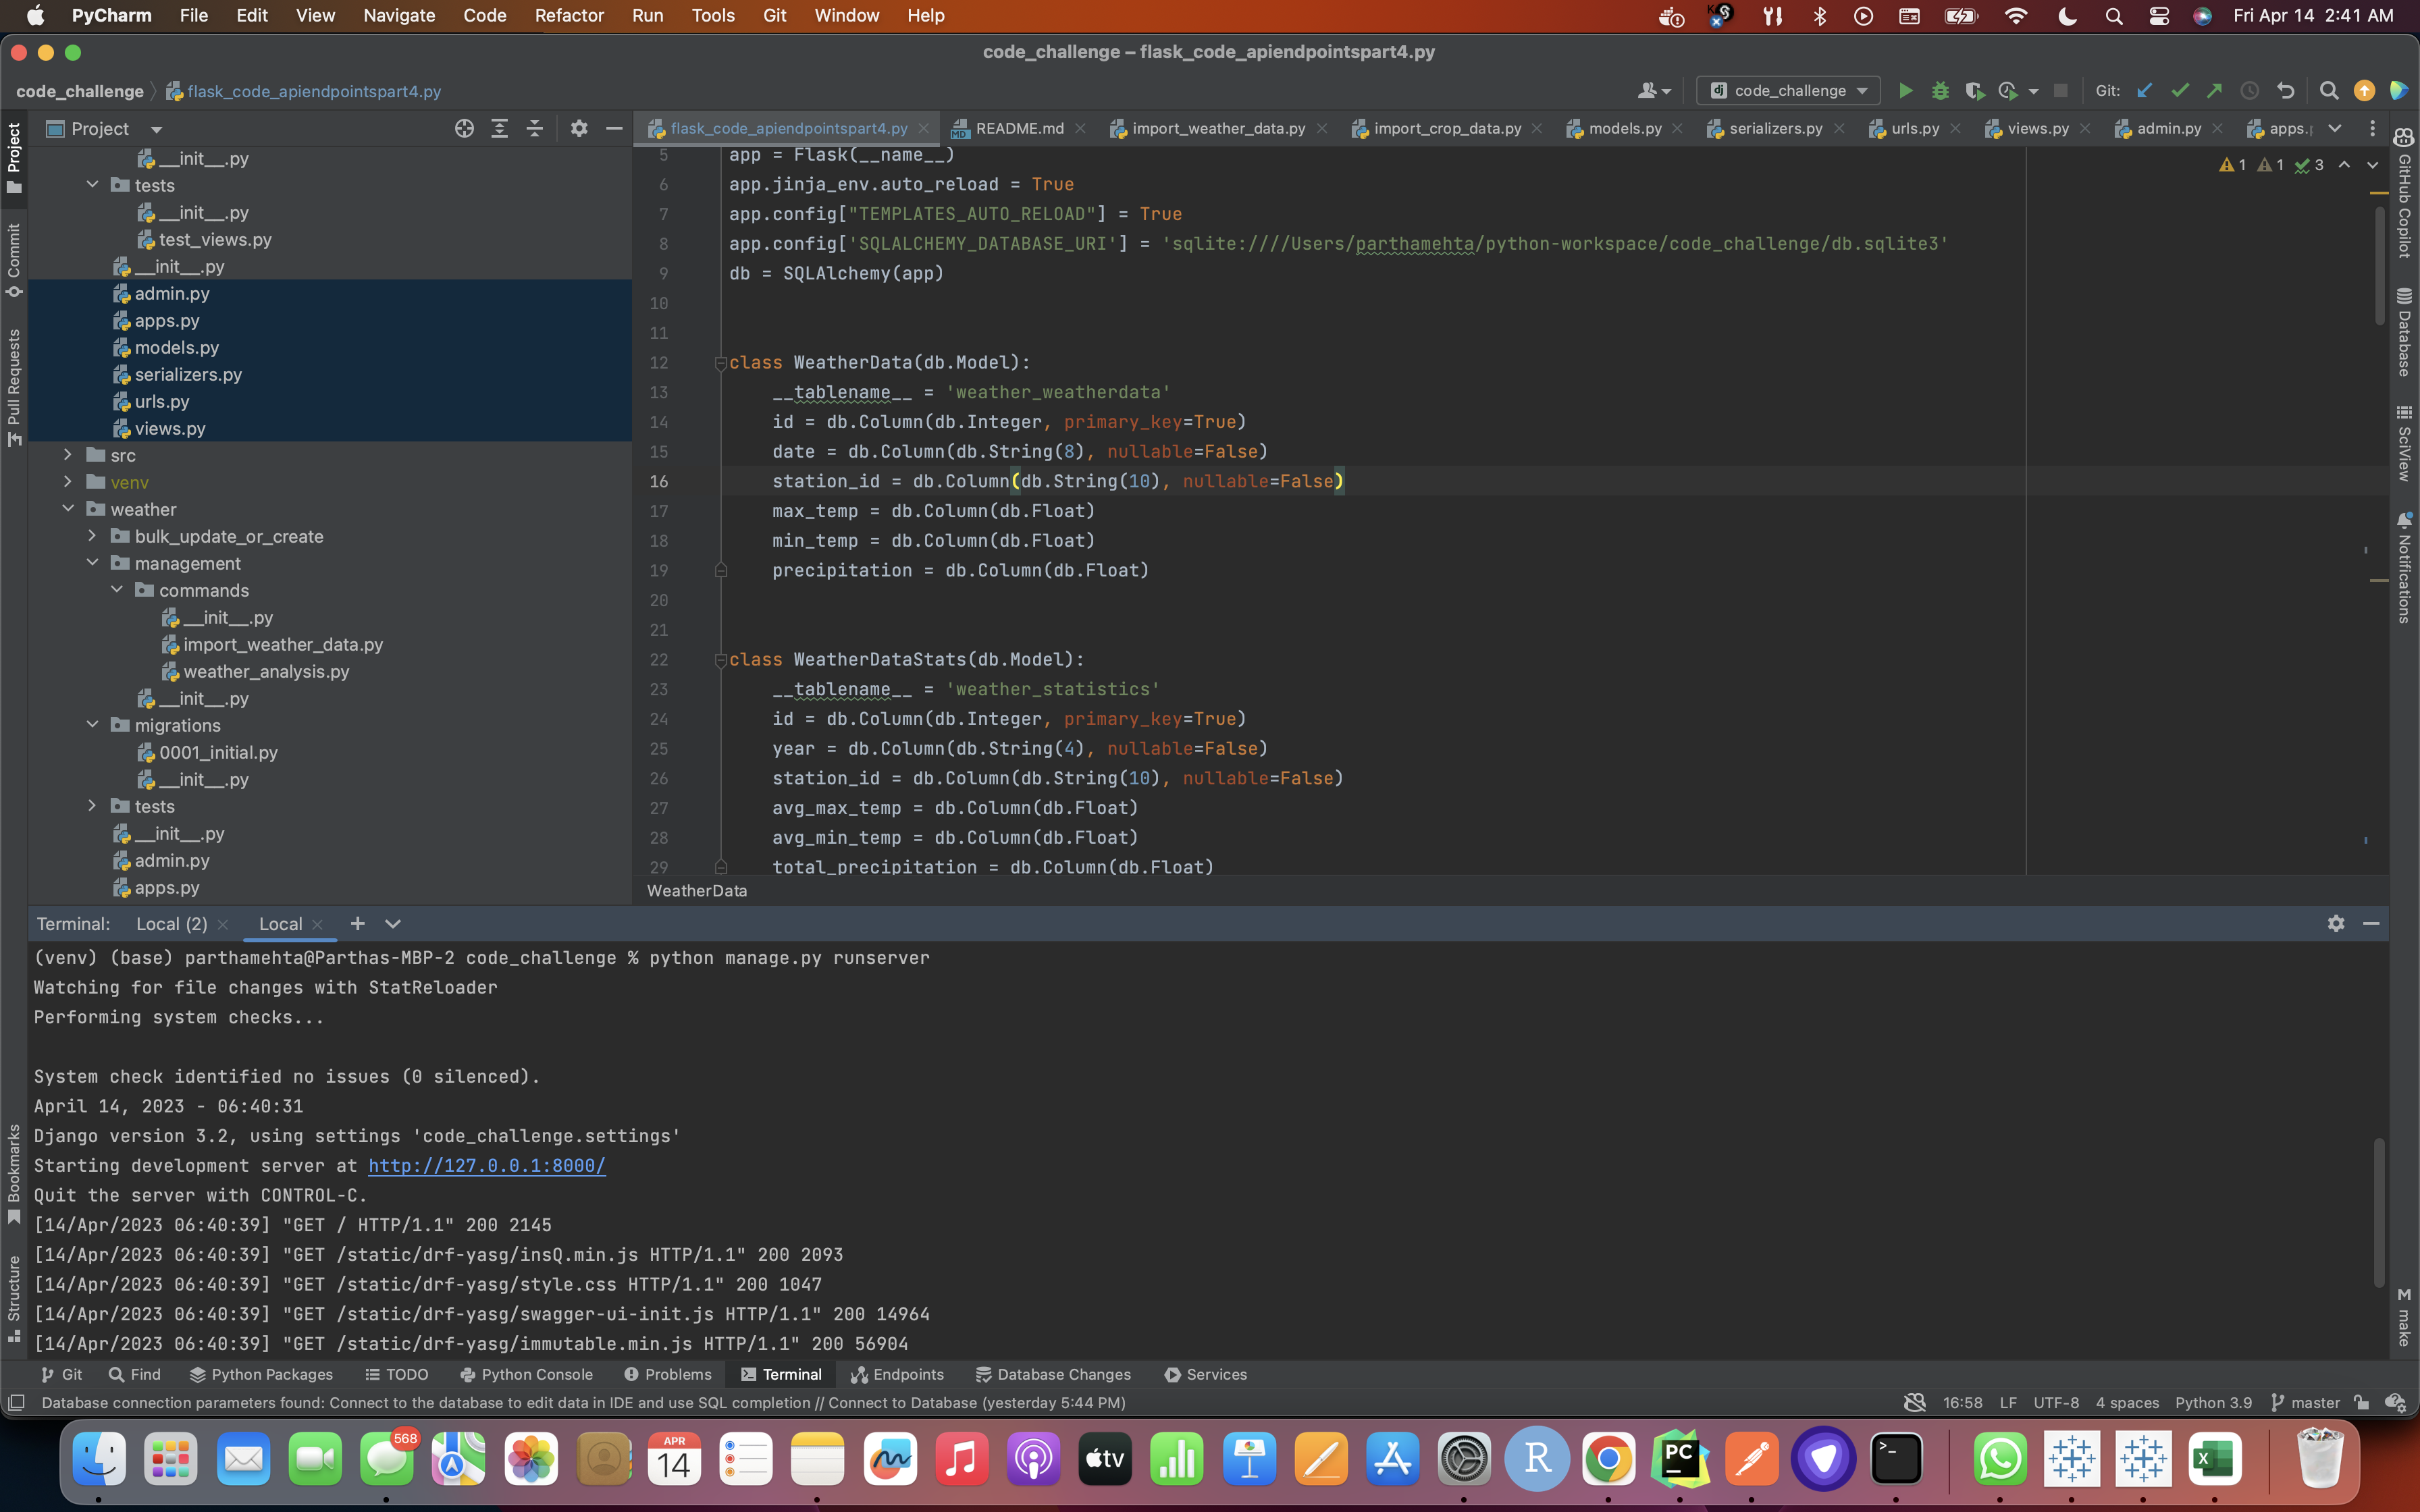
- Type 'python manage.py runserver' on the terminal like shown in the screenshot below:
- Then go to the link which shows up in the command line and test out if the Swagger requirement of auto-documentation is working or not
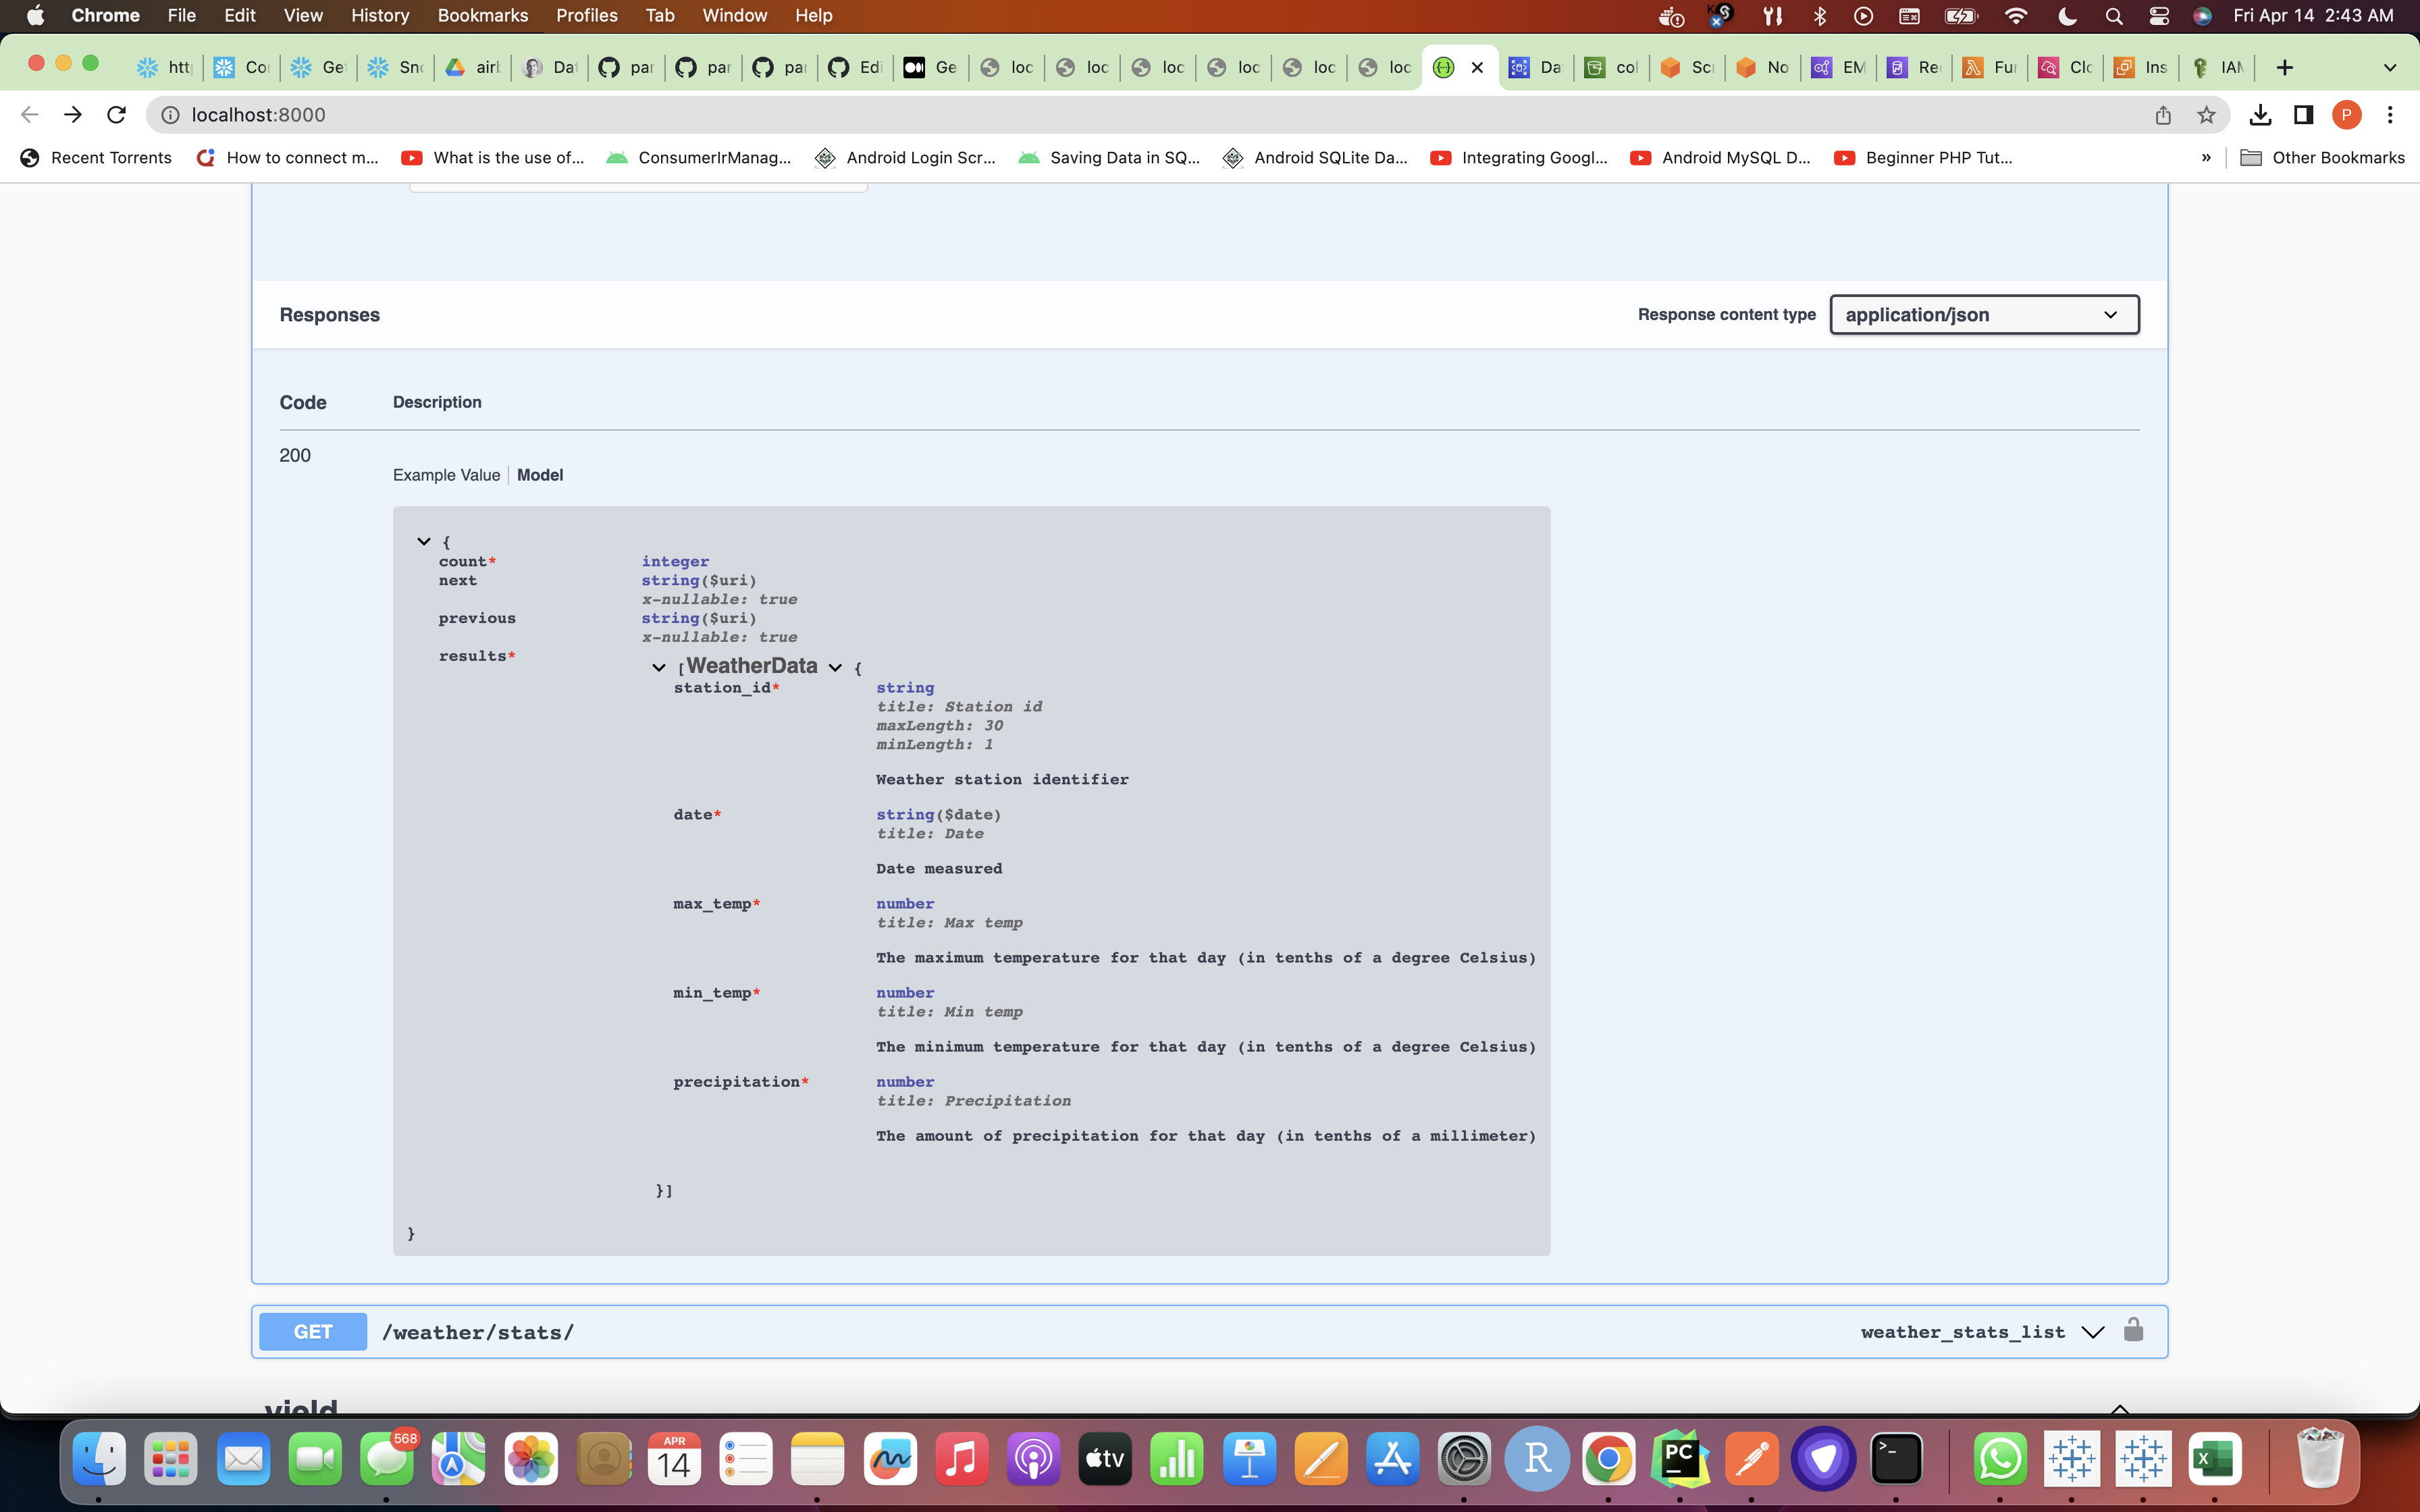
Swagger Execution Screenshot:
DEPLOYMENT APPROACH(I Have Already Done This on my AWS Account and source code py files have been attached too in this repository)
Here's how I would approach this:
-
I have first set up a database instance on AWS RDS: I used the AWS RDS service to create a Aurora MySQL database instance that can be accessed by the AWS Glue jobs / AWS Glue Crawlers and EMR clusters.
-
I created an AWS Glue job for data ingestion: This AWS Glue job reads data from the raw text files in S3, performs data cleansing and transformation, and writes the processed data to the MySQL database. Then, it has been scheduled to run on a daily or weekly basis using a CloudWatch Event trigger. We can also create AWS Glue Crawler that crawls through S3 folders and writes the data to Glue Data Catalog so that the data could then be retrieved using Athena and then perform analytics and just store it in Redshift cluster DB table.
-
Create an EMR cluster for data analysis: I created an EMR cluster with Hadoop, Spark, and Hive to perform data analysis tasks. I mainly used Spark to calculate the average maximum temperature, average minimum temperature, and total accumulated precipitation for each year and station, and write the results to a Redshift table. I also created an External Table using the below query in HIVE.
CREATE EXTERNAL TABLE weather_data( station_id STRING, date DATE, max_temp FLOAT, min_temp FLOAT, precipitation FLOAT ) STORED BY 'org.apache.hadoop.hive.jdbc.storagehandler.JdbcStorageHandler' TBLPROPERTIES ( "jdbc.driver.class"="org.postgresql.Driver", "hive.jdbc.database.type"="POSTGRES", "hive.jdbc.database.name"="", "hive.jdbc.url"="jdbc:postgresql://:/", "hive.jdbc.user.name"="", "hive.jdbc.password"="", "hive.jdbc.input.table.name"="" );
-
Then, I set up a Redshift cluster for storing results: I used AWS Redshift to store the results of the data analysis. This Redshift cluster and a table in it is used to store the calculated statistics.
-
I triggered data ingestion and analysis using AWS Lambda: So, basically there is an AWS Lambda function that triggers the AWS Glue job for data ingestion and the EMR cluster for data analysis. This has been scheduled so the Lambda function can run on a daily basis using a CloudWatch Event trigger.
-
The first event rule would trigger the AWS Glue job on a daily or weekly basis to perform the data ingestion and processing tasks. The event rule would specify the AWS Glue job as the target and set the schedule for the job to run.
-
The second event rule would trigger the AWS Lambda function on a daily or weekly basis to trigger the AWS Glue job and the EMR cluster for data analysis. The event rule would specify the AWS Lambda function as the target and set the schedule for the function to run.
-
But here, in my case, I have used just single event rule on CloudWatch to just trigger the Lambda which finally triggers my Glue Job and waits for this job to complete it's process and I have put a sleep method before it finishes and only once it finishes it will trigger EMR.
-
Although, by separating the event rules, you can have more control over the scheduling and dependencies of the tasks. For example, you can schedule the AWS Glue job to run at a different time than the AWS Lambda function, or you can set up the AWS Lambda function to trigger multiple AWS Glue jobs or EMR clusters.
To-Do
-
Expose the data through a REST API: You can use a web framework such as Flask or Django to create a REST API that exposes the ingested data and the calculated statistics. You can deploy the API on an EC2 instance or an AWS Elastic Beanstalk environment.
-
Set up monitoring and logging: You can use AWS CloudWatch to monitor your AWS Glue jobs, EMR clusters, Redshift clusters, and Lambda functions. You can also use other AWS services such as AWS X-Ray or AWS Elasticsearch for advanced monitoring and tracing.
-
Set up security: You can use AWS Identity and Access Management (IAM) to manage access to your AWS resources. You can create IAM roles and policies that grant least privilege access to your application and data processing resources, and enable encryption for data at rest and in transit.
SUMMARY OF RESOURCES REQUIRED
The total number of event rules, Lambda functions, and Glue jobs required for the project will depend on the specific requirements and design of the solution. However, based on the approach described, here are some approximate numbers:
-
Event Rules:
- One event rule: one to trigger the AWS Glue job and also EMR.
-
Lambda Function:
- One Lambda function to trigger the AWS Glue job and the EMR cluster for data analysis.
-
Glue Jobs:
- One Glue job for data ingestion, cleansing and transformation.
-
EMR Cluster:
- One EMR cluster for data analysis.
-
RDS Instance:
- One Aurora MySQL RDS instance to store the ingested data.
-
Redshift Cluster:
- One Redshift cluster to store the calculated statistics.
-
REST API:
- One REST API to expose the ingested data and the calculated statistics.
-
Monitoring and Logging:
- CloudWatch and other AWS services for monitoring and logging.
-
Security:
- IAM roles and policies to manage access to AWS resources and enable encryption for data at rest and in transit.
-
Note that this approach may require a lot more setup and configuration than imagined by just looking at the code and documentation/explanation of my approach, but it can provide a lot of scalability, performance, and flexibility for handling large volumes of data. You would set up two separate CloudWatch event rules for triggering the AWS Glue job and the AWS Lambda function.
Please note that these numbers are approximate and may vary based on specific design choices and implementation details.
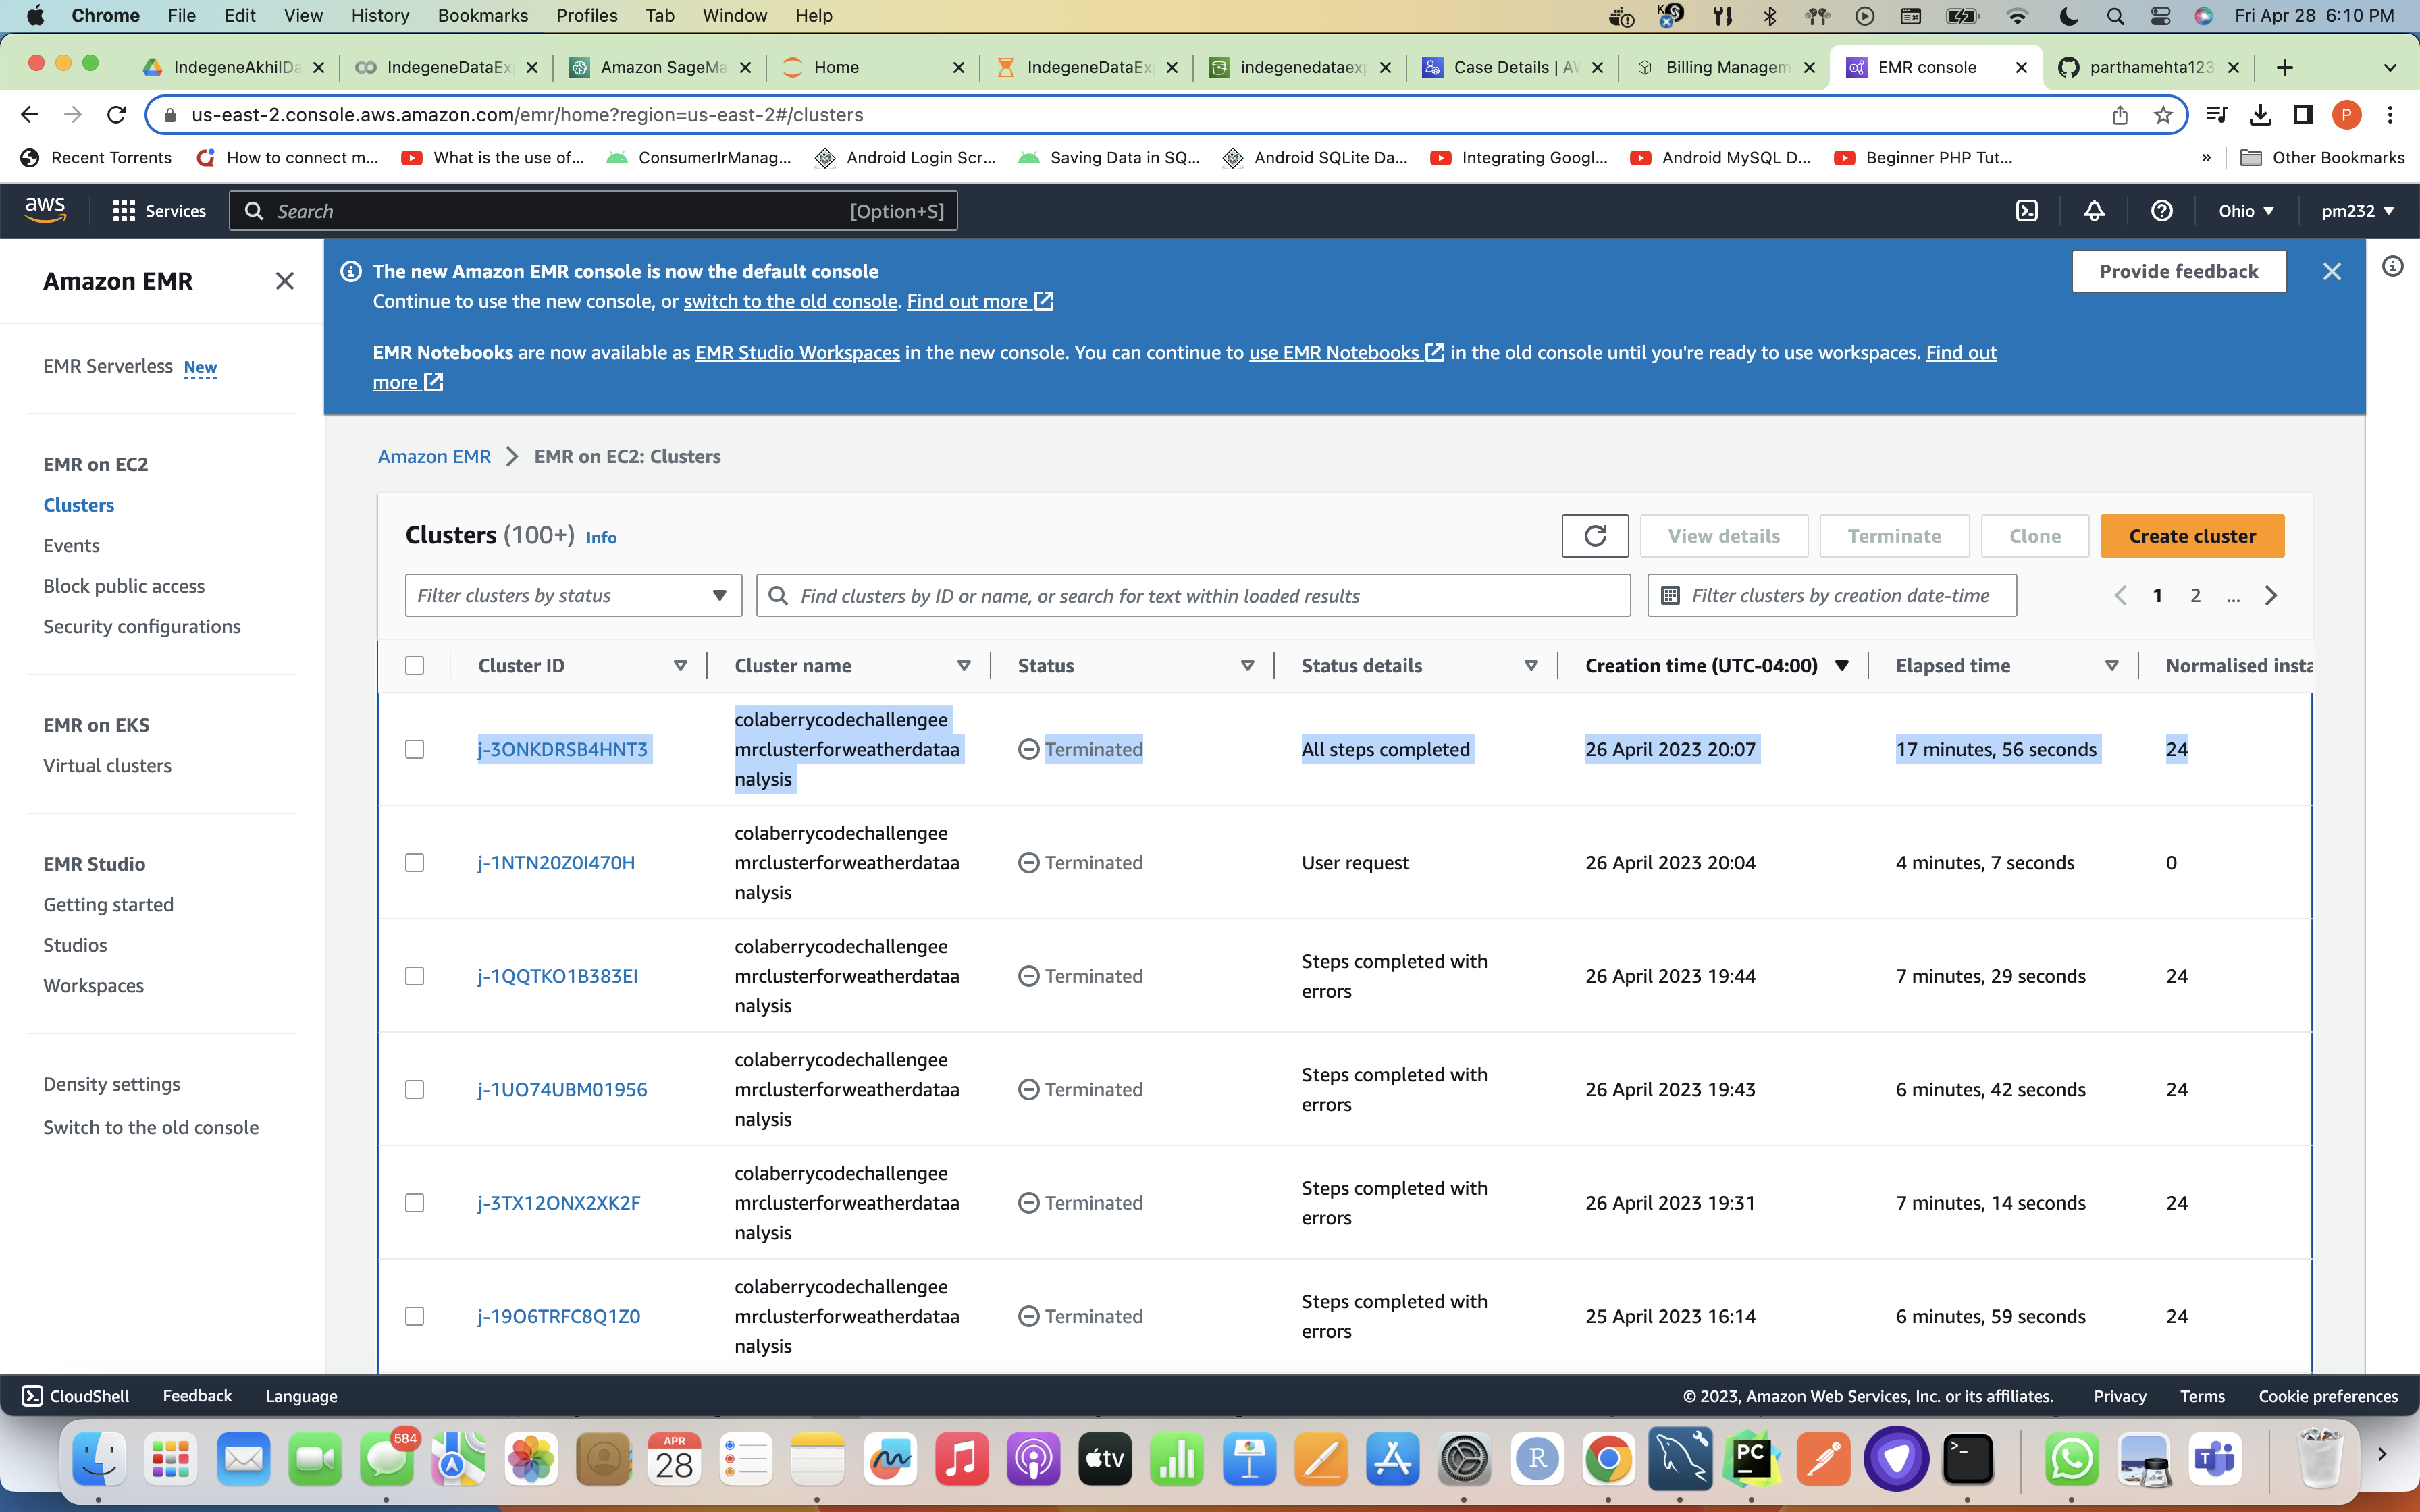
Screenshot attached For Glue Job Run Summary/Page (Note that now I have made individual Glue Jobs For Both Weather and Crop Data Ingestions To Achieve Concurrency
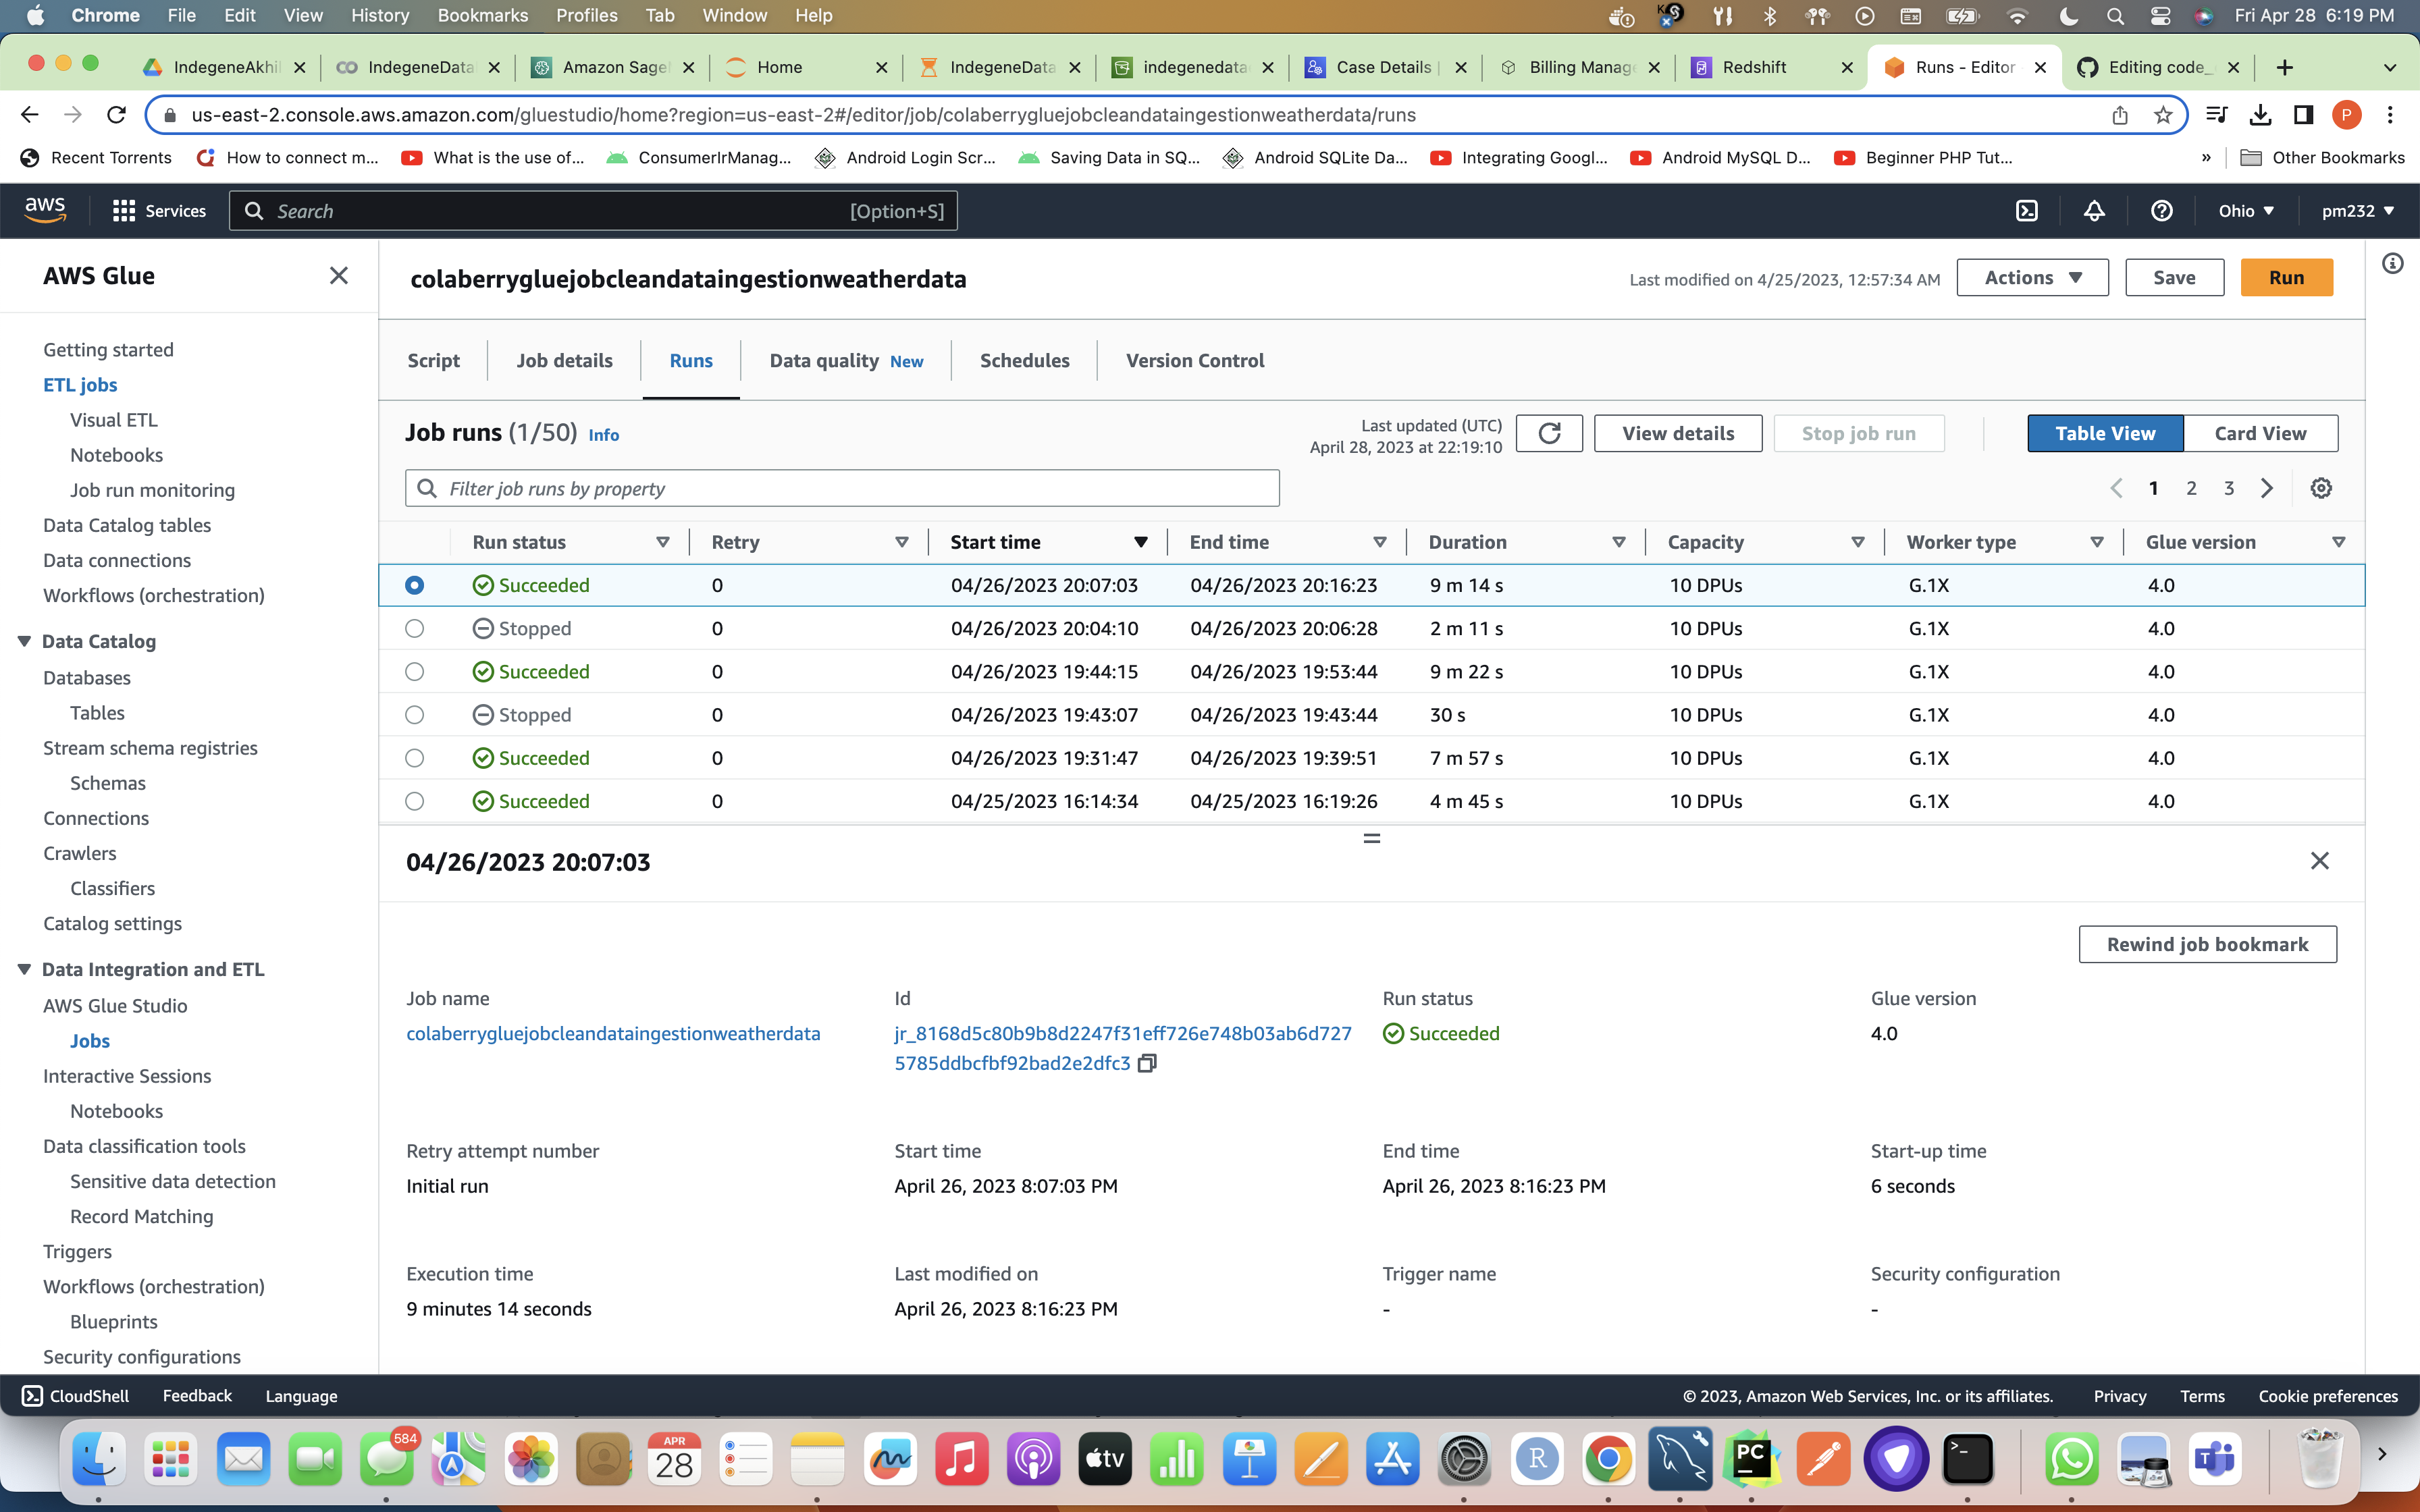
Once Glue Job is successful, it triggers EMR and while EMR job / cluster is executing it's task it takes the code from s3 to calculate weather statistics by reading the data from weather_data table which was created to ingest the original data from our data lake i.e S3 to RDS MySQL DB and writes this data with statistics to weather_statistics table in the Redshift Cluster's dev DB. Below is the screenshot for successful completion of all the steps after which EMR gets terminated as it has completed it's task.
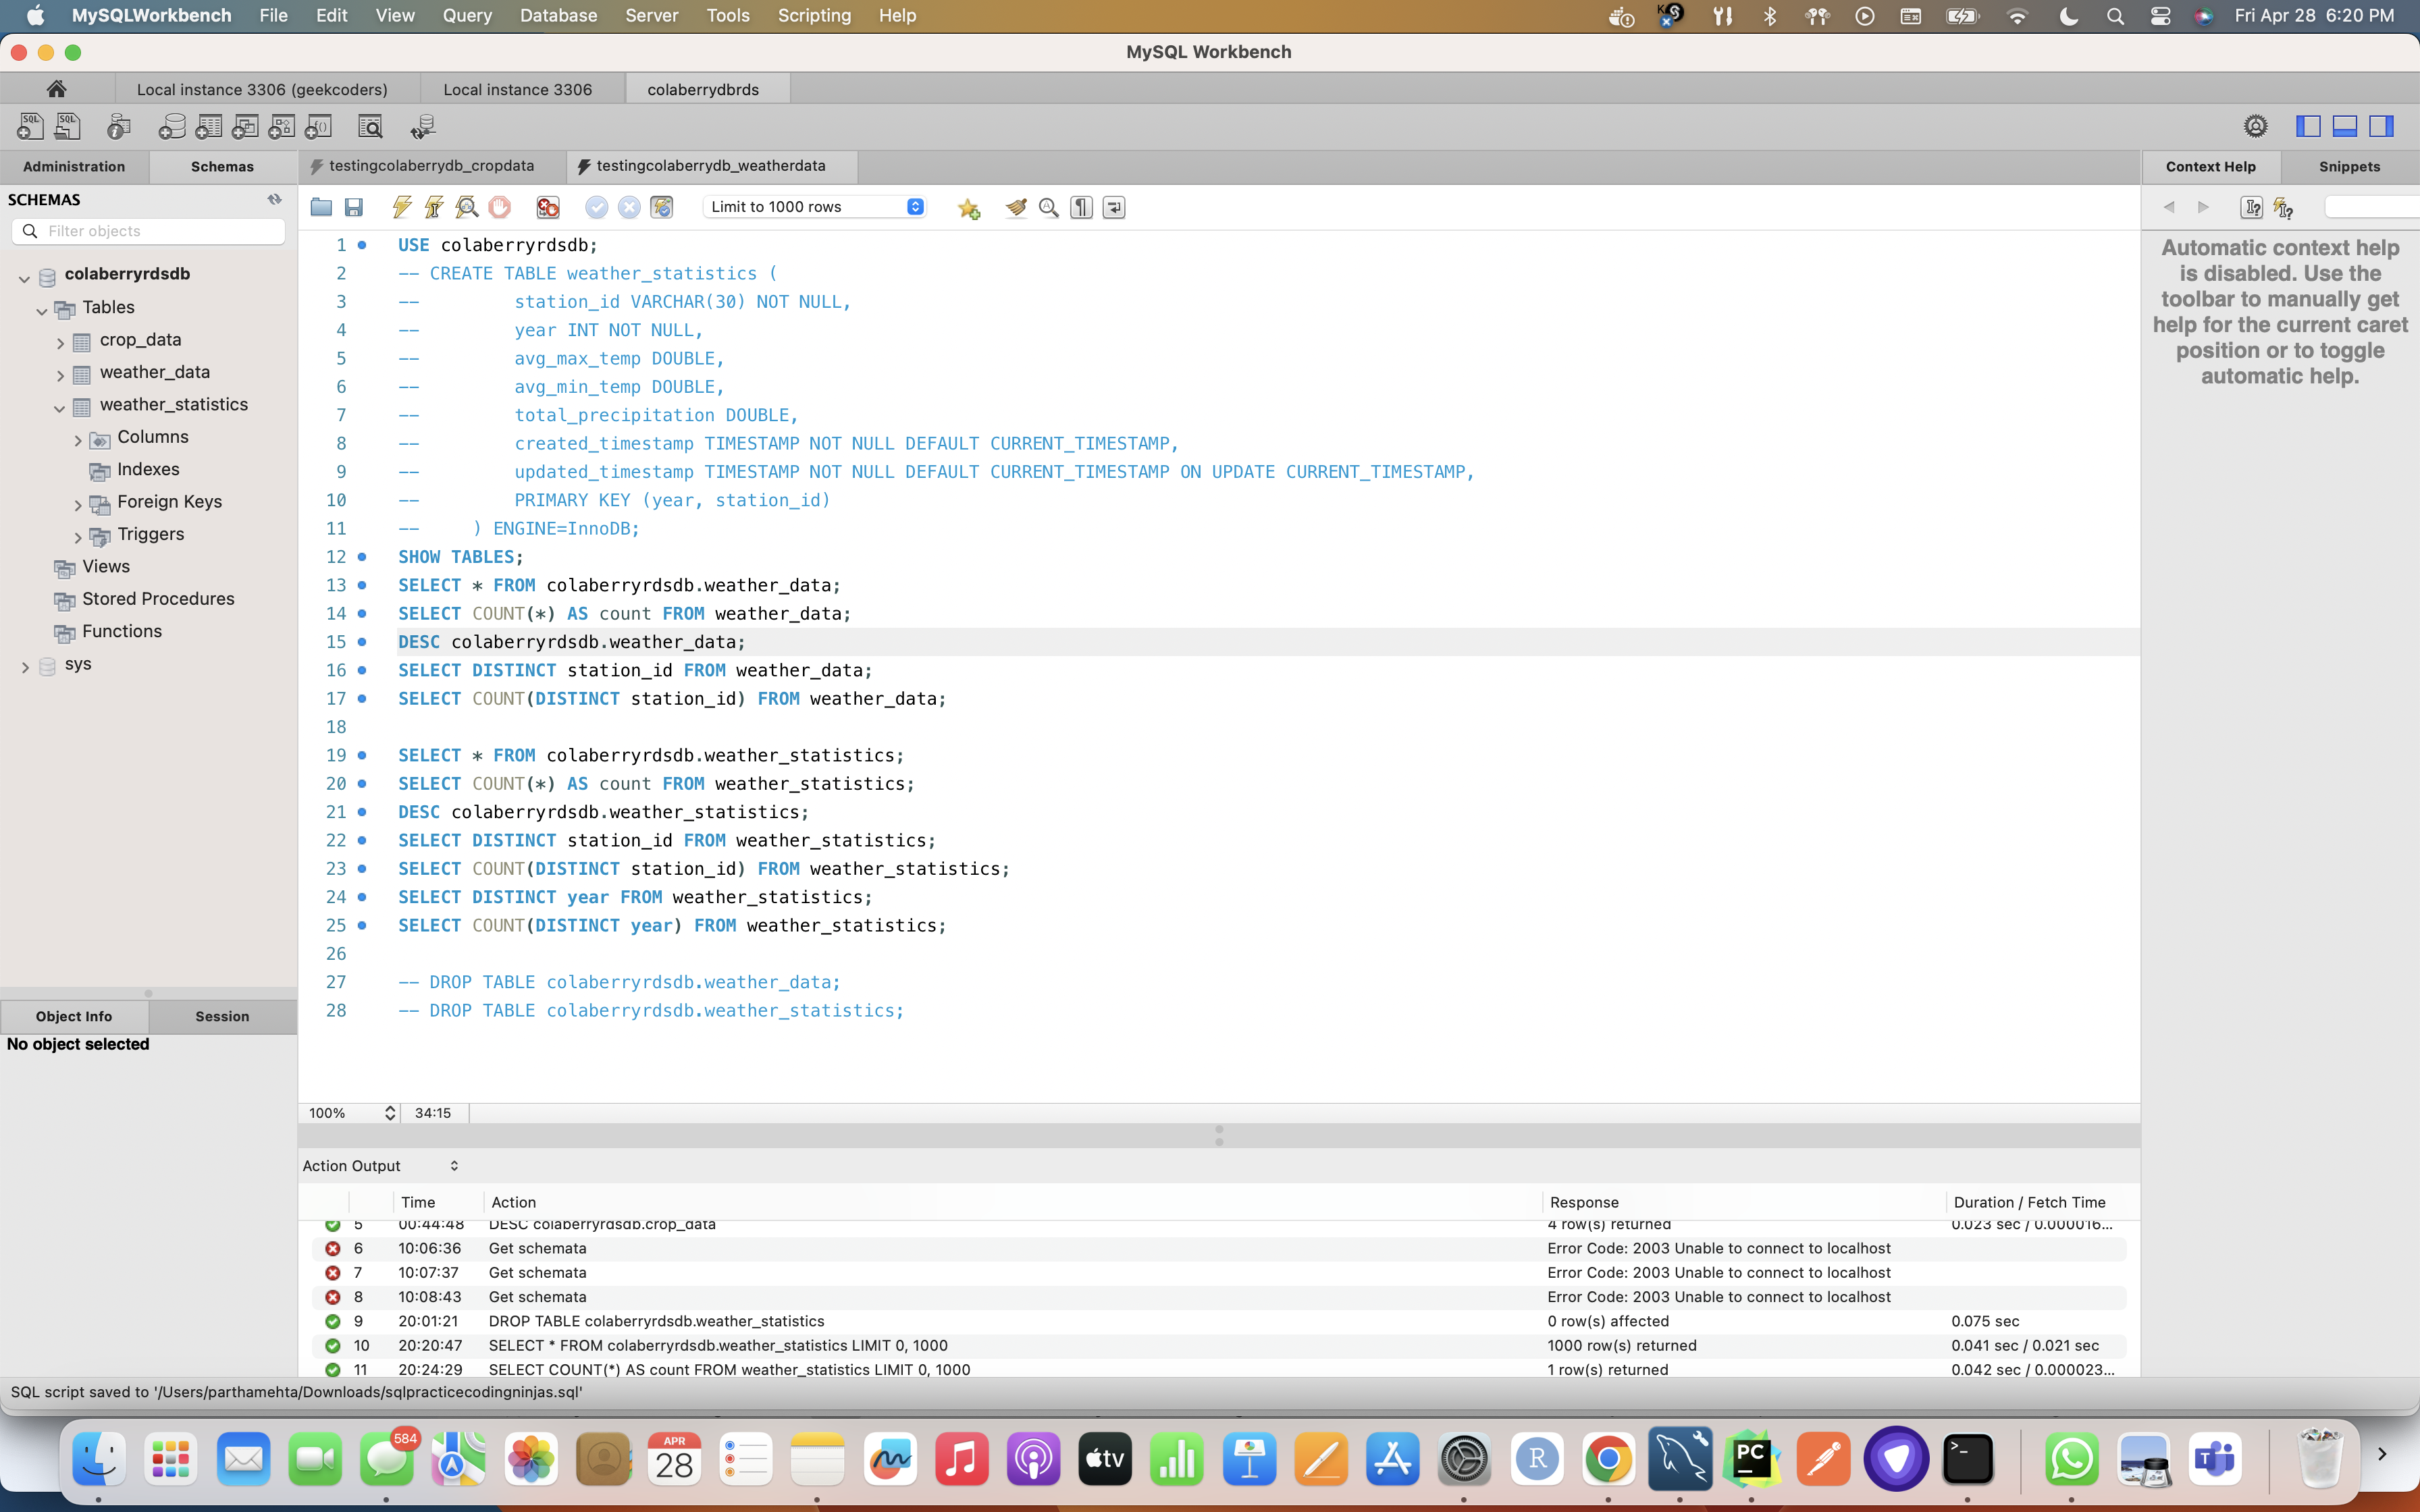
Redshift DB Weather Statistics table Screenshot

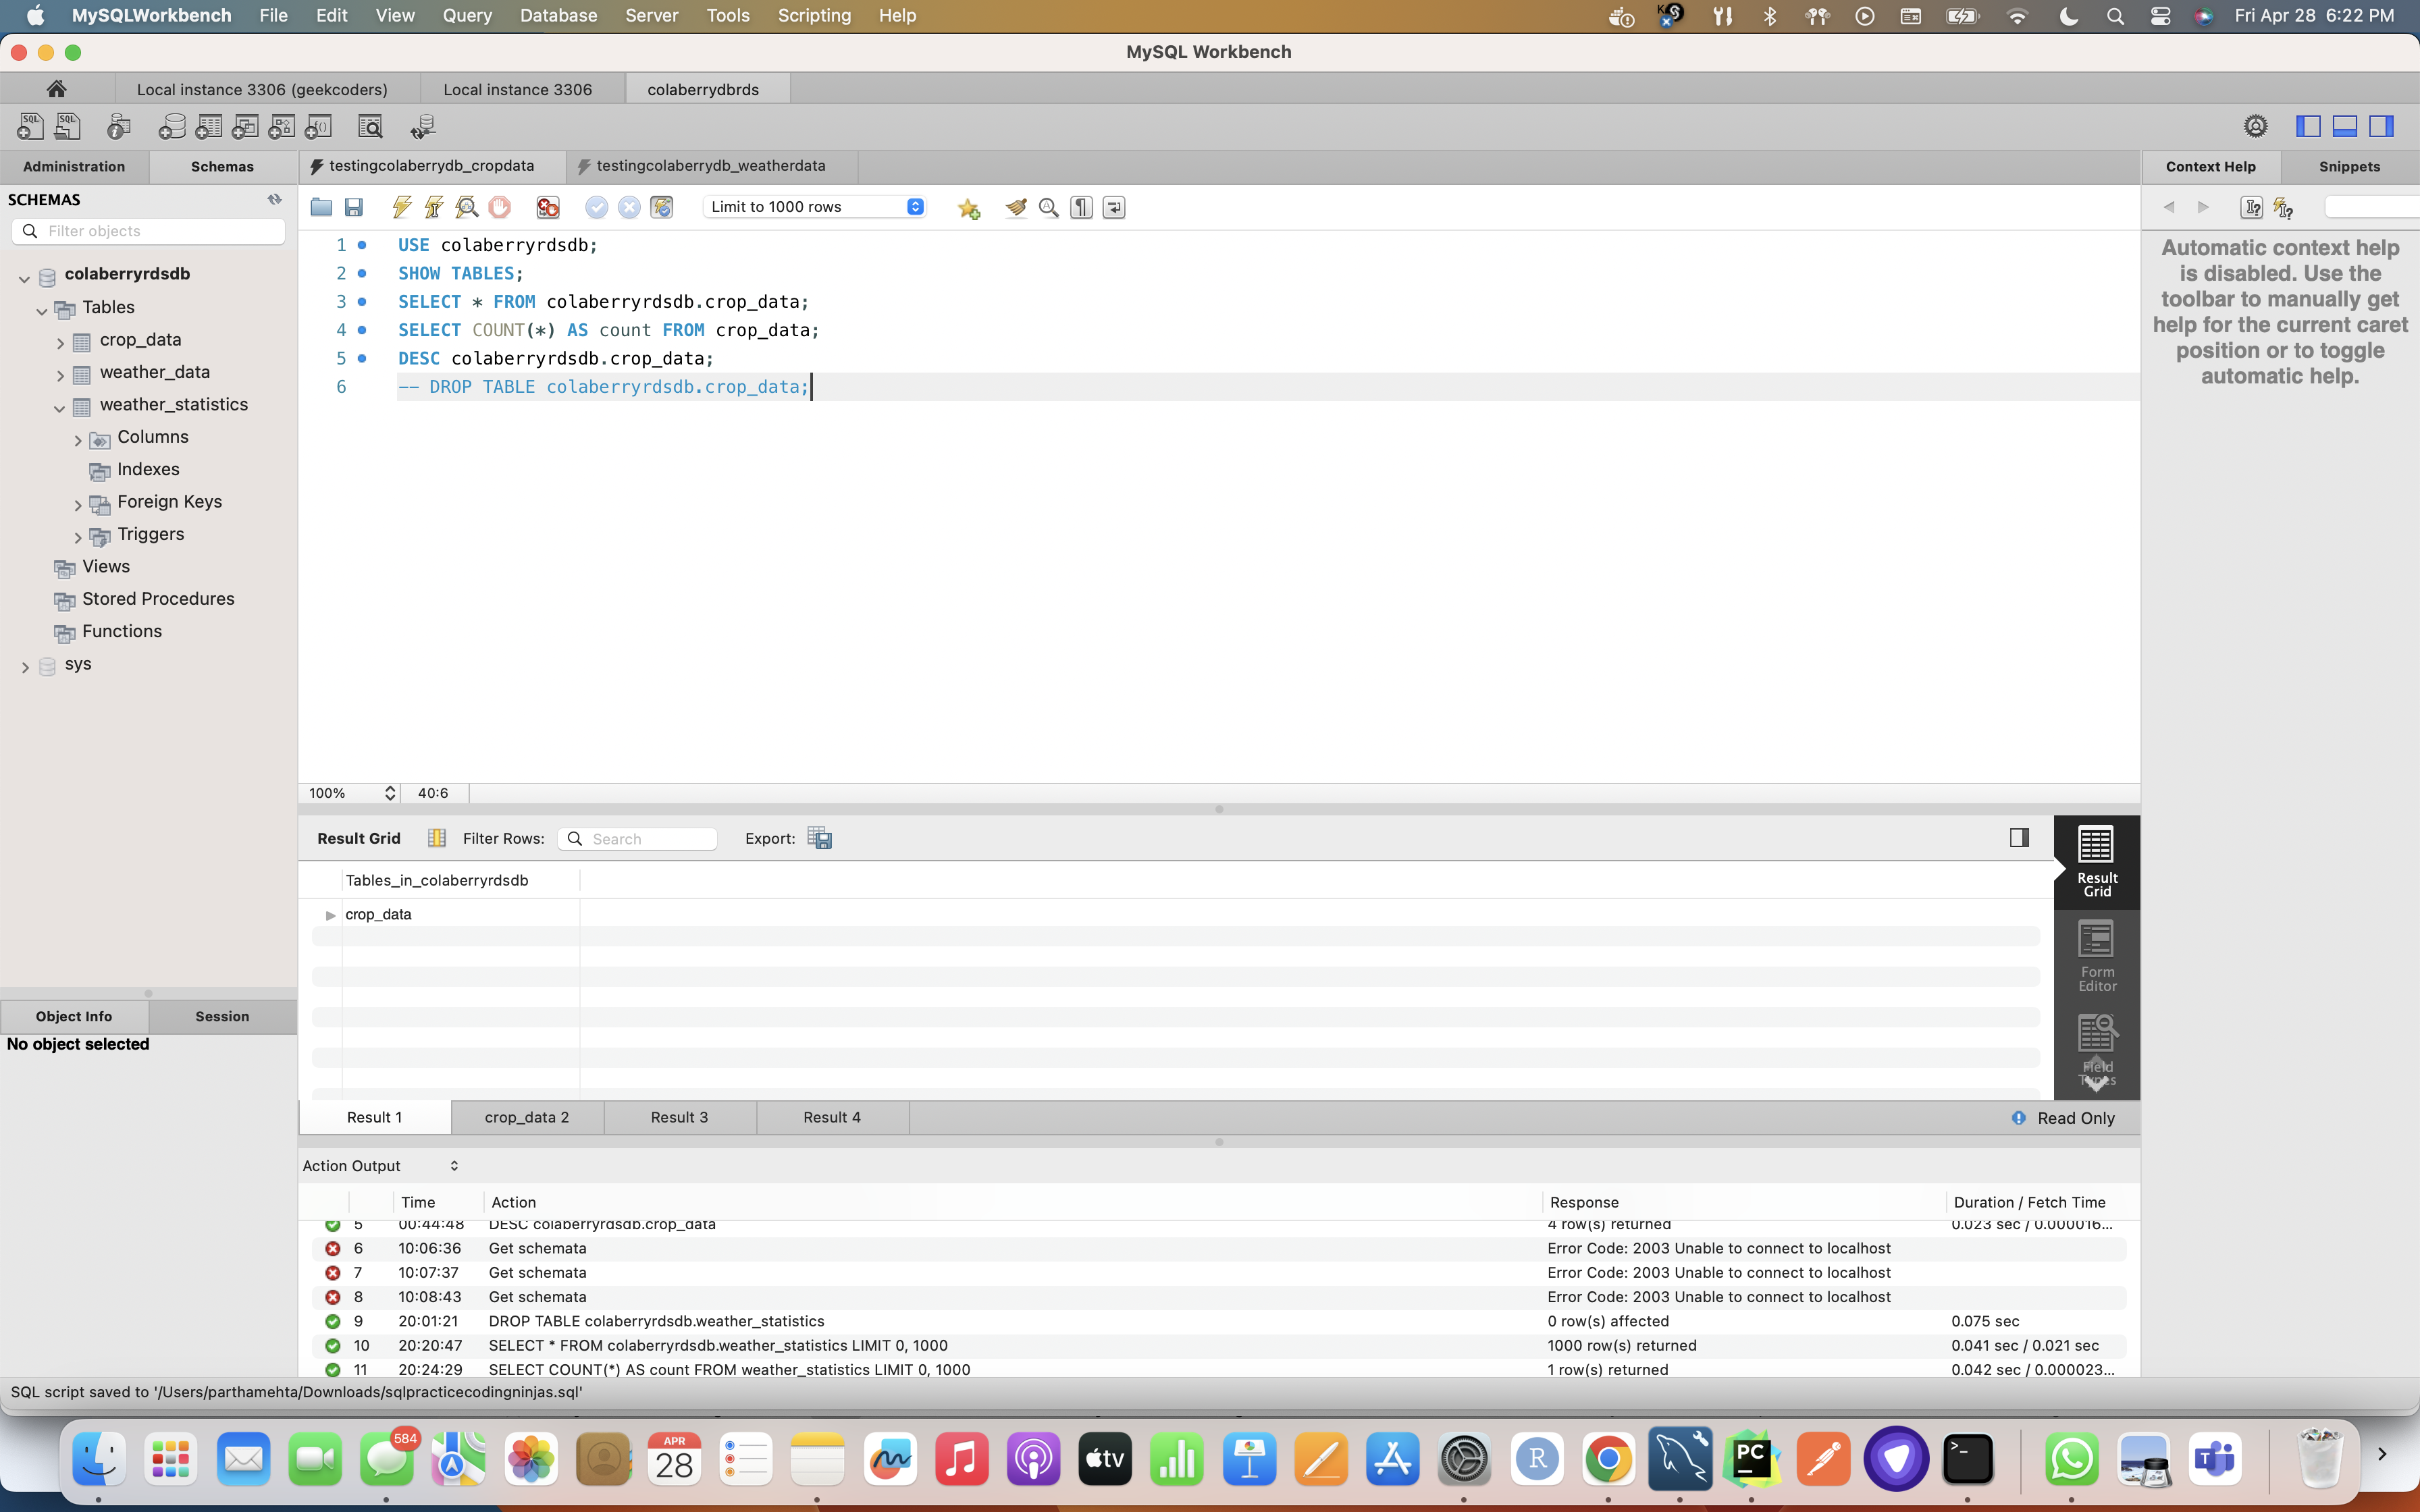
MySQL DB Testing for Weather and Crop Data