Home
Lantern applies minimal computing techniques to OER publishing practices. We believe that sustainable digital publishing requires minimal technology stacks.
"Minimal technology stacks" refers to the intentional constraints around the technology components required for a computing process.
Our goal is to minimize the technical footprint for digital publishing while maximizing control over the form, content, and distribution of OER texts.
Lantern uses Markdown and YAML as the source file formats for an OER project. These are non-proprietary plain text file formats. They can be opened and edited using any text editor on any operating system (on Windows, the default editor is Notepad; on macOS, the default editor is TextEdit). They can also be versioned with Git, allowing us to track and log the full history of a project's evolution over time.
Markdown provides many advantages for academic writing, OER production, and preservation:
"Markdown is intended to be as easy-to-read and easy-to-write as is feasible. Readability, however, is emphasized above all else. A Markdown-formatted document should be publishable as-is, as plain text, without looking like it’s been marked up with tags or formatting instructions." - John Gruber (one of Markdown's original creators)
Here's an example of Markdown syntax:
# Chapter Title

Introductory paragraph text with **bold** and *italic* text.

## Section Heading

Introductory paragraph for the section.

Another paragraph, but with a [link to a website](https://example.com).

### Subsection Heading

More content, but in list form:

- list item
- list item
- list item
Markdown is useful for digital publishers and preservationists because it is human-readable in its raw form and machine-readable for converting to HTML and dozens of other markup formats.
"Plain text files have many advantages over other formats. For one, they are readable on virtually all devices. They have also withstood the test of time better than other file types – if you’ve ever tried to open a document saved in a legacy word processor format, you’ll be familiar with the compatibility challenges involved." - Sarah Simpkin, "Getting Started with Markdown"
Visit the Markdown Guide to view examples of Markdown's basic syntax or skip ahead to Lantern's use of Markdown for content.
Lantern stores bibliographic metadata in a YAML file. YAML is a data serialization language, like JSON or XML. If this is your first time encountering YAML, we recommend watching this short video. YAML's syntax is organized in key-value pairs:
- the key defines the metadata field used by the templates
- the value captures the information specific to your project
Here's an example of YAML syntax:
title: Lantern
subtitle: An OER Publishing Toolkit
author:
    -   name: Chris Diaz
        affiliation: Northwestern University
    -   name: Lauren McKeen McDonald
        affiliation: Northwestern University
keywords:
    - textbooks
    - oer
    - digital publishing
Lantern includes a metadata.yml file that is used to store all the bibliographic data for your OER publication.
This tutorial will setup a Lantern project for you, but you will need to refer to the other pages in this wiki to complete a full OER project from manuscript to publication. For now, this will walk you through the steps of copying the template to your GitHub account in order to create an online workspace for your project. If you're new to GitHub, we recommend this video that introduces the interface and key concepts.
- Create a GitHub account. Login to your account
- Visit https://github.com/nulib-oer/lantern
- Click the green "Use This Template" button. This brings you to a "Create a new repository" form
- Enter a repository name for your project. Use a lowercase letters and hyphens instead of spaces (e.g.
your-awesome-oer-project). This name will become part of your site's URL:
Example:
https://USERNAME.github.io/REPOSITORY-NAMEwhereUSERNAMEis your GitHub username.
- Most users should choose "Public" repository. In order to use GitHub's free web hosting service for your final OER project, you must create a public repository unless you upgrade to a paid account.
- Leave the "Include all branches" option unchecked; you only want the
mainbranch - Click on the green button "Create repository from template." This will take you to your new repository.
Your new repository comes with a few files and folders you'll be using to add and edit your manuscript content. Here is an explanation for each top-level directory and file.
-
metadata.yml: This file contains a minimal amount of bibliographic metadata for your project. You can add more metadata as your project grows. -
references.bib: This file can be populated with bibliographic reference entries formatted in either BibTeX or BibLaTeX, which are common export formats available from Google Scholar or most reference management software. -
README.md: A basic description file explaining the purpose and usage of the repository files. -
LICENSE: A copyright and licensing file for the code used in Lantern. -
lantern.sh: The main Bash script for Lantern that brings everything together to process and create your project's publication outputs.
-
original/: Keep your original.docx,.odt, or.texfiles in this folder. Lantern will automatically convert these files to Markdown and add them to thetext/folder for you. -
text/: Store your project's content files in Markdown format, such as chapter files. Every.mdfile in this folder will be included in your publication. You can create a subdirectory called "drafts" to store.mdfiles that will not be included in the publication. -
images/: Store your project's image files files in this directory. -
templates/: Contains template files for each publication format. You can edit these files if you want to change, for example, the markup used for the HTML outputs. -
settings/: Contains Pandoc Default settings and options for specifying how Pandoc should handle the input and output files, including things like PDF page settings and default labels (e.g. "Contents"). -
lib/: Contains technical files required by Lantern to process your project's output formats, such as scripts, styles, and dependencies. -
.github/workflows: Do not edit these files unless you know what you are doing. They contain instructions for running GitHub Actions whenever a file in your repository is updated, such as rebuilding your publication outputs.
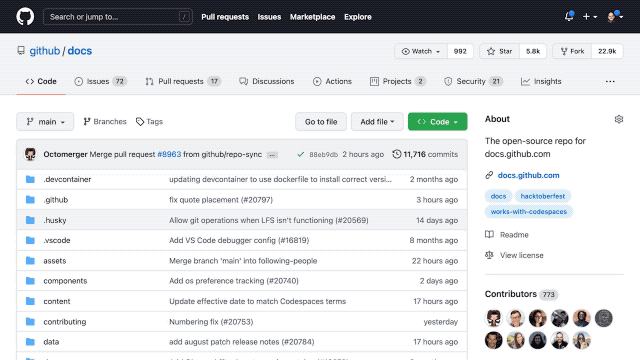
There are two ways to edit files on GitHub using the web interface. Both of these methods will allow you to edit the files in plain-text mode directly using your web browser.
- Click on the file you wish to edit, then click on the Pencil icon:

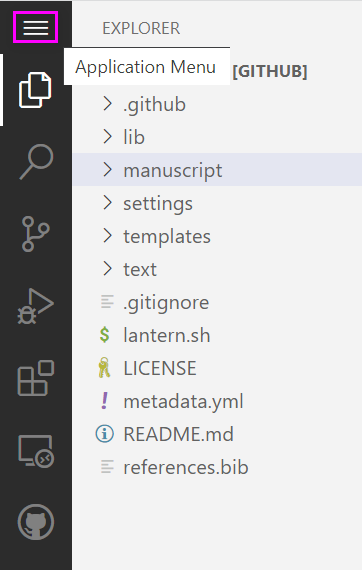
- Use GitHub's built-in Visual Studio Code text editor by press the
.key from your repository's homepage:
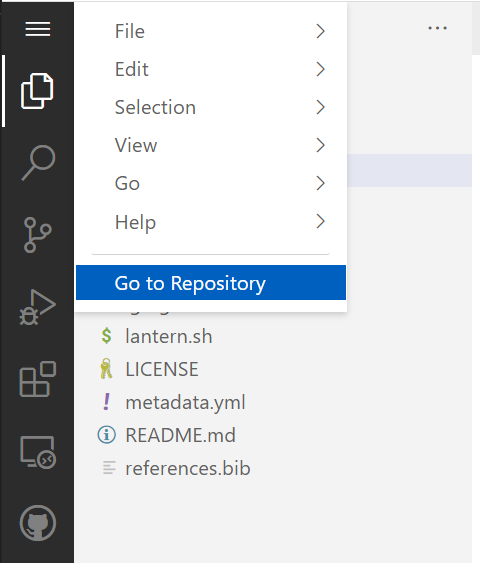
To exit this editor, click on the "Application Menu"
And select "Go to Repository"
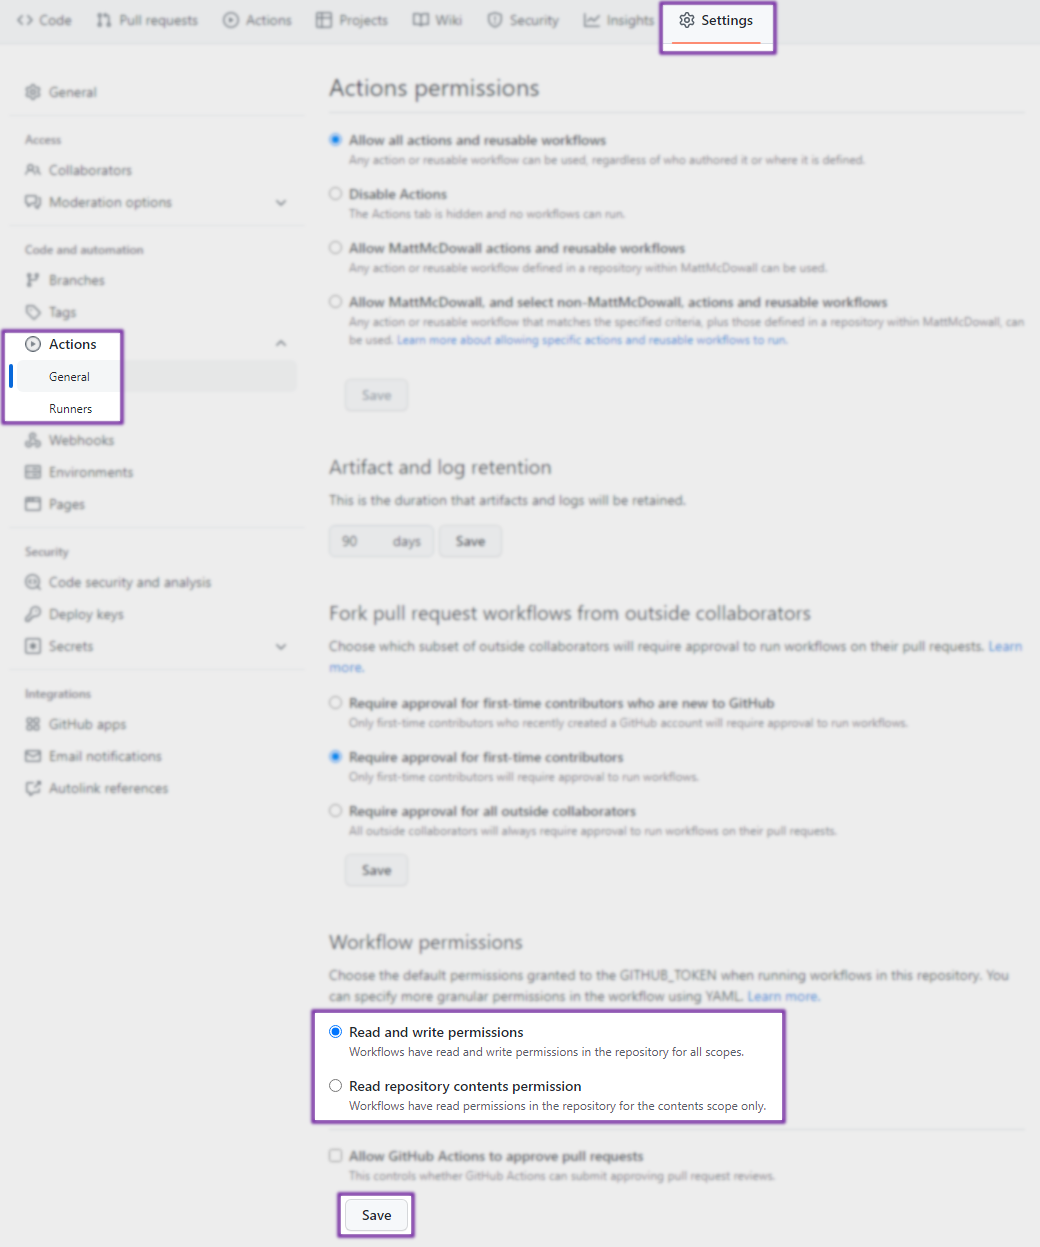
Your Lantern project is automatically configured to build a website for your project, but you'll need to enable both the GitHub Actions and the GitHub Pages service in order for the website to become available.
- Click on the "Settings" tab on your repository
- Click on the "Actions" button in the sidebar
- Scroll down to "Workflow Permissions"
- Select "Read and write permissions
Your final project will need bibliographic metadata in order to be indexed by search engines and library catalogs. Lantern stores metadata about the OER in a YAML file (metadata.yml). The information stored in the YAML file will be used to fill the templates for each of the publication formats.
- Open the
metadata.ymlfile in the online editor using one of the methods described above - Give your project a title by changing the text following the
:on line 3 of the file - Commit the change to the file so that it save a new version of your project in your repository (you can commit directly to the main branch)
Hint: YAML needs to be valid, so if you ever hit an error, it's a good idea to check the YAML code you're using with a YAML validation tool.

- Click on the "Pages" button in the sidebar
- In the "Source" drop-down menu, select
gh-pages - Keep the section drop-down menu option as:
/(root) - Click save

In a minute or two, your project's website will be available at the URL provided near the top of that page.
The URL for your website will be generated based on your GitHub username and your project's repository name. For example, if your username is "ma3b3" and your repository name is "lantern-test", the URL for your website will be https://ma3b3.github.io/lantern-test/
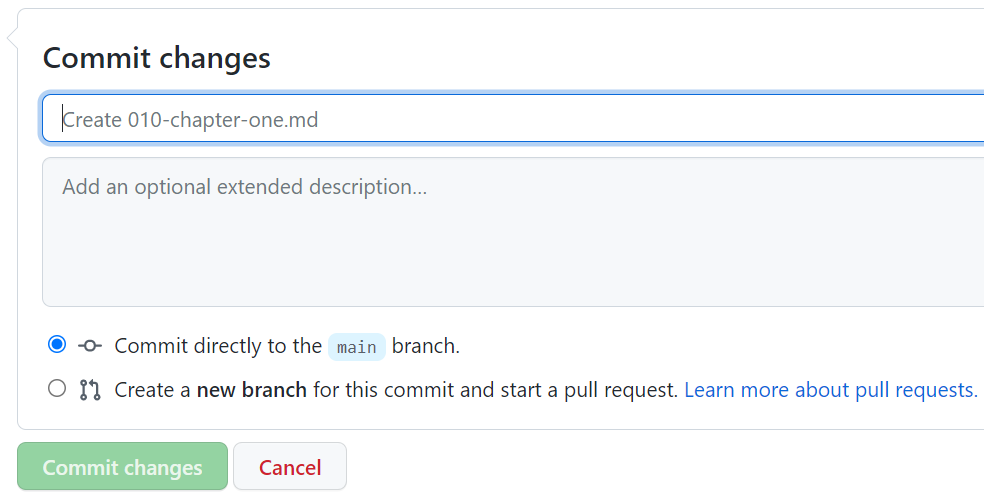
There is a subtle difference between "saving" a change and "committing" a change. A "commit" is a snapshot of your project the represents a version of it in it's history. Text editors provide a way to save changes to a file; Git provides a way to commit changes to your project's history.
Each update to your project files represents a commit. A commit is a snapshot of a repository. Each commit is an opportunity to briefly log the purpose of your changes to the repository, which is helpful for keeping track of the project's development. Whenever you commit a change to any of the files in your project's repository, GitHub will run the Lantern script to automatically regenerate your publication's output formats and update your website.
If you accidentally make an error in your code, you will receive a message from GitHub to your email address informing you of the error. It's nothing to worry about; it happens all the time! If the error is something you can't resolve on your own, or you have questions, let us know by making a post in the Discussion forum.
You can make a commit on your project by editing a file and filling out the form at the bottom of the editor:
CONGRATS! You now have your own Lantern project. In the next section, you will learn how to prepare manuscript files in word processing format (.docx) for conversion to markdown (.md).