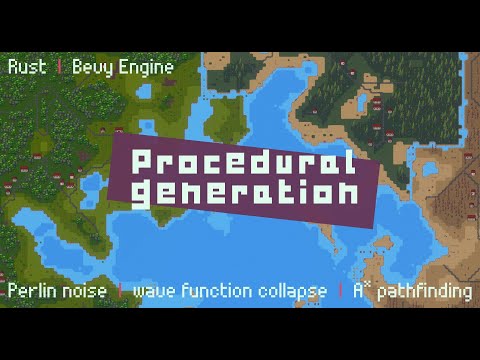
This repository contains basic generation logic for a 2D, pixel art, tile set-based world. It was written in Rust, using Bevy engine (v0.17.2). The purpose of this project was to familiarise myself a little more with Rust and procedural generation. It's a follow-up on my first attempt to learn Rust, Rusteroids, and my first, non-Rust procedural generation project, Procedural Generation Project 1. You will neither find advanced concepts of Rust being applied (correctly) here nor advanced procedural generation techniques.


- Generates an infinite and animated, 2D pixel art world that is fully deterministic
- Executes generation processes asynchronously (excluding entity spawning, of course)
- Terrain generation:
- Uses multi-fractal Perlin noise to generate terrain layers
- Features 3 biomes (dry, moderate, humid), each with 5 terrain types (water, shore, and three land layers e.g. sand/grass/forest)
- Each terrain type supports 16 different tile types, many with transparency allowing for smooth transitions and layering
- Uses a chunk-based approach (as can be seen in the GIFs)
- Employs contextual layers (
Metadata) to make chunks context aware, allowing for gradual elevation changes over great distances and inter-chunk biome changes without reducing generation performance
- Object generation:
- Uses a basic A* pathfinding algorithm implementation to generate paths crossing multiple chunks
- Generates 3 modular building types - each allowing for different door locations, and window/roofs styles - in settled areas along paths
- Uses the wave function collapse algorithm to generate additional decorative objects such as trees, ruins, stones, etc.
- Supports multi-tile objects and connected objects, the rules for which are expressed in
.tomlfiles - for example, ruins can span multiple tiles and span over multiple terrain types
- Features 32x32px sprites (or sprites that fit within a 32x32px grid) that were created by me
bevy-inspector-eguiplugin to play around with the generation parameters at runtimebevy_pancamplugin for free camera movementiyes_perf_uiplugin for performance metrics in an overlay
- Art work is somewhat inspired by sanctumpixel's style
- All sprites were created by myself and are available under CC BY 4.0
- Start with the
GenerationStageenum in conjunction with theworld_generation_systeminGenerationPluginwhich is driving the generation process - The terrain/world generation which generates chunks and tiles sits in
crate::generation::world - The object generation which generates paths and decorative objects placed on the terrain lives in
crate::generation::object - Resources used for both of the above can be found in
crate::generation::resources - Structs and enums used across multiple modules sit in
crate::generation::lib
Note
When you start the application, the default settings will result in no land or objects being spawned at the
origin cg(0, 0), so you'll have to move the camera in any direction to see something
You can run this project in any way you like, but I have set things up to make it easy to develop using JetBrains RustRover. For this, you'll need:
direnv- Any Direnv integration plugin e.g. https://plugins.jetbrains.com/plugin/15285-direnv-integration
nix
This way, you'll just need to direnv allow in the project directory after which all prerequisites (incl. Rust, Cargo,
all Bevy dependencies, etc.) will be available to you. The JetBrains plugin will ensure that the environment is
available to your IDE and you can run the project from there (vs cargo build and cargo run in the terminal).
RustRover forgetting where the Rust standard library is?
find /nix/store -type d -name rust_lib_src
Without direnv, you can use the Nix Flake by running nix develop in the project directory. If you want to use an IDE
such as JetBrains RustRover, you'll have to set up the environment manually. You'll most likely have to make
LD_LIBRARY_PATH available to your IDE.
Upgrade the flake by running nix flake update in the repository's base directory.
- Add the sprite to the relevant sprite sheet in
assets/objects/ - Add a new option to the
ObjectNameenum - Optional: Add the object name to the
any.terrain.ruleset.tomlfile (top, right, bottom, left) if it can be placed next to a tile that contains no object (i.e.ObjectName::Empty) - Add the object name to the
all.tile-type.ruleset.tomlfile (like justFill) to the relevantTileTypes on which the object can be placed - Add a new state to the relevant
{terrain}.terrain.ruleset.tomlfile using the index from the sprite sheet- Make sure provide of permitted neighbours (even if just
Emptyon all sides) - Make sure the permitted neighbours themselves list the new object name as a neighbour, too
- The application will run some validations and prevent startup with clear error messages if the configured state is unresolvable
- Make sure provide of permitted neighbours (even if just
- Optional: Add the object name to any terrain-climate combination in
all.exclusions.ruleset.tomlif it shouldn't be placed in those terrains and/or climates - Optional: If this is a large asset, make sure to add it to
ObjectName.is_multi_tile() - Optional: If this is an animated asset, add it to
ObjectName.is_animated()
- Add the sprite to the relevant sprite sheet in
assets/objects/ - Update the column and row values in
constants.rsfor buildings/paths, if necessary - Add the new option(s) to the
ObjectNameenum - Add the object name(s) to the
is_building()oris_path()function inobject_name.rs - Add the object name(s) to the
get_index_for_building()orget_index_for_path()function inobject_name.rs - Add the object name(s) to the
any.terrain.ruleset.tomlfile where appropriate (top, right, bottom, left) - If building sprite: Add the object name(s) to relevant
BuildingTypein theBuildingComponentRegistry
You can but don't need to update any other ruleset files as buildings and paths are placed prior to decorative objects
and therefore don't need to be considered in the wave function collapse algorithm which uses these rulesets. However,
the addition to the "any ruleset" file results in the neighbouring tile of the new sprite to be empty
(ObjectName::Empty). Without this, you'll see errors in the wave function collapse algorithm.
- Run the command below to generate a flame graph
- Linux:
CARGO_PROFILE_RELEASE_DEBUG=true RUSTFLAGS='-C force-frame-pointers=y' cargo flamegraph -c "record -g" --package=procedural-generation-2 --bin=procedural-generation-2
- Windows:
$env:CARGO_PROFILE_RELEASE_DEBUG = "true"; $env:RUSTFLAGS = "-C force-frame-pointers=y"; cargo flamegraph -c "record -g" --package=procedural-generation-2 --bin=procedural-generation-2
- Linux:
- This should run the application - once you close it, a
flamegraph.svgwill be generated at the root of the repository - Open it in your browser to see the flame graph
The .run folder contains a few run configurations for RustRover. Alternatively, you may want to consider creating:
- A run configuration with environment variable
RUST_LOG=procedural_generation_2=debugfor debug logs - A run configuration that also appends
,procedural_generation_2::generation::object=trace,procedural_generation_2::generation::path=tracetoRUST_LOGfor WFC and pathfinding trace logs - A run configuration with environment variable
RUST_LOG=bevy_ecs=debugto see Bevy ECS logs (e.g. which system caused anerror[B0003])