🚧 UNDER CONSTRUCTION 🚧
This describes how to contribute to SFN-CLIENT: the tools we use to track and coordinate the work that is happening and that needs to happen. This also describes the workflow -- the processes and sequences for getting contributions merged into the project in an organized and coherent way.
We use Waffle to manage our work on features, chores and bugfixes.
We keep our code on GitHub and use git for version control.
Each developer will usually work with a fork of the main repository on Agile Ventures. Before starting work on a new feature or bugfix, please ensure you have synced your fork to upstream/develop:
Please ensure you have nvm installed in your local machine. If you are using OSX you can run the command below
brew install nvm
Run the following command to install and switch to the current node version for the project:
nvm install v10.13.0
To ensure that the correct node version for the project is automatically selected when you cd into the sfn-client project's directory please install avn in your local machine and run the commands below in your terminal:
npm install -g avn avn-nvm avn-n
OR
yarn global add avn avn-nvm avn-n
Then run:
avn setup
Unfortunately, if you are using vs code's integrated terminal, you have to cd .. and cd back in cd sfn-client
In Mac's Terminal it works automatically.
If you are using fish shell please use this to install nvm and install avn for fish
npm install -g yarn
yarn
yarn start
-
This codebase uses Enzyme Javascript Testing Utility. To learn more about the Enzyme you can checkout their documentation.
-
start the test by running
yarn test -
then press
ato run all test
- If tests are failing, or you found a bug running the development server, you can debug using the inline debug tool.
So as to create ready issues,
- Navigate to this dummy ticket issue
- Click on the three dots as shown in the image below
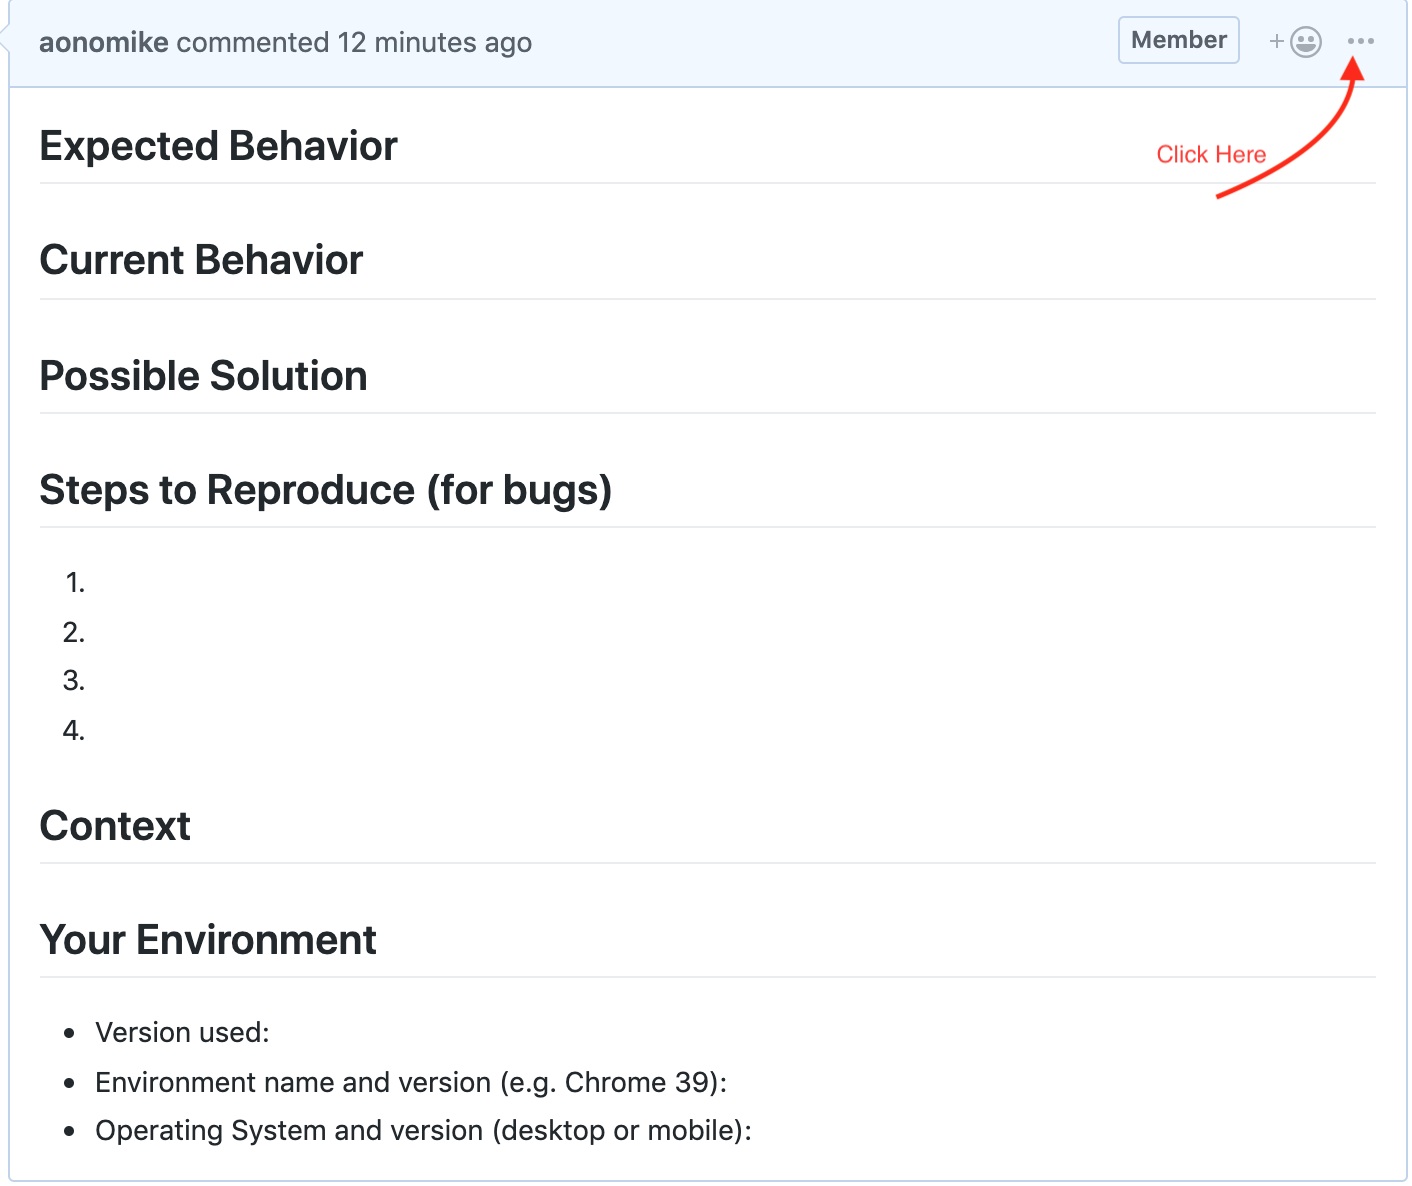
- Click on edit from the drop down.
- Kindly ensure that you don't override the dummy ticket issue.
- Copy the content of the issue and paste in the new issue you are creating so as to use it as a template.
- Fill in all the relevant sections as you create your issue.
- Submit your issue
When deciding on an issue to work on, look for the Help Wanted or Good First Issue tags.
git checkout develop
git pull upstream develop
After you pulled the latest develop branch, make sure you have also the dependencies installed each time, by running in the console:
yarn
Ensure you have setup AgileVentures/sfn-client's upstream develop. Otherwise you will not have the latest develop changes.
To confirm this, run git remote -v.
You should see a simillar output.
origin  https://github.com/yourgithubusername/sfn-client.git (fetch)
origin  https://github.com/yourgithubusername/sfn-client.git (push)
upstream    https://github.com/AgileVentures/sfn-client.git (fetch)
upstream    https://github.com/AgileVentures/sfn-client.git (push)
If not, you need to set the remote develop in order to get the latest copy once changes are merged.
In order to achieve that, run:
git remote add upstream https://github.com/AgileVentures/sfn-client
git pull upstream develop
This depends on the name of your origin (Counter check before running the above command).
You will now have the latest copy of develop in your local.
Once this is done, you can proceed with naming your branch following the below convention.
git checkout -b 17-add-sfn-logo
Where 17 is the ticket number and add-sfn-logo is a short description of the purpose of your branch.
Ensure your commit message clearly communicate the work you have done.
For example,
git commit -m "Implement user login"
For your Pull Requests, ensure you have a proper title describing your task. Make sure to add a link to the ticket you've worked on and add any screenshots if necessary.
In your pull request description please include a sensible description of your code and a tag fixes #<issue-id> e.g. :
This PR adds a CONTRIBUTING.md file and a docs directory

fixes #799
which will associate the pull request with the issue in the Waffle board.
Your pull request needs to be reviewed by at least two people in the team for it to be merged in develop branch.
Instructions on how to review a pull request can be found here.
We try to make designing components easier with setting up some base grounds of colors, typography and layouts. Before start designing a component for the page, please consult these materials. You can find them in the src/components/styles directory.
The layout of the pages is following Bootstrap's 12 column grid system, but with using CSS Grid and Flexbox together. We recommend to have a look at the documentation, or just give a shot to grid garden game.
The structure of the components and spacing is suggested to follow an 8px grid system, what does that mean? It means every spacing, padding and size (width, height) of a component is following a multiple of 8. To give you a head start related to this rule, we set up the margins and paddings already to use in the styles/utilities.scss file as SASS variables.
As moving towards with the project the individual screens and assets will be documented here


