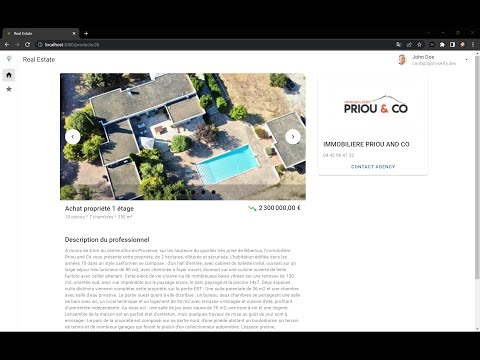
This application is collecting SeLoger real-estate products on demand and store them to a database. The user requires an account to login and start importing products. He/She can then list or search for those products later on.
The micro-services architeture is described in the below diagram:
flowchart LR
   USER --:80--> FE([front-end])
   USER --:8080--> AUTH([auth svc])
   USER --:8081--> PG([pg-admin])
   subgraph services
      FE -.-> GTW([api-gateway]) & AUTH
      GTW -.:8080.-> LOG([logger svc]) -.:27017.-> DBM[(mongo \n DB)]
      GTW -.:8080.-> PROD([product svc]) -.:5432.-> DB[(postgres \n DB)]
      GTW -.:8080.-> AUTH -.:5432.-> DB
      PG -.:5432.-> DB
   end
Vue.js Single Page Application (SPA) using Vuetify 3 component library, Vite tooling and Pinia store management.
KrakenD merge and map routes of all micro-services APIs and secure endpoints using the authentication service.
Keycloak handles OAuth2 authentication using OpenId worflow. It delivers a JWT token to the client once it is authenticated.
The product micro-service is a REST API handling CRUD operations on real-estate products. The database can be initialized using the import endpoint which connects to the SeLoger API and eventually store the results in the database.
The logger micro-service is a REST API handling a single endpoint /log. The MongoDB database logs all actions happening within the solution.
Install docker, make and compose and run the following command:
make up_build
Browse localhost:8080 to configure the authentication portal:
- Open Administration Console
- Login using admin/admin username and password
- Make sure the Invokify realm is selected
- Open Users menu and click add user button
- Create a new user by filling in Email, First & Last Name and check the box Email Verified, then click save.
- Open Credentials tab and set a new password (uncheck the box Temporary)
Browse localhost:80 to start the application.
The .gitlab-ci.yml configures gitlab pipeline for you, in order to build the docker images and then create resources in your Google GKE cluster.
Do not forget to change the context name (
nicolashvallee/go-real-estate:gke-agent-prod) with your own.
Before that, follow the below instructions:
-
Create the K8S cluster
Follow instructions to create a Google GKE cluster or simply activate the docker one.
-
Deploy the containers
Deployment files are defined in
./deployment/kubernetesfolder, and user can appply resources using the following commands:kubectl apply -f ./deployment/kubernetes/registry-credentials.yml kubectl apply -f ./deployment/kubernetes/postgres.yml kubectl apply -f ./deployment/kubernetes/pgadmin.yml kubectl apply -f ./deployment/kubernetes/keycloak.yml kubectl apply -f ./deployment/kubernetes/backend.yml