Training cascade Haar classified step-by-step on user data
Most of the haar classifier building process steps are taken directly from Mahdi Rezaei work "Creating a Cascade of Haar-Like Classifiers: Step by Step". Steps 2, 3 and 4 described in this repository repeat steps 4, 5 and 6 in the original work. https://www.cs.auckland.ac.nz/~m.rezaei/Tutorials/Creating_a_Cascade_of_Haar-Like_Classifiers_Step_by_Step.pdf
Step 1, 2 and 3 from original work were combined into step 1 of this repository and Python based Qt5 GUI app was developed to take sample images from video files.
- Positive samples - contain an object of intereset that needs to be recognized by cascade haar classifier.
- Negative samples - similar images but without objects to be recognized.
Run APP.py. Positive and Negative samples directories will autofill.
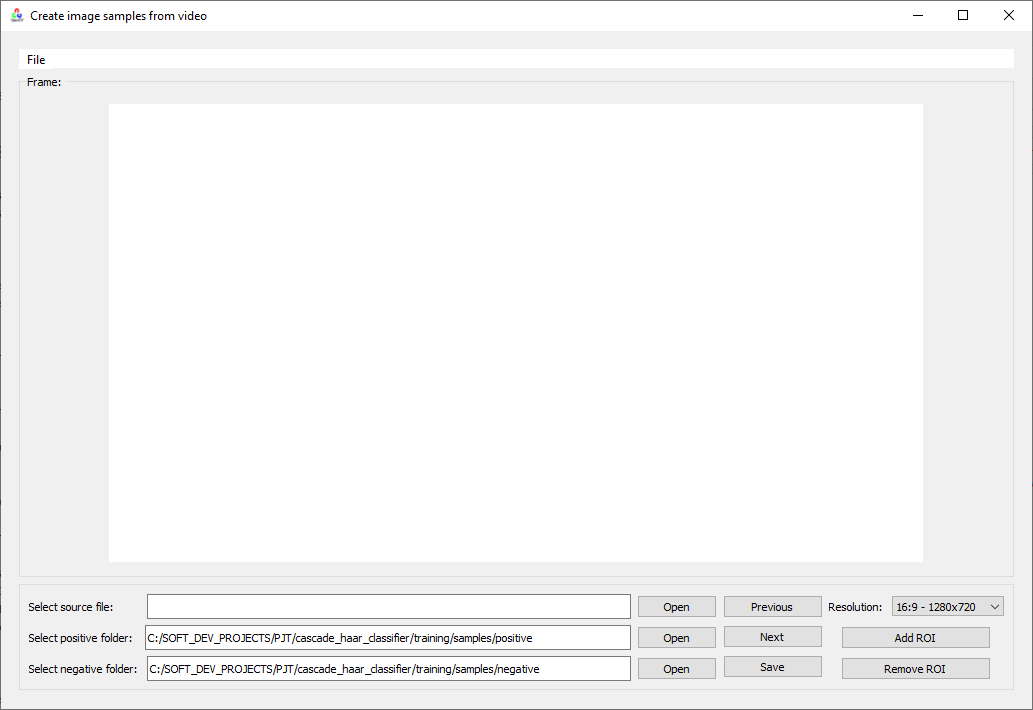
Open *.mp4 source file.
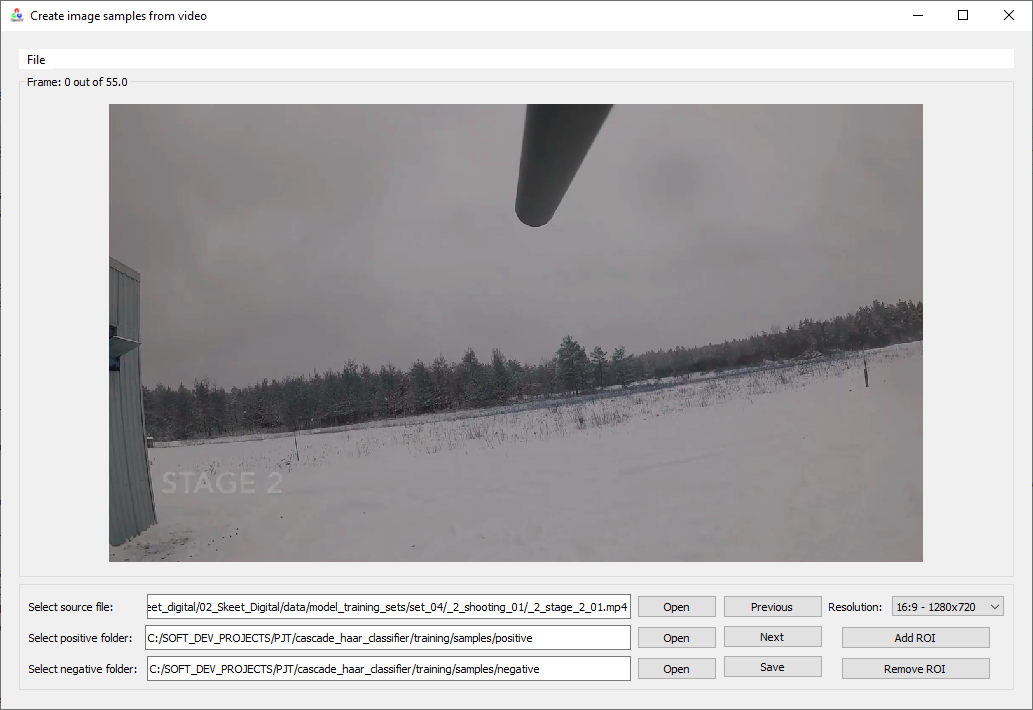
Scroll through the video file frames using Previous and Next buttons.
- To save a Negative sample just press Save button. As a result, the current frame will be saved as *.bmp file in /training/samples/negative/rawdata. Also, info.txt file will be created if does not exist yet in /training/samples/negative. Inside the info.txt file a new line will be added
\rawdata\mp3filename_framecount.bmp. - To save a Positive sample click Add ROI (Rectangle Of Interest). In a newly opened window drag a rectangle around the object.
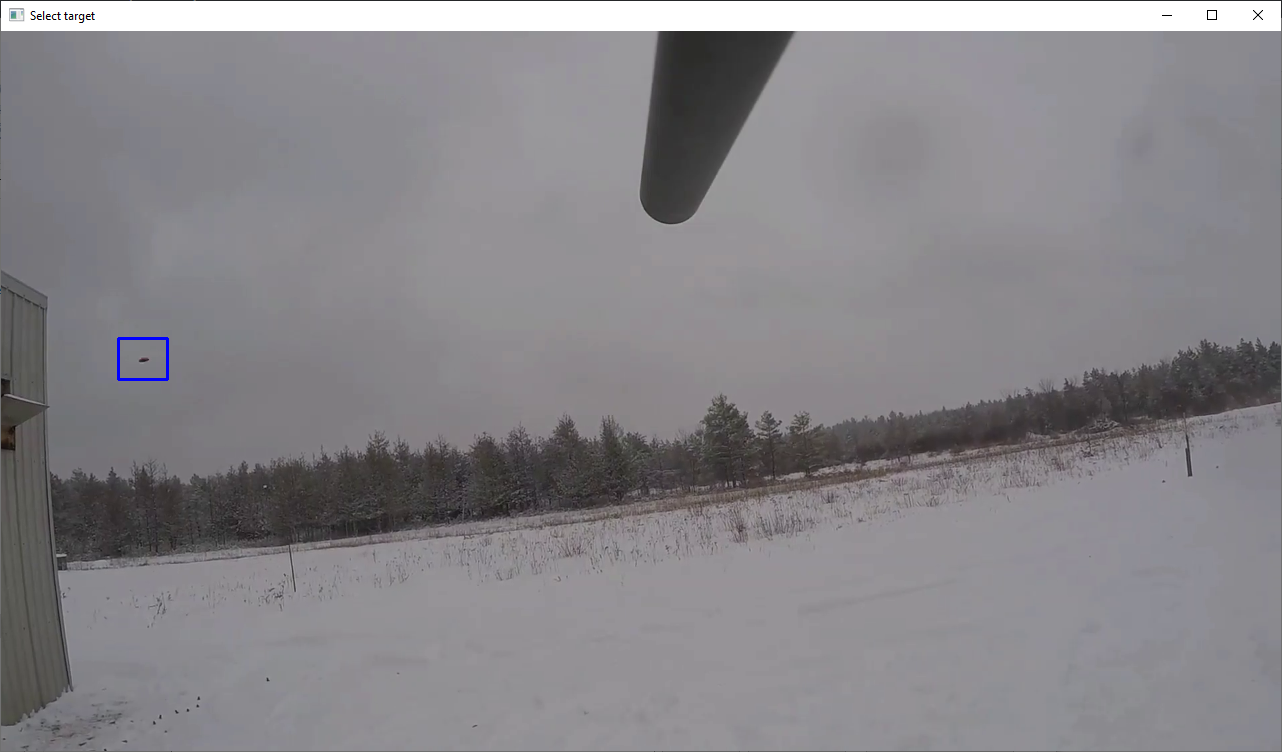 Press Enter. In the main window a green rectangle around the object will appear.
 The ROI data can be removed by clicking Remove ROI.
Multiple ROI can be added from the same image.
Click Save button. As a result, the current frame will be saved as *.bmp file in /training/samples/positive/rawdata. Also, info.txt file will be created if does not exist yet in /training/samples/positive. Inside the info.txt file a new line will be added
The ROI data can be removed by clicking Remove ROI.
Multiple ROI can be added from the same image.
Click Save button. As a result, the current frame will be saved as *.bmp file in /training/samples/positive/rawdata. Also, info.txt file will be created if does not exist yet in /training/samples/positive. Inside the info.txt file a new line will be added \rawdata\mp3filename_framecount.bmp ROIindex ROIx ROIy ROIw ROIh.
Open 00_samples_creation.bat in training folder. Its content is like:
pause
The parameters are:
- -info relative path to info.txt inside positive samples folder
- -vec relative path to output vector file
- -num number of positive samples
- -w width of object in pixels
- -h height of object in pixels
Close the 00_samples_creation.bat and run it. To run creatsample.exe following files are needed as well cv097.dll, cxcore097.dll, highgui097.dll, and libguide40.dll.
CMD should show a similar result:
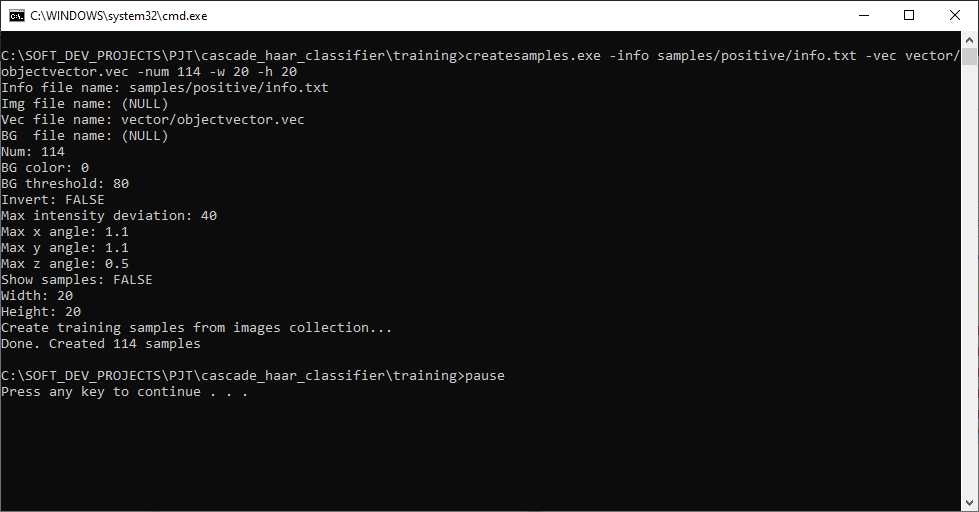 Also objectvector.vec file will be created in vector folder.
Open 01_haar_training.bat in training folder. Its content is like:
haartraining.exe -data cascades -vec vector/objectvector.vec -bg samples/negative/info.txt -npos 114 -nneg 78 -nstages 15 -mem 1024 -mode ALL -w 20 -h 20
pause
-data cascades path for storing the cascade of classifiers -vec path which points the location of vector file -bg path which points to info.txt file of negative samples -npos number of positive samples ≤ no. positive bmp files -nneg number of negative samples (patches) - has to be greater than or equal to number of positive samples -nstages number of intended stages for training -mem memory assigned in MB -mode check literature for more info about this parameter -w width of object in pixels - must be the same as in 00_samples_creation.bat -h height of object in pixels - must be the same as in 00_samples_creation.bat -nonsym use this parameter without argument if the object is not horizontally symmetrical
harrtraining.exe collects a new set of negative samples for each stage, and –nneg sets the limit for the size of the set. It uses the previous stages’ information to determine which of the "candidate samples" are misclassified. Training ends when the ratio of misclassified samples to candidate samples is lower than a certain value. Regardless of the number of stages (nstages) that is defined in haartraining.bat, the program may terminate early if we reach above condition. Although this is normally a good sign of accuracy in training process, however this also may happen when the number of positive images is not enough (e.g. less than 500).
Close the 01_haar_training.bat and run it. To run haartraining.exe following files are needed as well cv097.dll, cxcore097.dll, highgui097.dll, and libguide40.dll.
CMD should show a similar result:
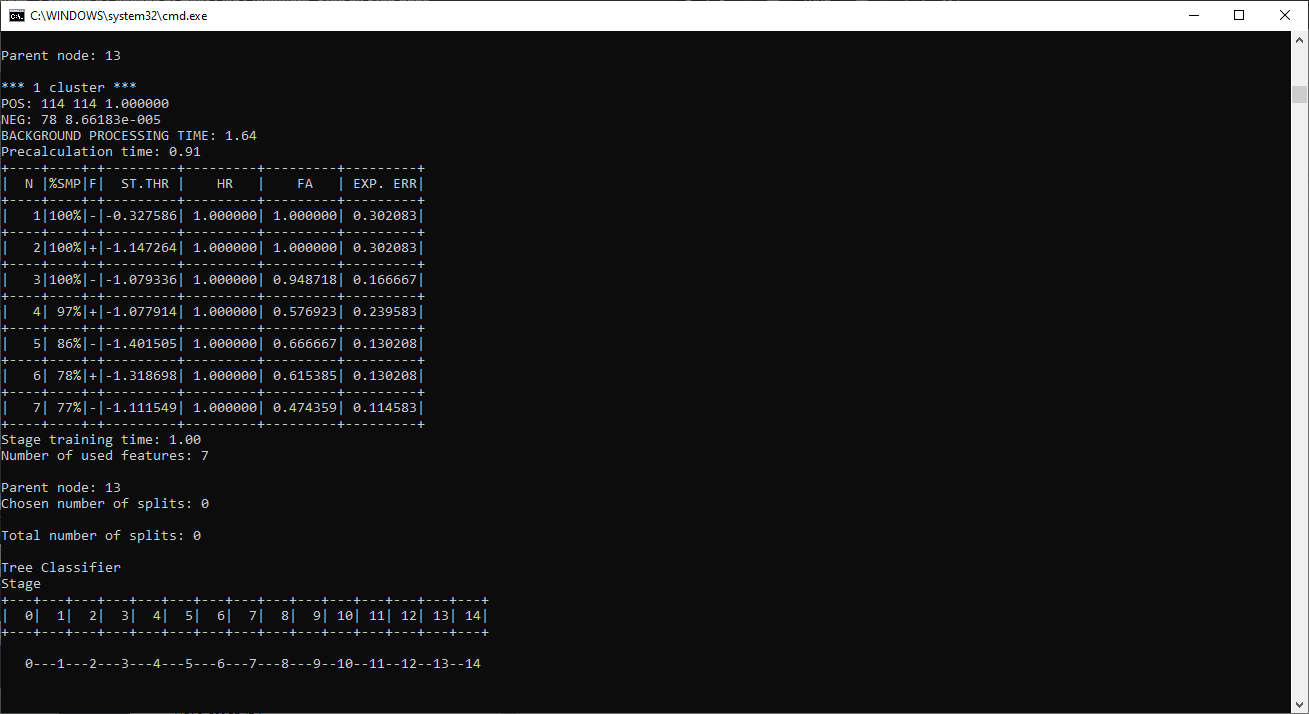
Data provided is related to the 14th stage of training Parent node: Defines the current stage under training process N: Number of used features in this stage %SMP: Sample Percentage (Percentage of sample used for this feature) F: “+” if flipped (when symmetry applied) and “–“ if not ST.THR: Stage Threshold HR: Hit Rate based on the stage threshold FA: False Alarm based on the stage threshold EXP. ERR: Exponential Error of strong classifier
- the number of features used in higher nodes are more than the earlier nodes
- the overall false detection (false alarm) decreases with stages
- the computational time for training increases with stage
Copy 0 - N folders from training/cascades directory to cascade2xml/data directory.
Open 00_convert_cascade_to_xml.bat file in cascade2xml folder. Its content is like: haarconv.exe data clay_target.xml 20 20 data - relative path to folder with cascades. clay_target.xml - final haar cascade xml file output 20 20 - width and height of object in pixels same as in haartraining.exe
Close the 00_convert_cascade_to_xml.bat and run it. To run haarconv.exe following files are needed as well cv097.dll, cxcore097.dll. CMD will close after xml file is created. The xml file can be further used in cv2:
#initialize Haar classifier
detector = cv2.CascadeClassifier('clay_target.xml')
#detect object with haar cascade (select max weight)
rectangles_w_h, levels, weights = detector.detectMultiScale3(image, scaleFactor=1.075, minNeighbors=5, minSize=(15, 15), maxSize=(50,50), outputRejectLevels=True)
Run pip install -r \__misc\requirements_ide.txt within virtual environment to install:
spyder==5.1.5
opencv-python==4.5.5.62