Server Setup
This document describes different steps to install a euglena lab server
Install Ubuntu 18.04 LTS
Create an account with username mserver
Add a root account
sudo passwd root
Log in as root
su
Change /etc/passwd and replace 1000 for mserver to 2000 (both instances -- the user ID and the group ID)
Change /etc/group and replace 1000 for mserver to 2000
Change ownership of all files belonging to the user:
find / -uid 1000 -exec chown -h 2000 {} +
find / -gid 1000 -exec chgrp -h 2000 {} +
(Don't fear 'Operation not permitted' warnings for processes, i.e. /proc...)
Logout and relogin into shell. (If you receive 'who are you' warnings, reboot the machine.)
git clone git@github.com:hirklab/euglenalab.git
cd euglenalab/
git submodule init
git submodule update --recursive
You will likely need to generate an SSH key and add it to your GitHub account under Settings for the above to work.
cp deployment.js.sample deployment.js
cp .env.default .env
Update deployment.js and .env for IPs, Database and Execute. Then:
sudo ./setup_iptables.sh
If you lose Internet access after the above, reboot the machine.
sudo apt-get update

sudo easy_install --upgrade pip
sudo apt-get install python-pip python-dev build-essential
sudo apt-get install autoconf libtool nasm yasm cmake libav-tools
sudo apt-get install libjpeg8-dev imagemagick libv4l-dev libavcodec-dev libswscale-dev libkrb5-dev cmake
sudo pip install --upgrade pip
sudo pip install --upgrade virtualenv
sudo pip install --upgrade virtualenv virtualenvwrapper
echo "export WORKON_HOME=~/.virtualenv" >> ~/.bashrc
echo ". /usr/local/bin/virtualenvwrapper.sh" >> ~/.bashrc
mkdir -p ~/.virtualenv
source ~/.bashrc
mkvirtualenv euglenalab

pip install nodeenv xlsxwriter numpy
nodeenv -p
workon euglenalab
cd shared/
npm install
cd ..
ssh-copy-id mserver@euglena.stanford.edu
Stores all tables for user details, experiments, live experiments in queue
sudo apt-key adv --keyserver hkp://keyserver.ubuntu.com:80 --recv EA312927
echo "deb http://repo.mongodb.org/apt/ubuntu xenial/mongodb-org/3.2 multiverse" | sudo tee /etc/apt/sources.list.d/mongodb-org-3.2.list
sudo apt-get update
sudo apt-get install -y mongodb-org
sudo service mongod start

mkdir db
scp mserver@euglena.stanford.edu:tmp/dump/master.tar.gz db/
cd db
tar xvzf master.tar.gz
mongorestore -d dev ./master
cd ..
Main Server which interacts with user frontend to authenticate and run experiments
Setup processing data links for file download and video display
cd ~/euglenalab/server/public/media/finalBpuDataLinks
ln -sf ~/finalBpuData ./

cd ~/euglenalab/server
./install.sh
./run.sh
cd ..
If the forever command is not found, you may need to install it globally:
sudo npm install forever -g
Middleware between webserver and BPUs which
- controls which BPU should handle the next experiment
- maintains queue for all the experiments
- routes all user commands for experiments to BPUs from webserver
Executing controller
cd controller
npm install
./run.sh
cd ..
It executes multiple processing nodes to ingest all the images recorded for the experiment and process them into a movie and multiple data files for later analysis.
cd processing
./build.sh
Link OpenCV to virtualenv
cd ~/.virtualenv/euglenalab/lib/python2.7/site-packages/
ln -s /usr/local/lib/python2.7/site-packages/cv2.so cv2.so
Build GoLang
sudo apt install golang
echo 'export GOPATH=$HOME/go' >> ~/.bashrc
echo 'export PATH=${PATH}:${GOPATH}/bin' >> ~/.bashrc
source ~/.bashrc
go get gopkg.in/mgo.v2
If using virtual environment:
workon euglenalab
Execute
./run.sh
sudo apt-get install nfs-common nfs-kernel-server
sudo nano /etc/exports
Add below
/home/mserver/bpuEuglenaData_forMounting 192.168.1.100/24(rw,async,no_wdelay,crossmnt,no_root_squash,insecure_locks,sec=sys,anonuid=1025,anongid=100)
Create a directory /home/mserver/bpuEuglenaData_forMounting
Execute
sudo service nfs-kernel-server start
sudo exportfs
This should show the below
/home/mserver/bpuEuglenaData_forMounting
	192.168.1.100/24
Hostname and IP Setup
Change /etc/hosts to reflect IP for Eug-X
Change /etc/hostname to name for eug-X
Change /etc/network/interfaces to reflect IP for Eug-X
Filesystem
sudo raspi-config
Choose Expand the filesystem
Choose Enable Camera
If camera is not working, execute
sudo modprobe bcm2835-v4l2
Add below to /etc/modules-load.d/modules.conf
bcm2835-v4l2
Execute
sudo reboot
cd euglenalab-github/setupBpuScripts/
Make change for auto-mounting
sudo nano /etc/fstab
192.168.1.100:/home/mserver/bpuEuglenaData_forMounting /mnt/bpuEuglenaData nfs rw,nosuid,nolock        0       0
    sudo reboot
Following command does the same operation for once. Changes do NOT persist reboot
Mount
sudo mount 192.168.1.100:/home/mserver/bpuEuglenaData_forMounting /mnt/bpuEuglenaData -v
Set Folder Permissions
sudo chown -R pi:bpudata /mnt/bpuEuglenaData/
sudo chmod -R 775 /mnt/bpuEuglenaData/
Start Streamer
./mountAndStartImageStreamer.sh
Start Server
cd ../bpu
./initLeds.sh
./startBpu.sh
(You can also start the above scripts in the background by running ./run_bpu.sh.)
Know Public IP
curl http://ipecho.net/plain
Add BPU to mongoDB via mongoBooster. Specifically, add to the BPU table.
Make sure BPU is in the list in ./shared/mainConfig.js and
-
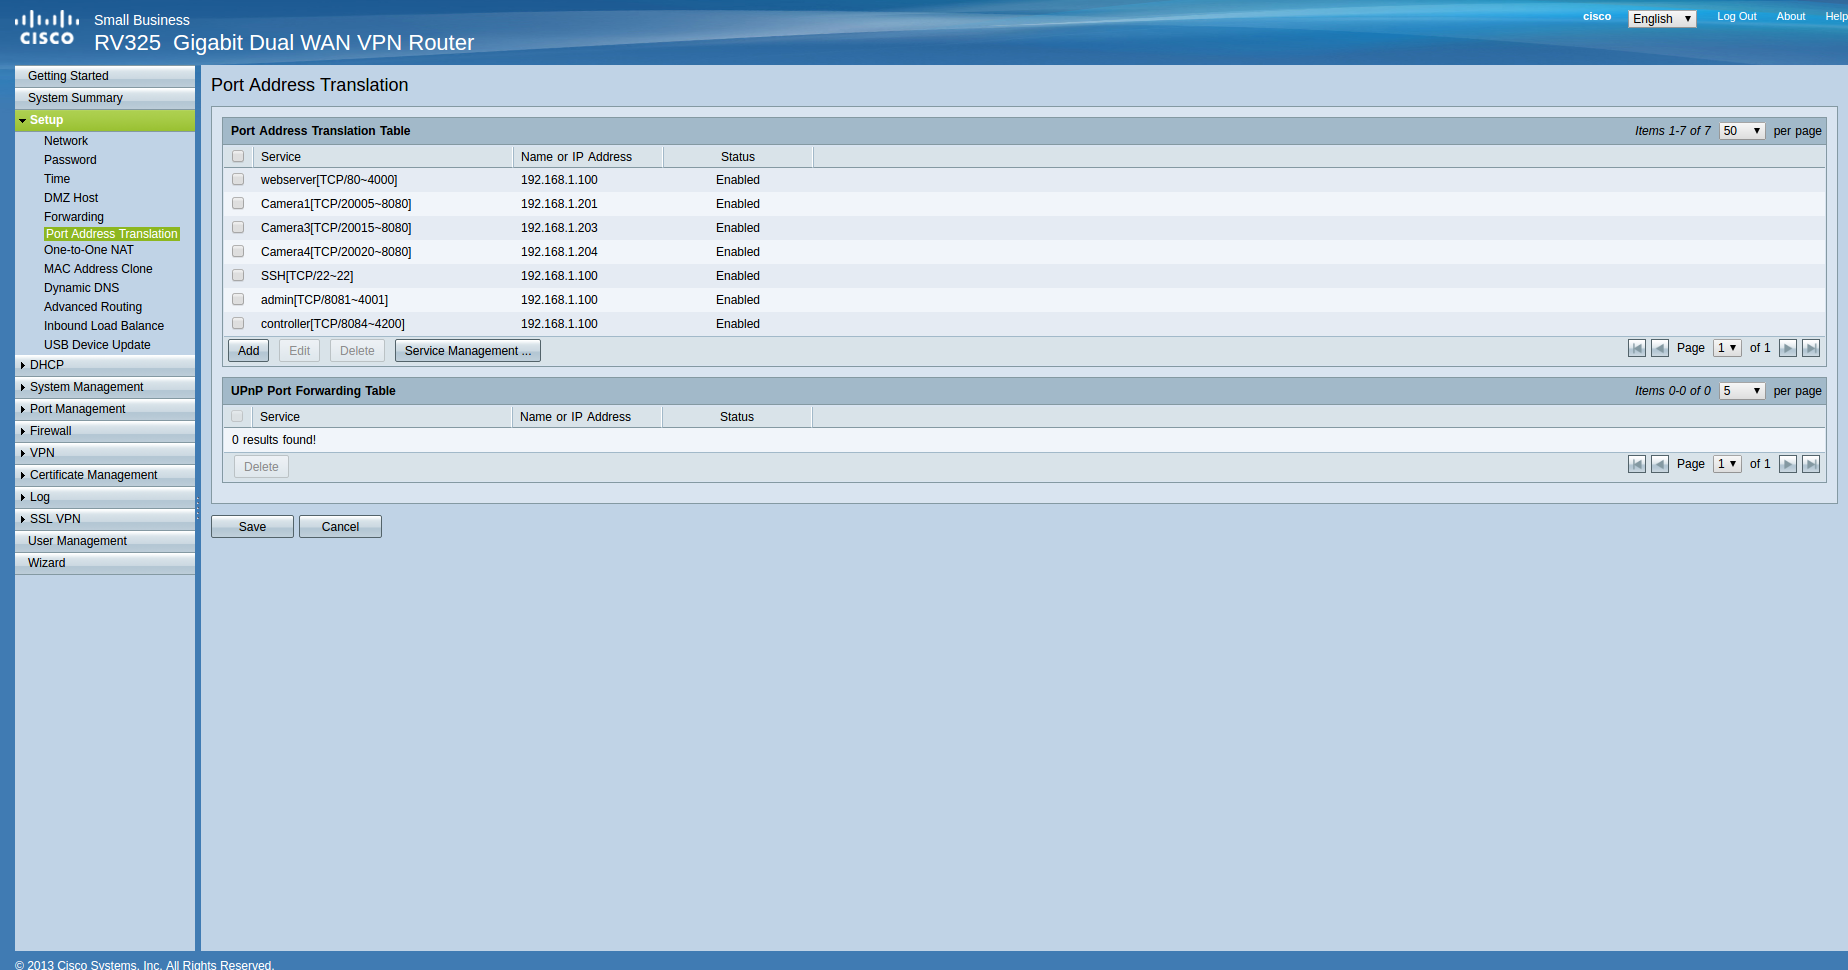
Open the RV325 Gigabit Dual WAN VPN Router (using Opera browser) [https://192.168.1.1/default.htm]
-
On the left menu click setup --> Port Address Translation
-
Click on 'Service Management...' tab below the Port Address Translation Table
-
Click on 'Add' to add a device (e.g. CameraN). Set the external port value to (20000+(N*5)), and internal port value to 8080 for CameraN. Then click 'Save'.
-
Click on 'Add' tab below the Port Address Translation Table and select the new device you included (e.g. CameraN). Set the 'Name or IP Address' value to the static BPU IP you used for your BPU. Select 'Enable' option.
Firewall Controller Setup [Host Server]
- Open the Firewall application
- Set the following values: a. Profile: Public b. Status: ON c. Incoming: Allow d. Outgoing: Allow
- Click on the '+' under 'Rules' and select 'Advanced' tab
- Set the following values: a. Name: EugN b. Insert: N+1 (for a new BPU) c. Policy: Allow d. Direction: Out e. Interface: All Interfaces f. Log: Do Not Log g. Protocol: Both h. From: 192.168.1.(200+(N*5)) 8080 i. To: 171.65.102.104 20000+(N)
- Click 'Add'