OVPN Manager 3.0.0 is a comprehensive, self-hosted web panel built on Flask, engineered for high scalability and stability. It centralizes the management of not just OpenVPN, but also Cisco AnyConnect (Ocserv), L2TP/IPsec, and now WireGuard (wg1).
This major update transforms the panel into a high-performance solution for managing users, resellers, and multi-node deployments across diverse VPN protocols.
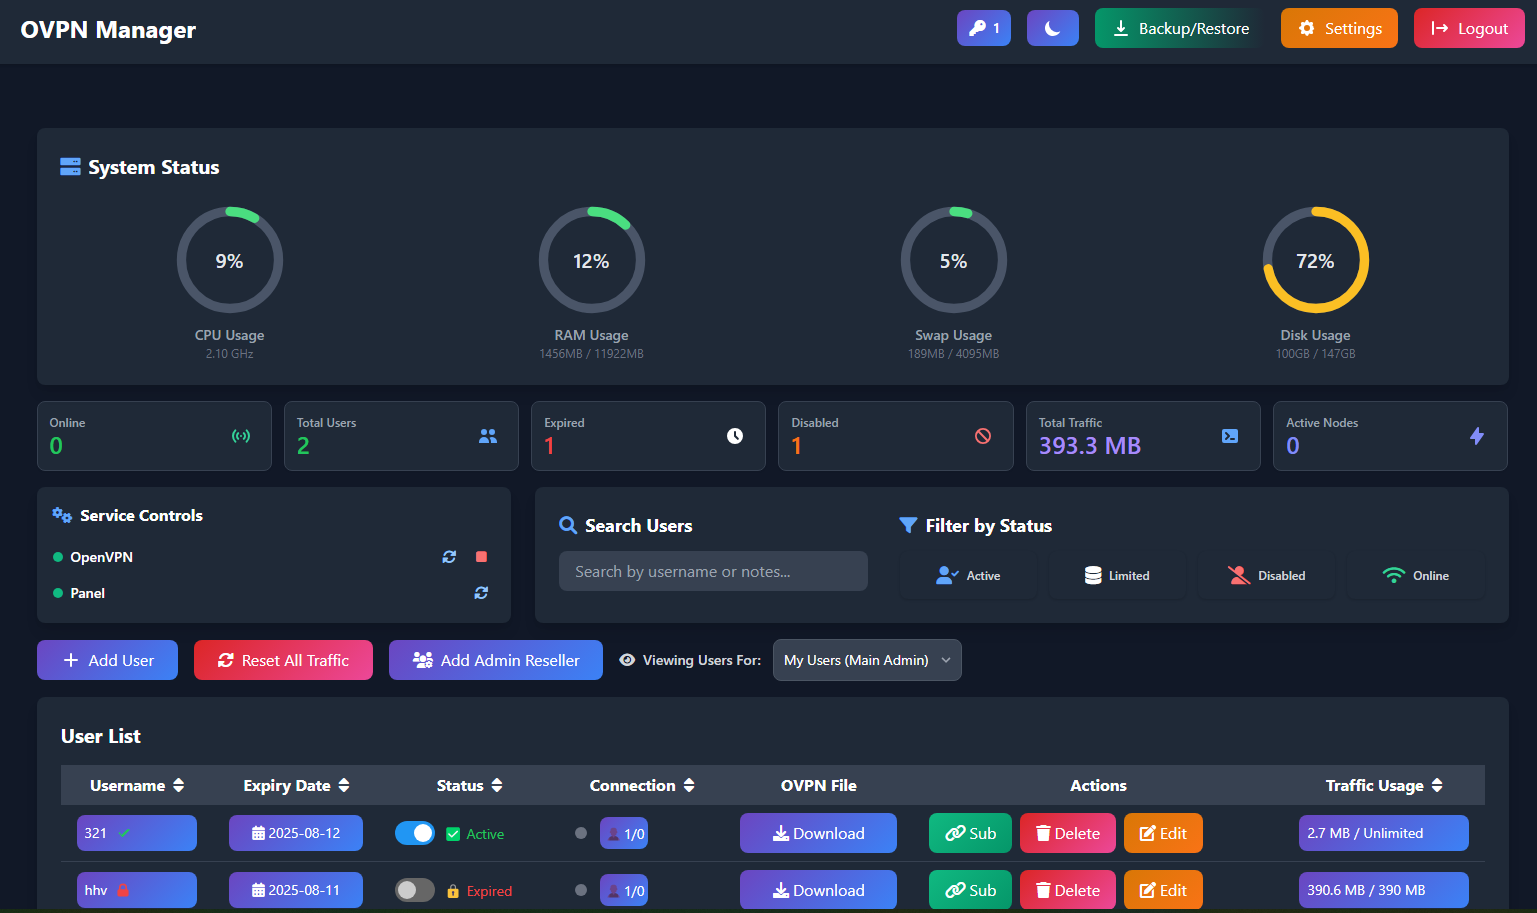
The panel is designed for administrators demanding granular control over user access, traffic, and server resources with a focus on core architecture stability.
- Multi-Protocol Support: Full integration and management for:
- OpenVPN (UDP/TCP)
- Cisco AnyConnect (Ocserv)
- L2TP/IPsec
- WireGuard (wg1)
- Database Scalability: Added core support for PostgreSQL alongside SQLite. Includes a Smart Migration Engine to securely and automatically transfer all existing user data from SQLite to PostgreSQL for high-load environments.
- Persistent Security Key: Implemented a security fix to store the
SECRET_KEYpersistently, enhancing session security and preventing forced admin logouts after service restarts. - Concurrency Fixes: Major architectural upgrade with the implementation of
DB_WRITE_LOCKandGLOBAL_SYNC_LOCKto eliminate deadlocks and database corruption under high traffic/activity.
- Create Users: Add single or bulk users.
- Protocol-Specific Passwords: Set unique passwords for L2TP and Cisco for each user.
- WireGuard User Data: Automatically manage WireGuard (wg1) user requirements (keys/IP) alongside other protocols.
- Detailed Limits: Set specific limits for each user:
- Data Limit: Assign quotas in GB or MB.
- Connection Limit: Define the maximum number of simultaneous connections (per protocol).
- Expiry Date: Set fixed expiration dates or flexible durations.
- Real-time Control: Activate or deactivate users instantly.
- Traffic Monitoring: View live and cumulative data usage (Upload/Download) for each user.
- Subscription Page: Each user gets a unique, token-based subscription page showing their stats, QR code, and download links.
- Create Sub-Admins: Main admin can create sub-admin (reseller) accounts.
- Assign Quotas: Set limits for each sub-admin, including maximum number of users they can create and a total data quota they can assign.
- Independent Management: Sub-admins manage their own users within the limits you've set.
- Centralized Control: Manage and sync users across multiple servers (nodes) for OpenVPN, Cisco, L2TP, and WireGuard from a single main panel.
- Node Health Monitoring: View the live status of all connected nodes.
- Protocol Provisioning: New nodes are intelligently configured to support all enabled protocols automatically during setup.
- Tunnel Visibility: Granular control to show/hide specific protocol configurations (OpenVPN, Cisco, L2TP, WireGuard) for users connected to a particular tunnel.
- Scheduler Upgrade: Switched from
GeventExecutortoThreadPoolExecutorfor background jobs, significantly improving the stability and responsiveness of the panel under load. - Enhanced SSL Management: Includes a re-written SSL engine with advanced support for SNI (Server Name Indication) and automated "Double-Tap Restart" to ensure smooth certificate renewal and application.
- Backup & Restore: Create full backups, now including configurations and user data for all supported protocols (OpenVPN, Cisco, L2TP, WireGuard).
- Advanced Configuration: Directly edit configuration files for the main server and each node, including
server.conf,ocserv.conf, IPsec settings, and WireGuard configuration as applicable. - Customization: Change the panel port, set a custom admin URL path, and switch between dark and light themes.
- Full Automation: A secure, key-based RESTful API allows for programmatic management of users, including creation, editing, deletion, and status retrieval.
- Documentation: Full API documentation is available at eylandoo.github.io.
The panel is a robust Flask application acting as the central management brain.
- Backend: Flask, Gevent (for WSGI), SQLAlchemy (for database ORM)
- Database: PostgreSQL (Recommended for scale) or SQLite
- Core Management: Interacts directly with
systemctland dedicated scripts for managing OpenVPN, Ocserv, Libreswan (L2TP/IPsec), and WireGuard (wg1) services. - Frontend: Tailwind CSS, Font Awesome, Vanilla JavaScript
- Scheduling: APScheduler utilizing ThreadPoolExecutor for high-stability background tasks.
The installation process is fully automated using a management script.
- A server running Ubuntu 22.04 (x86_64). The installer will not work on other versions.
- Root (
sudo) access to the server.
Connect to your server via SSH and run the single command below. This will download the main management script and start the installation menu.
wget -q -O /root/vpn_manager.sh https://raw.githubusercontent.com/eylandoo/openvpn_webpanel_manager/main/vpn_manager.sh && chmod +x /root/vpn_manager.sh && /root/vpn_manager.shAfter running the command, an interactive menu will appear.
- Select the Install OpenVPN Core, Install Cisco AnyConnect, Install L2TP/IPsec , or Install Wireguard option(s).
- Follow the prompts to configure the desired protocols.
- The script will handle all installations automatically.
Once the necessary cores are installed, you will return to the main menu.
- Select the Install OpenVPN Web Panel option.
- The script will ask for the following details:
- Admin Username: The username for logging into the web panel.
- Admin Password: The password for the web panel.
- Panel Port: The port on which the web panel will be accessible.
- The installer will then set up all dependencies, download the panel application, and configure the services.
After the installation is complete, the script will display the access details for your new web panel, including the URL, username, and password.
You can manage your installation at any time by running the manager script again:
vpn_managerThis will open the main menu where you can:
- Uninstall the Web Panel or any of the installed VPN Cores (OpenVPN, Cisco, L2TP).
- View your panel's login information.
- Access the Panel Settings to change the username, password, or port.
- Update the web panel to the latest version.
- 7-Day Trial: To receive a 7-day trial license, please visit our Telegram bot: @eylan_licensebot
- Purchase & Inquiries: For purchasing a full license or setup assistance, please get in touch via Telegram: @eylandooo
- Telegram Channel: @eylanpanel