![]()

Our aim is to deliver maximum functionality, enabling you as a site owner to configure the plugin exactly as needed, all while maintaining an user-friendly interface.
However, it's beneficial to be familiar with all the available options.
The plugin is organized into two primary sections:
Installation and Settings.
- Download the latest "CloudLinkd-Smart-Hospital.zip" file from the releases tab.
- Unzip the Downloaded file to the root of your smart hospital website.
- Go to application/libraries/customsms.php and enter your API Key and Sender ID ( Your Device/Phone number ( *Without country code + ) ) from your CloudLinkd WhatsApp account https://wa.cloudlinkd.com.
- Log in to your Smart Hospital admin panel.
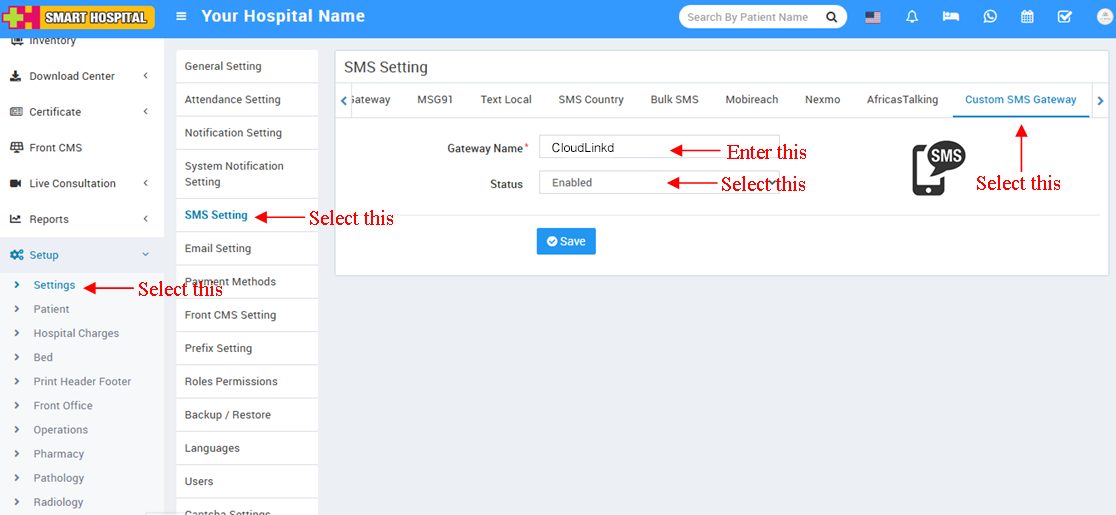
- Select the System Settings then select SMS Settings.
- Select Custom SMS Gateway.
- Enter the Gateway Name: CloudLinkd.
- Select Enabled then save.
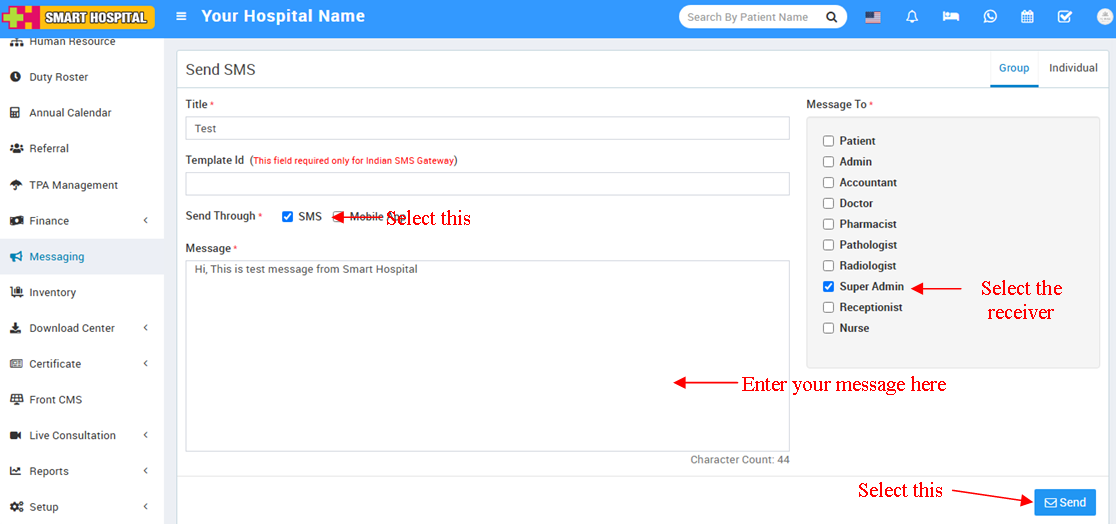
- Select Communicate tab then select Send SMS.
- Select Send Through : SMS.
- Select option from Message to field.
- Enter your message in the Message field.
- Select Send Now and then Submit.
All credits to the Team CloudLinkd and the original creators of these files.