Python, Flask, PostgreSQL, Gunicorn
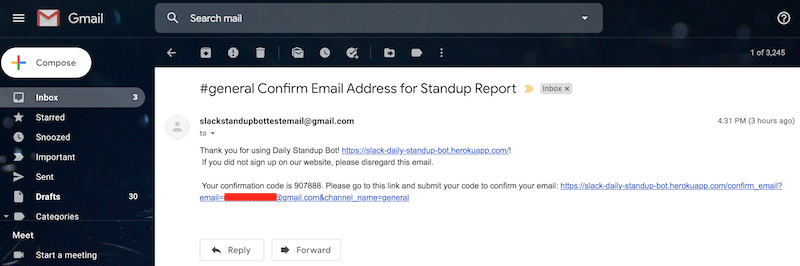
To receive an email summary of standup reports, you must confirm your email address:
And then a screenshot of what this looks like in gmail:
(Does not have Slack integration but allows you to still view the standup form and submit it to the database, letting you see what you need when making all HTML, all CSS, and some Python changes)
- Git (https://git-scm.com/downloads)
- python3, specfically Python 3.8 (Mac:
brew install python3, and if you don't have homebrew for the above step, get it here: https://docs.brew.sh/Installation; Windows: https://phoenixnap.com/kb/how-to-install-python-3-windows) virtualenv, installed viapip3 install virtualenvfor Mac and Linux orpy -m pip install --user virtualenvfor Windows
- Fork this repository (https://docs.github.com/en/free-pro-team@latest/github/getting-started-with-github/fork-a-repo)
- Run
git cloneto clone this project onto your computer (https://docs.github.com/en/free-pro-team@latest/github/getting-started-with-github/fork-a-repo or https://git-scm.com/book/en/v2/Git-Basics-Getting-a-Git-Repository) - Use
cd Slack-Standup-Report-Botto change directories into your Slack-Standup-Report-Bot copy - Run
./build-mac-and-linux.sh(MacOS or Linux) or./build-winows.sh(Windows) to run my build script to set everything up for you. (If it won't run, dochmod +x ./build-mac-and-linux.shif Mac/Linux orchmod +x build-winows.shif Windows and then run the script again. +x will let it be executed.)- If you're wondering what the script does, these are each of its parts (and if you don't care, that's fine too!):
- Running
virtualenv -p python3.8 myenvto create a virtual environment - Running
source myenv/bin/activateto start your virtual environment - Running
pip3 install -r requirements.txtto install required dependencies for project - Running
python -m spacy download en - Running
export FLASK_APP=app.pyto set the app - Running
psqlto run sql - Running
create database standupto make your standup database - Running
CREATE TABLE channel (id SERIAL PRIMARY KEY, channel_name varchar(120), standup_hour int, standup_minute int, message text, email varchar(50), timestamp varchar(50), response_period_in_hours int, email_confirmed boolean, confirmation_code varchar(120), hours_delay int, minutes_delay int);to create your table you'll need for this app - Running
export DATABASE_URL="postgresql:///standup"to set an environment variable that points to your newly-created database - Running
gunicorn --bind 0.0.0.0:5000 wsgi:app;to start the app
- Running
- If you're wondering what the script does, these are each of its parts (and if you don't care, that's fine too!):
- Go to http://127.0.0.1:5000/ to see your app running
- To exit
myenv, your virtual environment, just typedeactivateand hit enter
Each time you make changes, you'll push to Github, which we'll set up to trigger an automatic deploy to Heroku. Your bot can then use your new changes.
- Install the Heroku CLI (command line interface) https://devcenter.heroku.com/articles/heroku-cli
- Go to https://dashboard.heroku.com/apps (register if you haven't)
- Click
Newand thenCreate New App - Give it a name and click
Create - You will be dropped onto the
Deploytab. Note your app name and how to access your app via web browser:
- In the
Deployment methodsection, clickGitHubConnect to Github
- Choose your repository
- Click
Enable Automatic Deploys. Now, anytime you push to Github, your code will be automatically deployed to Heroku! - Go to the Resources tab
- In the
Add-Onssection, type inHeroku Postgresand install theHobby Dev - Freeversion
- Go back to the
Settingstab and clickReveal config varsagain - The new
DATABASE_URLconfig var (environment variable) has been added for you! Now when you accessos.environ["DATABASE_URL"]in the Slack Standup Bot app code, the application will pull in the value of that newDATABASE_URL


- Make a Slack workspace (They're free, don't worry!) at https://slack.com/create or I can invite you to a test Slack workspace I set up for this Slack bot and my standup Slack bot
- Go to
https://api.slack.com/apps - Make your app and attach it to your workspace you just made

- On the Basic Information page, go to
Permissions - Scroll down to
Bot Token Scopes - Add:
channels:history,channels:join,channels:read,chat:write,chat:write.customize,chat:write.public,groups:history,incoming-webhook,users.profile:read,users:read - Now scroll up and click
Install App to Workspace
- You now have a bot token!

- On the Heroku Settings tab
https://dashboard.heroku.com/apps/christinastest/settings(or whatever your URL is, which will have something other thanchristinastestand will instead have your app's name in it), go toReveal config varsagain and add the Slackbot token:SLACK_BOT_TOKENand value is whatever your value is


- Go to the #general channel in Slack and tag the bot, example:
your-username  9:56 PM
@Name Of Your App
- After tagging the bot, you'll be asked to invite it to the channel. Invite it.
- Go back to the Heroku
Resourcestab (Ex: https://dashboard.heroku.com/apps/christinastest/resources) - Click on your database
- At the top of the page you're brought to, copy the name (Example:
postgresql-cubed-27245) - Open up a new terminal and run
heroku pg:psql postgresql-cubed-27245 --app christinastestin any directory, wherepostgresql-cubed-27245is the name of your database andchristinastestis the name of your app
- Now that you're connected to your database, run
CREATE TABLE channel (id SERIAL PRIMARY KEY, channel_name varchar(120), standup_hour int, standup_minute int, message text, email varchar(50), timestamp varchar(50), response_period_in_hours int, email_confirmed boolean, confirmation_code varchar(120), hours_delay int, minutes_delay int);to create your table - That's it!

- If you're having issues and need to debug, run
heroku logs --tail --app christinastestin a terminal window (in any directory), wherechristinastestis the name of your app on heroku. To quit, type\q