Using the Validation Editor
Use the Validation Editor to create and manage your validations for an Assurance session. Each validation uses a function that receives the events in an Assurance session. You can write functions to validate your client configuration, event conditions, tests and use cases.
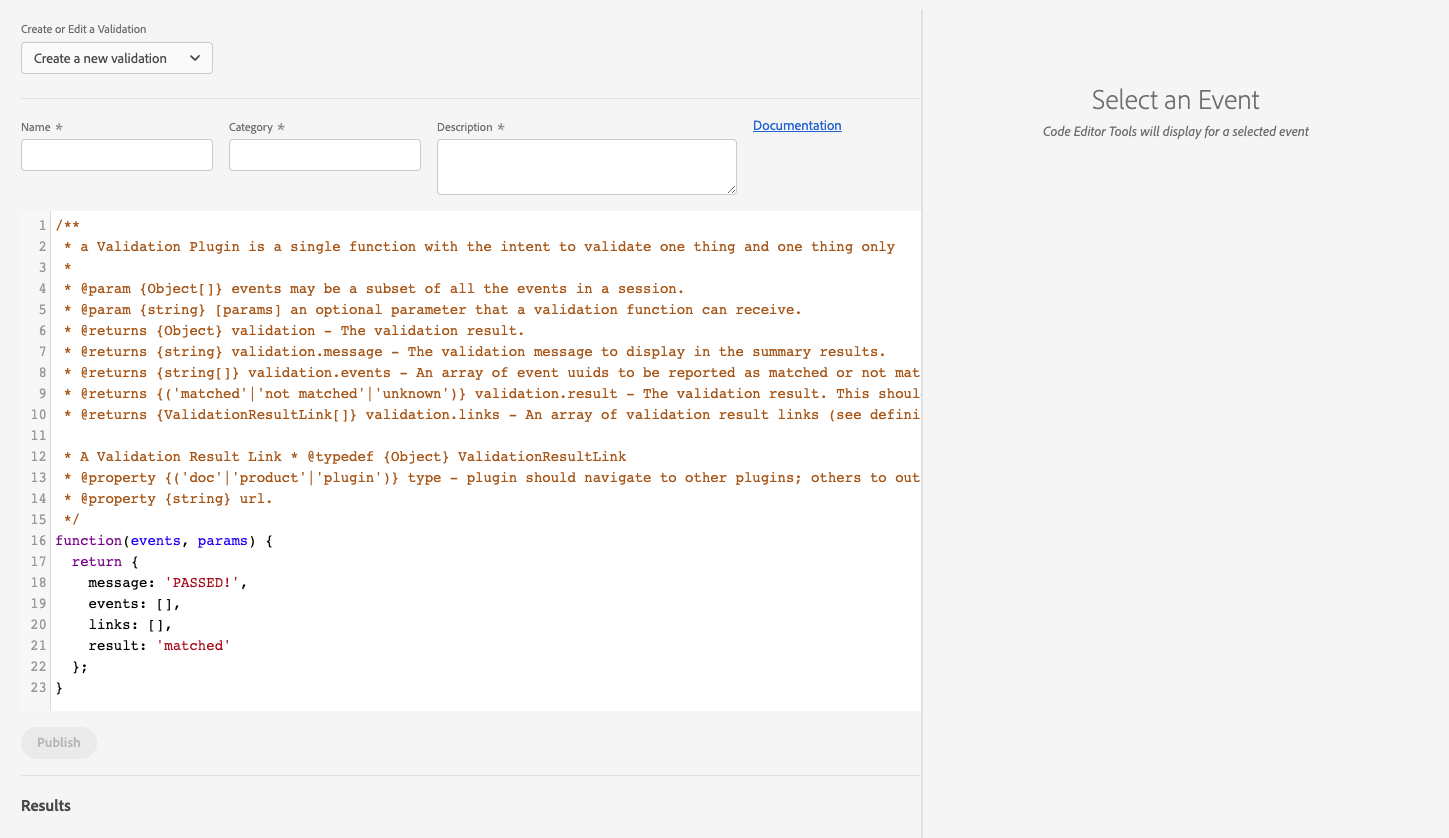
The view is divided into two panels. The left panel contains a validation picker, a form with a few fields, and a code editor. The picker contains options for creating or editing a validation. The default state is "Create a new validation". Other options will include validations created by your IMS Org. Choosing one of those plugins will fill the form fields and code editor with the validation data for viewing and editing.
Building a validation function consists of three steps:
- Finding, or filtering, events.
- Testing the found events pass certain criteria.
- Returning the results of the test in a required format.
More info on how to write a validation function can be found on the Writing a Validation Function Page.
You can add console.log() in your function to print items to the developer console. Alternatively you could use the message property of the result object to debug messages to the results panel.
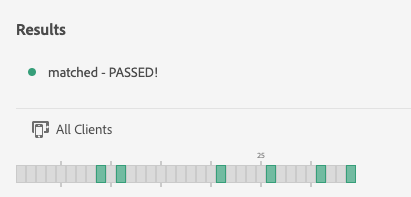
The validation function will automatically be tested after any text changes in the code editor. The results of the function will be displayed in the results section just below the editor. If an error occurs from the function written in the code editor, an error status is displayed along with the reason.
When a validation function returns a result object that contains one or more uuids in the events array, then those events will be highlighted in the timeline with the following colors:
- Green - matched
- Orange - unknown
- Red - not matched
You can save your validation by clicking the publish button. The publish button will be enabled once the form fields for name, description, and category have been filled and the function in the editor does not have any errors and can return a result object.
Your validation will then be displayed in the Validation Summary view.
The right panel is a new feature coming soon to the Validation Editor view and contains tools to help make it easier to write a validation function. The tools panel is rendered once an event is selected. An event can be selected in the timeline or in another plugin view.
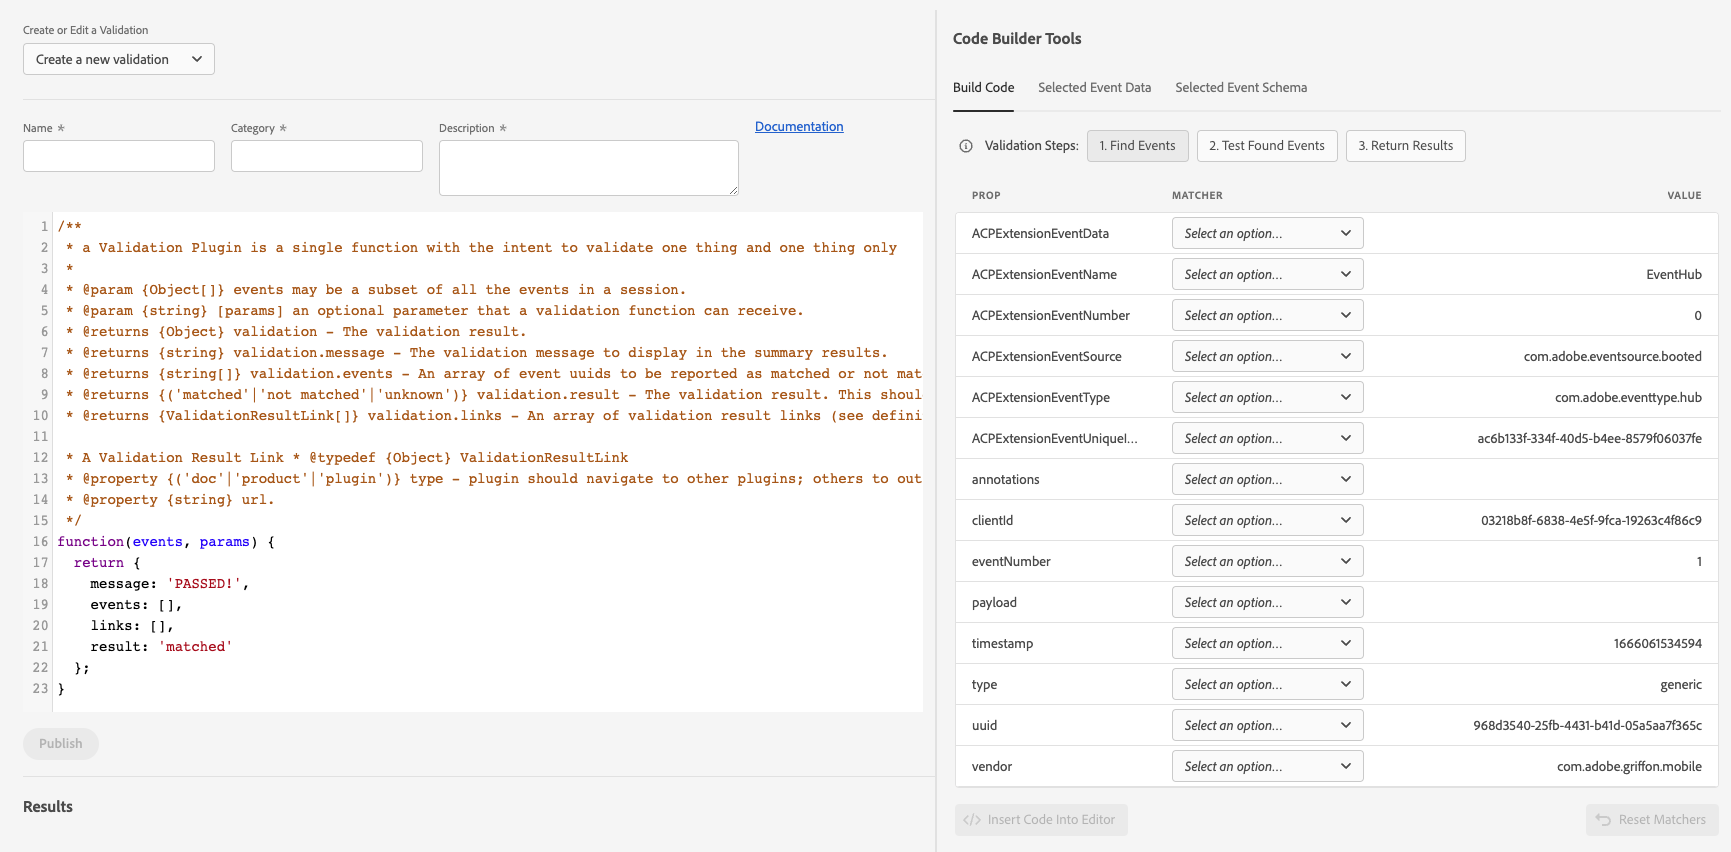
The Build Code tab aims to assist writing validation function code, as well as illustrate how the Assurance Toolkit can be used to make finding and testing events easier. This tool can be used to write an entire validation function or just as a helper for completing any of the three steps to writing a validation function.
Within the top of the Build Code tab are three action buttons that correspond to the three steps of writing a validation function.
At the bottom of the tab is a button, labeled "Insert Code into Editor". This button will add code to the code editor on the left.
Note, that the code will automatically be inserted where it logically fits unless the cursor is active in the code editor. Otherwise, the code will be inserted at the location of the cursor.
With this step active, all of the data that belongs to the selected event is rendered in a table. The first column is the property or key with the last column representing its value. The middle column contains pickers on how a value can be matched against. Some values can be matched with equality or with greater than/less than comparisons or whether it exists. Using the matcher pickers, you want to identify one or more event values that are common among all events you are interested in testing.
With one or more matchers selected, clicking the "Insert Code into Editor" button will add the code at the beginning of the function or at the cursor position.
Clicking this button will display the same value matcher table shown in the previous step. It also contains a radio button above the table to choose whether every found event or at least one found event should pass the test. The idea is you want to test whether the found events that were filtered criteria you define with these matchers. Find a value to match against that you want to ensure meets a certain criteria. It's possible this value varies within the found events.
With one or more matchers selected, clicking the "Insert Code into Editor" button will add code that tests found events against these matchers to the editor.
The final step is returning the results of the test. When this button is active, two text inputs are displayed. Here you will provide a message for when the test passes and when the test fails.
Clicking the "Insert Code into Editor" button will add code that decides what message to display based on whether the test above passed or failed.
Below is a video that demonstrates how the code builder tools could be used to test whether all Analytics events match against a custom context data value.
BuildCodeValidationEditor.mp4
This shows the selected event data in JSON format
This shows the JSON schema matched for the selected event. The schema contains metadata about the event and are defined in the Assurance Toolkit.