BrightTime adjusts your Android screen's brightness based on the time of day. This improves your phone's battery life. Other projects like Backlight! make it easier to manually adjust your brightness settings to save power, but BrightTime completely automates this process. Your phone will know the optimal brightness setting and adjust it for you. The default install is suitable for most users, but advanced users can thoroughly customize the schedule.
BrightTime is easy to use. Currently, BrightTime requires Android 5.0.2+.
- Click here and click the
Begin Downloadbutton. - Connect your phone to your computer and open its internal storage or SD card.
- Locate the downloaded
BrightTime-xx.apkfile and move it to your phone directory. - Locate
BrightTime-xx.apkon your phone and click it to begin installation. - Click
Installand eitherDoneorOpenon the following screen.

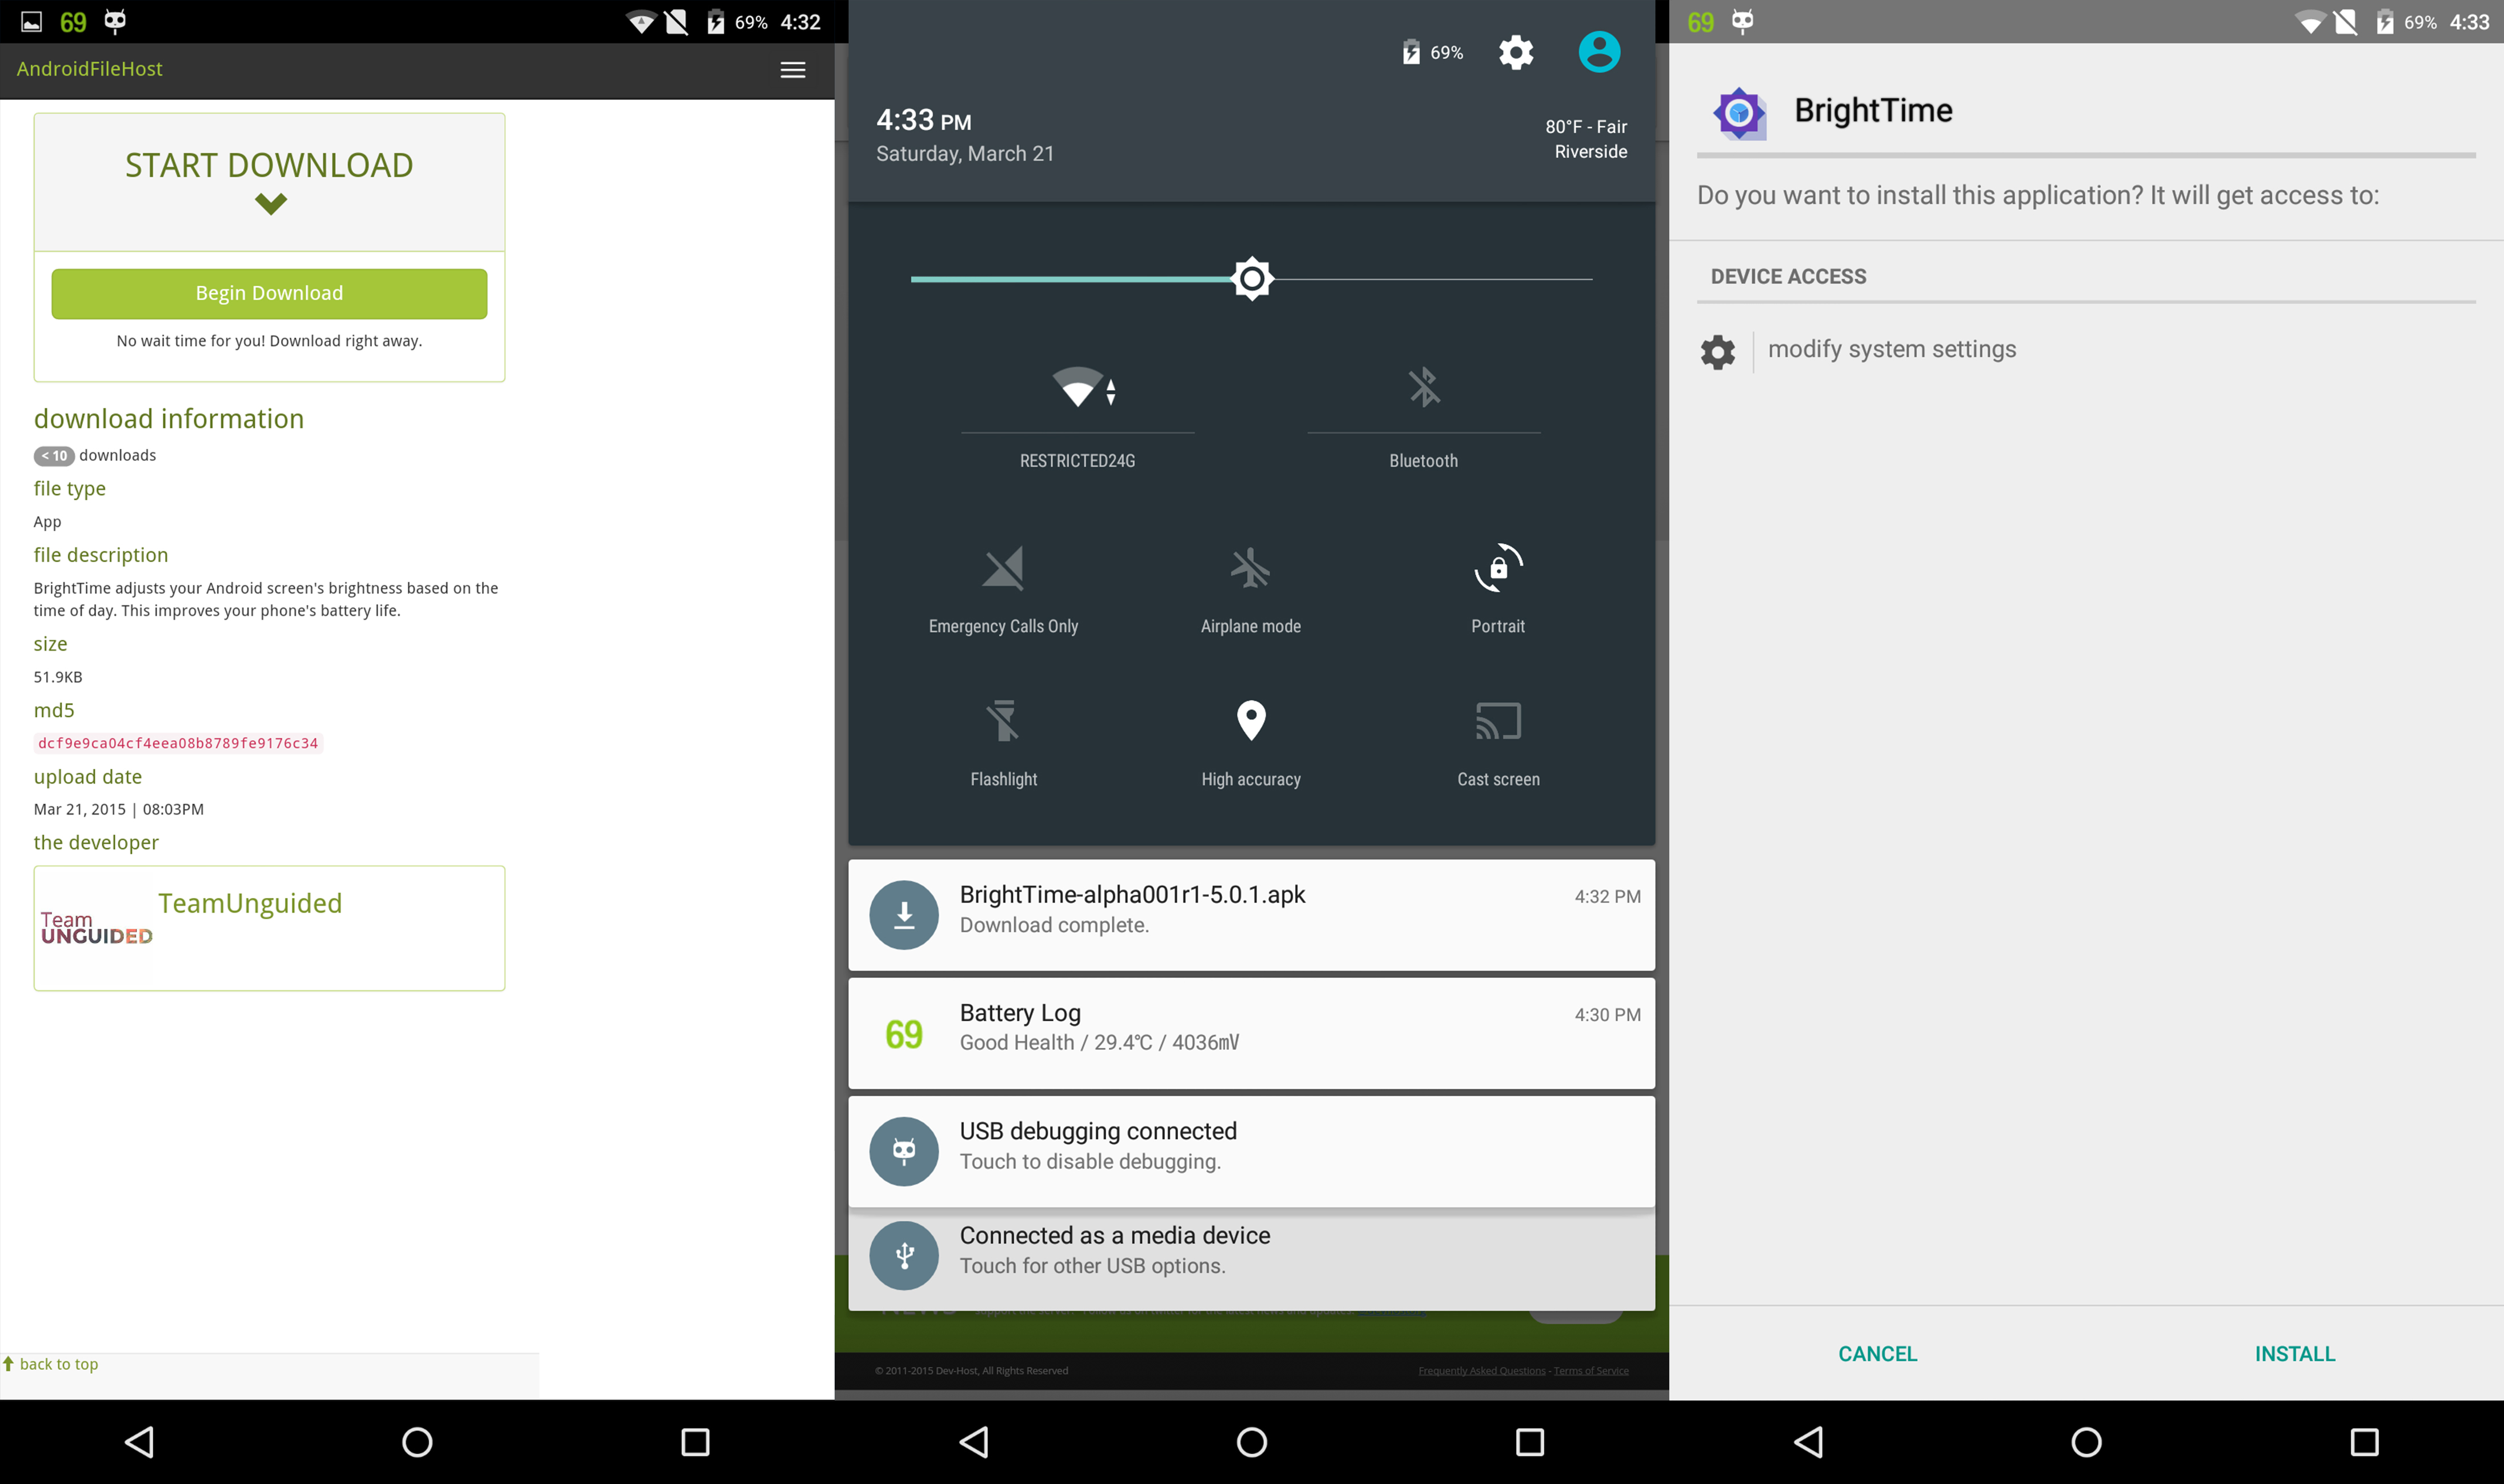
- Click here and click the
Begin Downloadbutton. - Open your notification bar and click the downloaded
BrightTime-xx.apkfile. - Click
Installand eitherDoneorOpenon the following screen.
BrightTime comes with default settings that should be good enough for most users. Advanced users can follow these directions to change your settings.
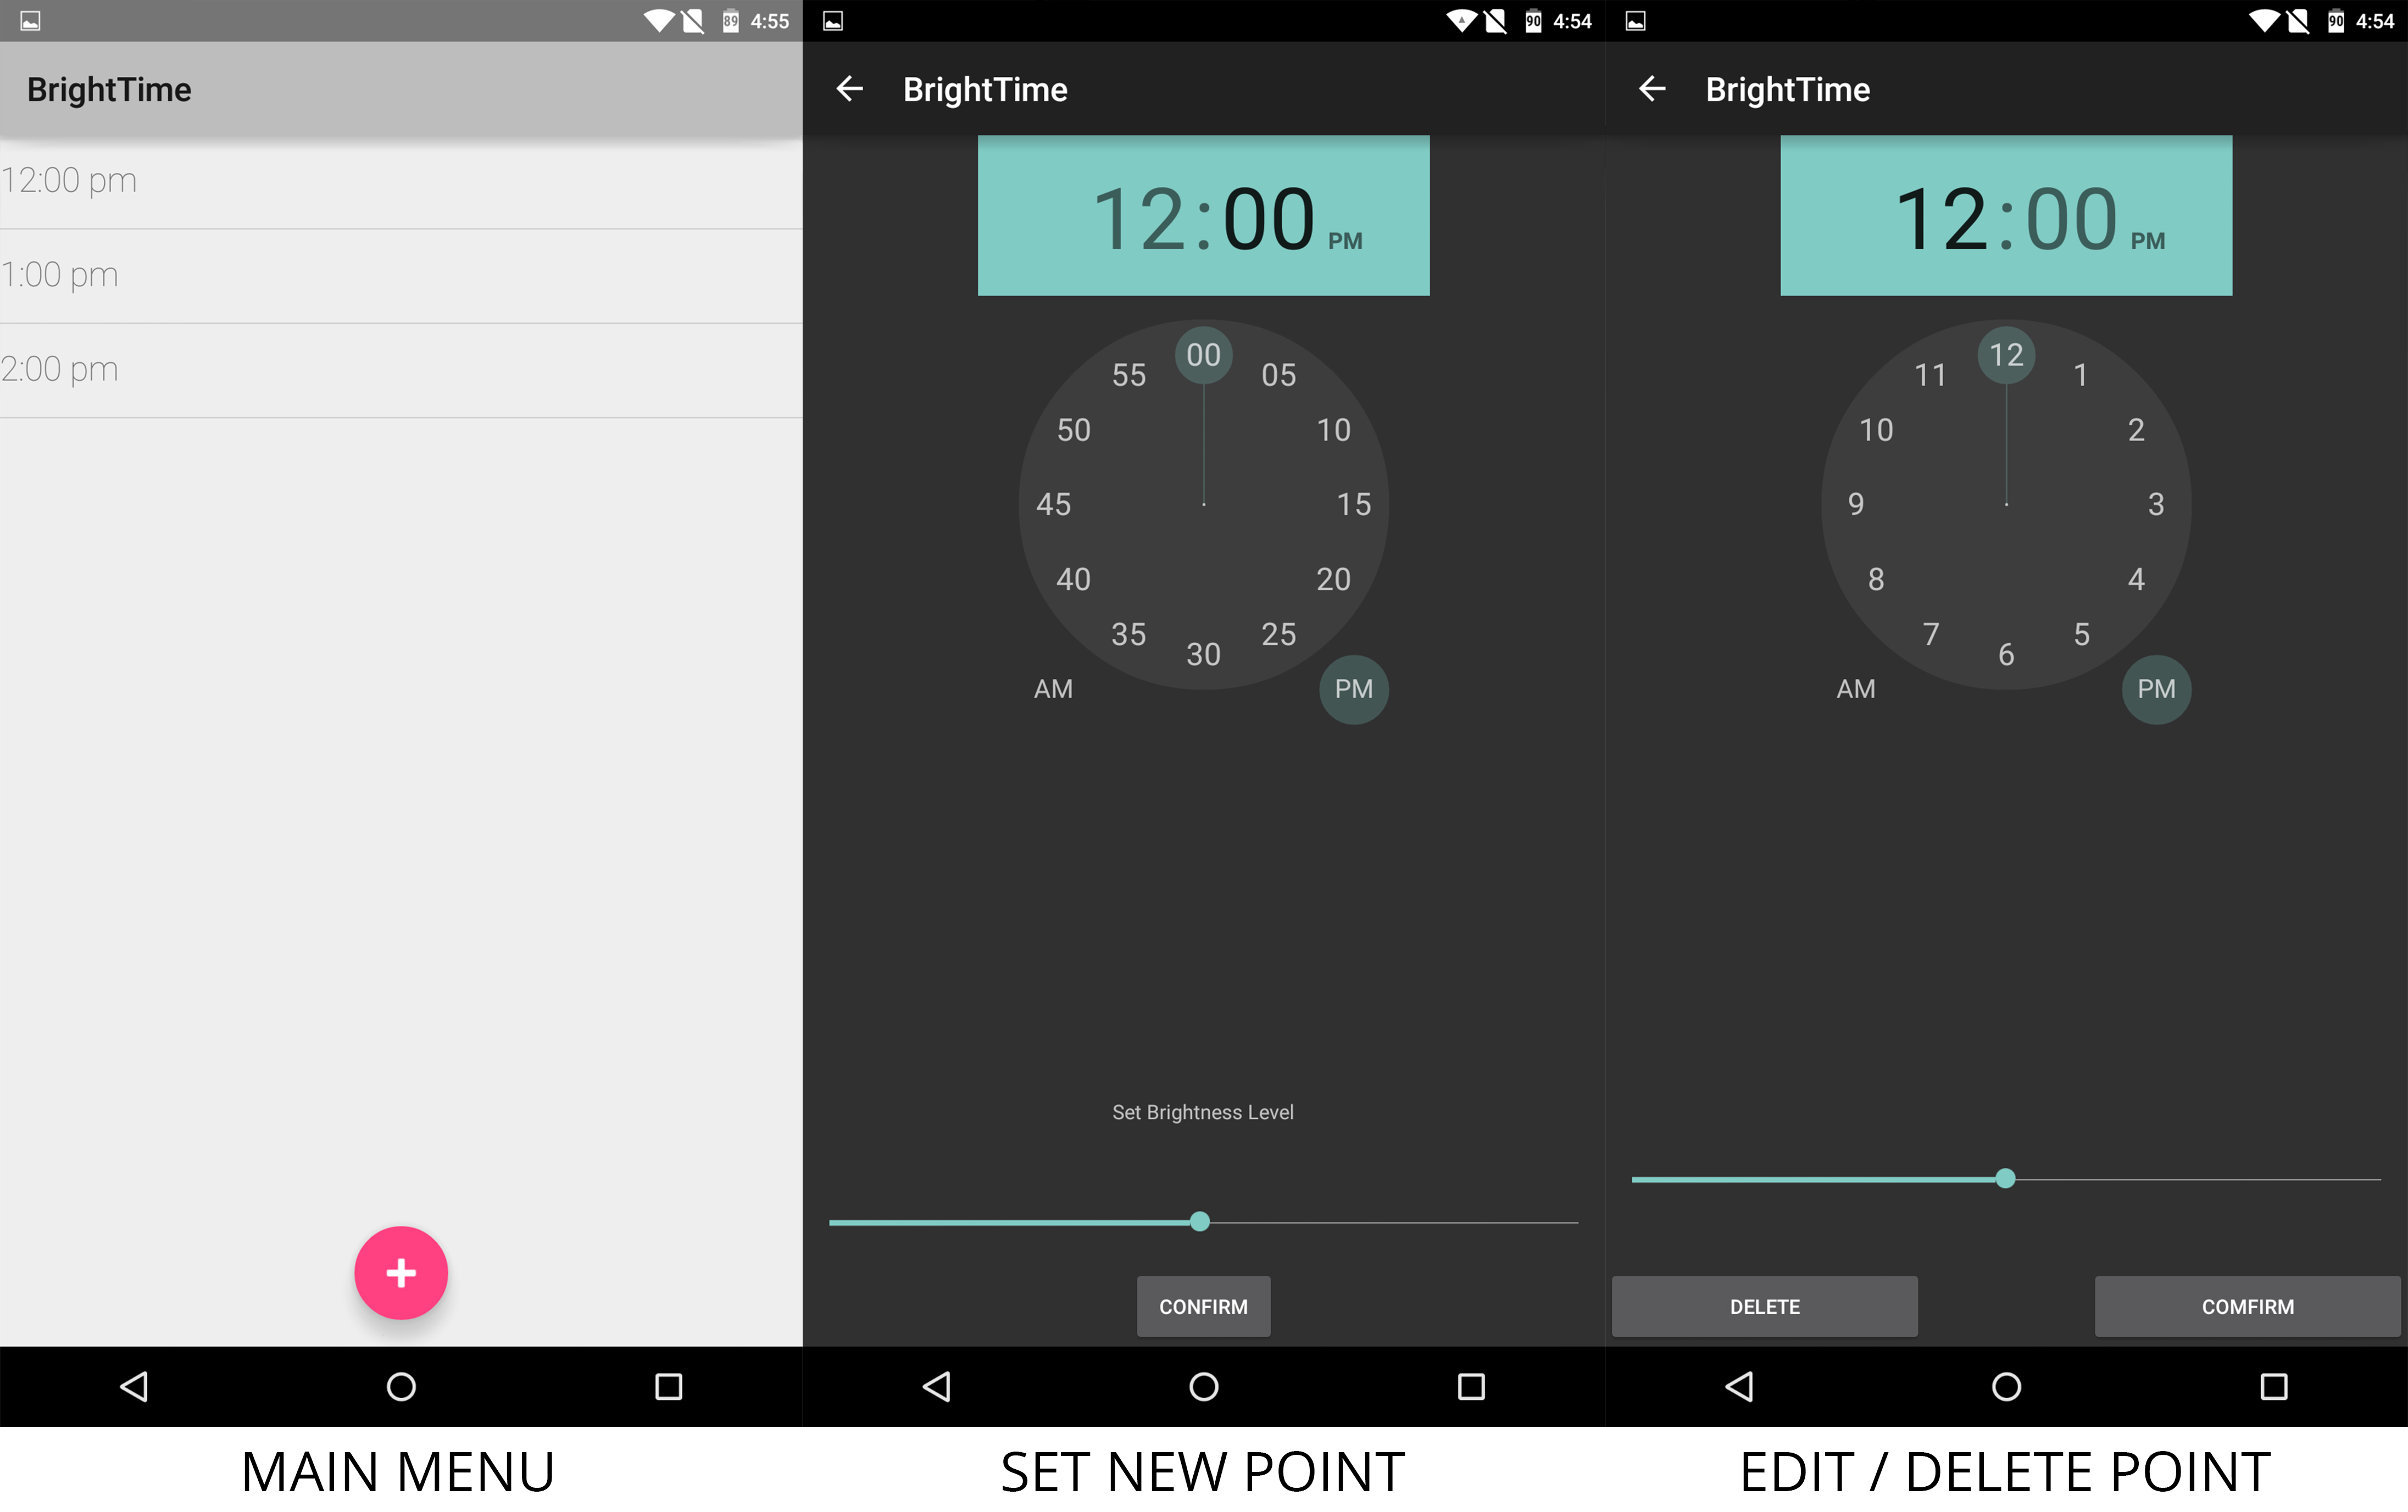
BrightTime uses points that allow users to set times at which the brightness changes.
- To create a point:
- Tap on the
+, the circular pink button at the center bottom of the screen. - Select your desired time and brightness.
- Once finished, click the
Confirmbutton. Point added! - You will return to the main screen where your added point will appear on the list by time.
- Your screen brightness will now change according to the brightness and times you have set.
- Tap on the
- To edit/delete a point:
- Tap on the point you created previously.
- Delete the point altogether using the
Deletebutton. - Modify any settings for that point and press
Confirmto save changes. - To discard and go back, tap your
Backbutton at either the top or bottom of your screen.
Short Demo Below:

- Allow users to
Undochanges or deletion of their points. - Clean up UI, icon, and code to fit Google's design guidelines and Code style guidelines.
- Support for Android Jelly Bean (4.1 - 4.3.1) and KitKat (4.4)
The easiest way to build is to install Android Studio with Gradle. After installation, you can import the project into Android Studio:
- Download the project into a working directory.
- Open Android Studio, click
Import Project - Locate your working directory to import.
- Click
OK - Importing and building will be automatic via Gradle.
Feel free to leave an issue or email us at teamunguided@gmail.com.