Project Setup Guide
Follow this guide to set up the development environment and a developer build of TF2 Panda.
- Windows 64-bit
- Python 3.8 or newer
- This is the Python interpreter that will be used and compiled against
- Visual Studio with C++ support
- Git
- A good text editor, like VS Code, Atom, or Notepad++
- Blender 2.9x (3 isn't supported yet)
-
Ogg vorbis encoder
- Put oggenc2.exe on your PATH, rename it to oggenc.exe
-
jom build system
- Put jom.exe on your PATH
- Optional: LLVM Clang
This will house the development environment and all of the engine and game repositories.
mkdir %USERPROFILE%\player
This contains development environment boilerplate stuff and third-party package build scripts.
cd %USERPROFILE%\player
git clone https://github.com/toontownretro/wintools
This will copy some files to bootstrap your development environment.
cd wintools\panda
setup
Edit player/env.bat to contain the correct locations of your Python and Visual Studio installations. Edit PYTHON_LOCATION and the call to the vcvars.bat script if they are not already correct. Ignore the Maya location.
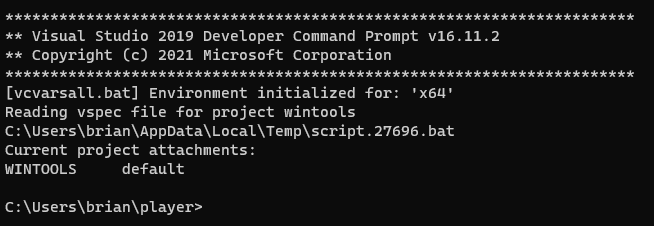
Run the Terminal.lnk shortcut in your player folder. This is a special terminal that pulls in env.bat when it launches. You must use this terminal (or at least pull in env.bat) when working within the player environment.
Fortunately, prebuilt third-party packages for 64-bit Windows are provided, so you don't have to build them yourself. Download the latest prebuilt wintools release from here, and copy the built folder into the root wintools directory.
This is the build system used by the engine and game projects.
cd %PLAYER%
git clone https://github.com/toontownretro/ppremake
cd ppremake
msbuild ppremake.sln -m -p:Configuration=Release;Platform=x64
ppremake.exe should be built in ppremake\built\bin. Leave it there, as we will use the "attach" feature of our development environment to make it accessible.
Run this.
ppremake
Notice how it wasn't able to find it. Now, try this.
cta ppremake
ppremake
The "ctattach" (cta) feature of our development environment allows for projects to be kept isolated and brought into the environment when needed, rather than cluttering up a public install directory or PATH.
This is also useful in other ways, such as two side-by-side game projects with conflicting configuration variables. Keep them isolated and only attach to the one you're working on.
Attaching works by modifying environment variables to include the project's bin folder on PATH, etc, temporary to the current terminal session. It's important to remember that a project does not exist in the development environment unless you attach to it.
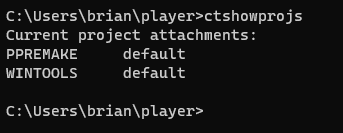
You can view your current attachments with the ctshowprojs command.
This is the first actual component of the engine. We will use the ppremake system to build it.
Before we can build it, add these lines to player\Config.pp. They respecify some build options we're using that aren't yet default.
#define USE_MEMORY_MIMALLOC 1
#define DO_PIPELINING 1
#define USE_DELETED_CHAIN
#define HAVE_EIGEN
#define LINMATH_ALIGN 1
#define ARCH_FLAGS /arch:AVX2
#define BUILD_COMPONENTS 1
#define DONT_COMPOSITE 1
#define DO_CROSSOBJ_OPT
#define BUILD_TYPE make
If you want to use the LLVM Clang compiler instead of Microsoft's compiler, also add #define USE_COMPILER Clang. You have to have it installed on your computer though, of course. If you want to use Visual Studio projects instead of Makefiles, change BUILD_TYPE from make to msbuild. You also need to specify the platform toolset version of your VS installation. For VS 2022, add #define MSVC_PLATFORM_TOOLSET v143. For VS 2019, use v142.
Now let's clone and ppremake it.
cd %PLAYER%
git clone https://github.com/toontownretro/dtool
cta ppremake
cta dtool
cd %DTOOL%
ppremake
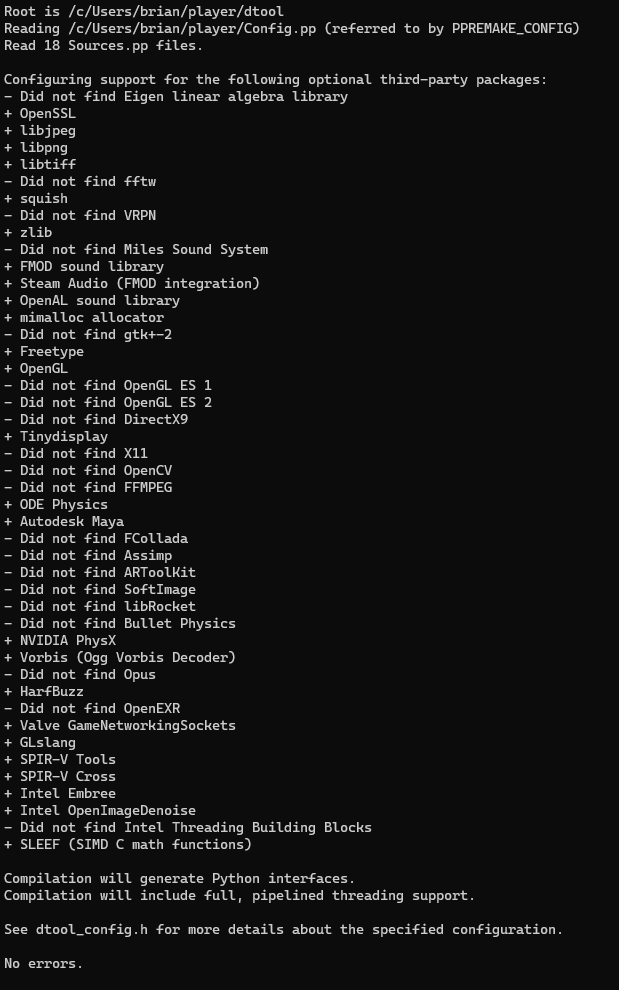
Compare the output to this image. Make sure Python was found and enabled, and all the relevant third-party packages were found. Several of them are not needed, so they aren't found even in the example below. But make sure the ones found in the example are found when you run it. Don't worry about SLEEF though.
Now, let's build it!
Use this command for Makefiles. -j 5 means to use 5 threads for compilation.
jom -j 5 install
Use this command for Visual Studio projects.
msbuild dtool.sln -m
You can also open the solution with devenv dtool.sln and build it in the Visual Studio IDE, if you prefer.
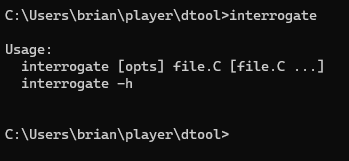
Hopefully it built without any errors. Check that the interrogate program in dtool works correctly to verify. This program is installed into dtool\built\bin, and because we're attached to dtool (via cta dtool), that directory is magically on our path.
interrogate
Next, let's do panda. This is the main engine component and takes the longest to build.
The process is exactly the same as dtool, except we don't have to worry about changing our Config.pp or validating the third-party packages, as that only needed to be done once.
cd %PLAYER%
git clone https://github.com/toontownretro/panda
cta panda
cd %PANDA%
ppremake
jom -j 5 install
OR
msbuild panda.sln -m
Once again, same process.
cd %PLAYER%
git clone https://github.com/toontownretro/pandatool
cta pandatool
cd %PANDATOOL%
ppremake
jom -j 5 install
OR
msbuild pandatool.sln -m
Once again, same process.
cd %PLAYER%
git clone https://github.com/toontownretro/direct
cta direct
cd %DIRECT%
ppremake
jom -j 5 install
OR
msbuild direct.sln -m
This one's a little different. This project is a "model" tree, whereas the previous projects were all code trees. dmodels contains core assets and shader code, which must be built and installed.
First, add the following line to player/Config.pp.
#define SHADERCOMPILE_OPTS -j 10
This specifies the number of threads to use when compiling shaders. Set it to a reasonable value for your CPU.
Next, add the following lines to player/Config.prc.
model-path .
model-path $DMODELS/src
These lines append the search path used to locate files on disk.
Note, you must use -j 1 for model trees! Additionally, model trees make use of programs in pandatool, so we need to make sure we're attached to it (via cta pandatool).
cd %PLAYER%
git clone https://github.com/toontownretro/dmodels
cta direct
cta dmodels
cta pandatool
cd %DMODELS%
ppremake
jom -j 1 install
If you can run pview without any errors, then dmodels (and panda) built correctly.
We've finally gotten to TF2! Give yourself a pat on the back. I know this is a pretty involved process.
Before we do anything, we can't attach to tf because there isn't an entry for it by default in the player/vspec folder, which registers all of the projects that we can attach to. Create a tf.vspec file in player/vspec and put the following text.
personal:root:path=$PLAYER/tf
prebuilt:root:path=$PLAYER/prebuilt/tf
default:root:path=$PLAYER/tf
Now you should be able to do cta tf after cloning it.
cd %PLAYER%
git clone https://github.com/TF-Panda/tf
cta tf
cd %TF%
ppremake
jom -j 5 install
OR
msbuild tf.sln -m
Here's the last one! This is the TF2 model tree and will take some time to build. It has to export all of the models, compile all of the textures, etc.
As with tf, we need to create a tfmodels.vspec in the player/vspec folder. Add the following text.
personal:root:path=$PLAYER/tfmodels
prebuilt:root:path=$PLAYER/prebuilt/tfmodels
default:root:path=$PLAYER/tfmodels
Futhermore, in order for the models to be exported from Blender, it needs to know where Blender is installed on your computer. Add the following line to player/Config.pp, and correct it to the location of your Blender install.
#define BLEND2EGG_OPTS --blender-dir "C:\Program Files\Blender Foundation\Blender 2.92"
Now, let's clone and build it. As with dmodels, we need to make sure we're attached to pandatool. In contrast to dmodels, tfmodels supports threaded builds.
cd %PLAYER%
git clone https://github.com/TF-Panda/tfmodels
cta tf
cta tfmodels
cta pandatool
cd %TFMODELS%
ppremake
jom -j 5 install
Let's do a victory lap by viewing the Engineer model! Run pview models/char/engineer. Press c to center the view on the model, and press a to move to the next animation.