In this project we developed an android app that controls the FlightGear simulator application, as a remote.
https://www.youtube.com/watch?v=gvifnI0PSjM
https://1drv.ms/p/s!AjmFOzCmeat1qTTKVpNITMDPkWnf
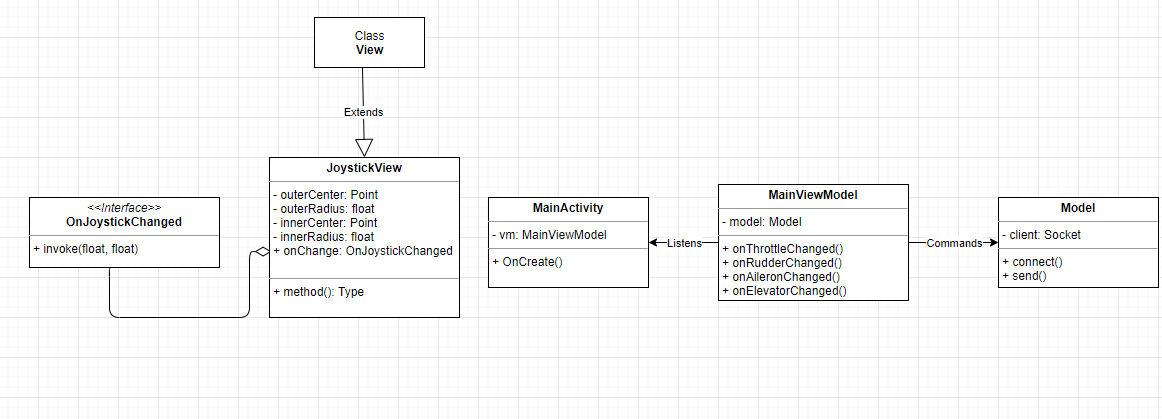
Under app/src/main/java/com/example/remotecontroljoystick folder:
View - JoystickView - the view of the joystick.
MainActivity - The main View of the project.
utilities - OnJoystickChange interface.
viewModel - contains the MainViewModel.
Model - contains the model.
- Your IDE of choise (we used Android Studio).
- Flghtgear application.
How to run the program:
- Open the FlightGear application and in
settingsunderadditional settingspaste the following text:--telnet=socket,in,10,127.0.0.1,6400,tcp - In the FlightGear application press
Fly!. - Under the
Cessnacategory clickautostartto start the engines. - Clone the project from GitHub to your pc.
- Open the project in Android Studio and click 'run'(shift+F10) to run the app on the emulator.
- In the app in the emulator, enter your local ip address (i.e 192.168.x.x) and port: 6400, then click connect.
- Now you can control the aircraft with the joystick and the two sliders of the thorttle and the rudder.
- Have a nice flight!
In our project we used the MVVM architecture in order to make everything work.
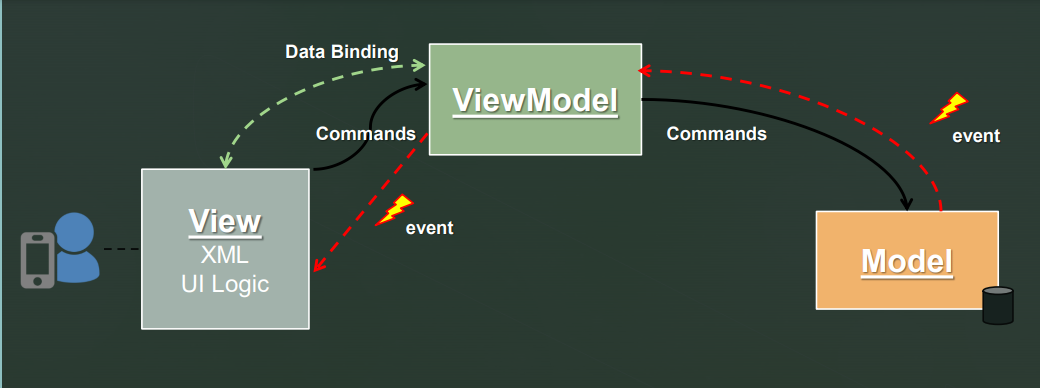
The MVVM architectural pattern is divided to three parts: View: responsiple for the visual display of the data to the user. ViewModel: manages between the View and the Model. Model: contains the algoritim to proccess the data and send it to the FlightGear server. We are using Data Binding Between the View and the ViewModel. So when a proprety has been changed in the view (i.e user changed rudder or thorttle), it will trigger the appropriate callback function in the MainViewModel. The MainViewModel listens to events from the joystick. The Model gets the information to send to the FlightGear server.