This is a flutter app that utilizies its animation and painting API to make a very modern, smooth, animation. This was a real challenge to build, specially because it was my first time learning how to use flutter's CustomPainter.
Big thanks to Tubik @dribble for making this awesome design and inspiring me to do this app!
This is a pretty advanced app, so I'll assume you know the basics of flutter.
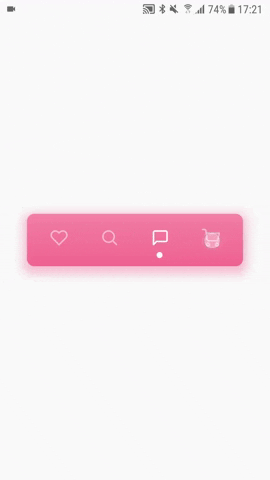
The first thing I want to talk about is the HeartBeatAppBarContent widget. As you can see, it's a StatefulWidget inside of the HeartBeatAppBar widget, and its state uses the SingleTickerProviderStateMixin. For those of you who don't know, this is what allows us to animate widgets in flutter. We have one AnimationController and 3 Animations<double>:
-
The controller itself is what's going to control the animation values
-
The
_activatingOpacitywill animate the opacity of one of the icons so it becomes brighter (indicating it being activated) -
The
_deactivatingOpacitywill animate the opacity of one of the icons so it becomes dimmer (indicating it being deactivated) -
The
_heartBeatAnimationis what's going to allow us to control the percentage of the animationg, defining the beginning and ending points of the path of the Painter, so we actually see the line of the heartbeat moving.
We have 3 properties in the HeartBeatAppBarContent's state.
-
_activatedallows us to keep track of what is the activated icon so that, when we click one of them, we can animate from the _activated to the_nextActivated -
_nextActivatedallows us to keep track of what's the next icon that is going to be activated so that we can make the heartbeat path from the_activatedX position, to the_nextActivatedX position. Its default value is 0, and its immediately changed when the animation is called -
_positionsis a List of doubles which allows us to know what is the position in the X axis of each icon. This was hardcoded but it can and should be responsive to the width of the device.
When an animation is called,
_nextActivatedgets the value of the clicked button (if the first icon was clicked, then_nextActivatedis set to 1, since the default value is 0). Now, we give the HeartBeatPainter itsbeginningproperty of_positions[_activated]and itsendingproperty of_positions[_nextActivated].In other words, theHeartBeatPathwill start at the position of the activated icon, and will go to the position of the next activated icon. Once the animation ends,_activatedis set to_nextActivatedand _nextActivated is set back to 0.
This is where things get a little hairy, but I'll try to keep it very simple. HeartBeatPainter extends CustomPainter. That means that it needs two methods: paint and shouldRepaint. Since we're using an animation coming from its parent widget, we are not going to need shouldRepaint, so it just returns false.
We have 3 properties:
beginningis the starting X position of theHeartBeatPath, and its coming from_positions[_activated].endingis the ending X position of theHeartBeatPath, and its coming from_positions[_nextActivated].animationis anAnimation<double>which is what allows us to know how much of the animation has passed. So if its value is 0.5, that means 50% of the animation has gone through, and that's useful to determine what is the current state of the path itself. This will be passed to thesuperconstructor as therepaintattribute.
Then we are defining 3 functions. lerp, sigmoid and parabola, which are used to determine some of the values. I'm not going to go through the math of this, but this allows us to have smoother animations.
We also have a bool inversed a List<Offset> _points. The first one is important to determine if the path will have to go from left to right, or from right to left. The second will contain all of the points that are going to be used to make our heartbeat path. That means _points[0] is the first point of the path, and the last value of _points is last point of the path.
In _points, we hard coded a bunch of values:
- The ones that start with
beginning + a * PERCENTAGEallows us to make a lot of points in between the beginning of the path, and the heartbeat wave (which is always in the middle). If we didn't have this, the path would be "skippy", and the animation would not look smooth at all. - The same goes for the ones that start with
startingPoint + 30 + b * PERCENTAGE. This makes a bunch of points in between the ending of the heartbeat wave, and the ending point of the whole path. - All of the other points are the heartbeat wave being hard coded
startingPointis the X position of the beginning of the heartbeat wave.
As you can see from the code,
_positionschanges depending on the_inversedvalue, and therefore, on the direction of the heartbeat animation.
Now here comes the main part. We have a variable start that indicates what is the first point of our path, and this changes depending on the _animation.value. Hence, if _animation.value is closer to 1, the start value will be greater, which makes the back of the path start to move when the animation starts progressing. We also have a percentage variable, which is what controls the front of the path, since this will define the last point of our path.
From there, we are calling a for loop, that goes from the start point (first), to percentage point (last), and adds all of the points in between to the path.
The color of the path (which is a gradient) and the circle (which is the indicator of the current icon) also animate and get its properties depending on the
inversevalue.