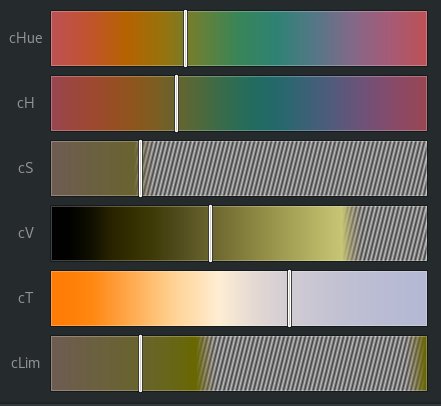
CIECAM Sliders, Adjusters, and Pickers #6
Description
Sliders
cHue: A static hue selector where all hues are shown at a fixed "value" and "saturation", with the normal D65 white illuminant. Perhaps "local color" would be an appropriate description. This can be a guide for color selection when the cH slider is severely restricted due to various selections below. Clicking a color on this slider will bypass the remaining sliders and reset the color temperature to D65.
cH: A dynamic hue selector where all hues are shown with the selected dimensions from the remaining sliders
cS: Selector for "saturation"
cV: Selector for "value"
cT: Selector for Color Temperature, to cast the colors in a warm or cool light
cLim: a "saturation" limiter to set the maximum saturation that you can pick. This can be useful to guide your selections for within a constrained "limited palette".
Gaps: The "stripes" indicate colors that are not available without colors going out of gamut, display range, or because of the cLim restriction. Clicking in these regions could invoke a "gamut mapping" function that would sacrifice "saturation" in order to reach the desired "hue" or "value".
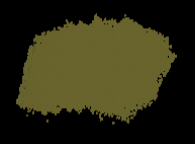
Example: We have selected a dull green with a "cool" illuminant. We've also set the cLim slider to restrict our "saturation"
Which is this lovely color:
Adjusters
Edit your settings.json file and set your "tune_model" to one of "HSV, HCY, CIECAM, or Pigment"
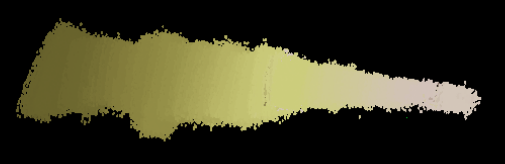
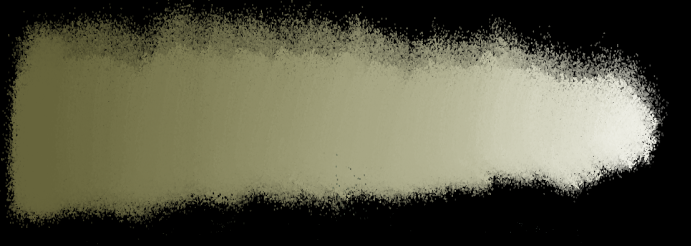
Press Shift+F to increase the "value" of this color, and you can paint a gradient like this.
CIECAM
As the "value" becomes too bright, the color is desaturated towards the "cool" color of the illuminant.
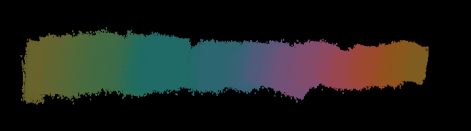
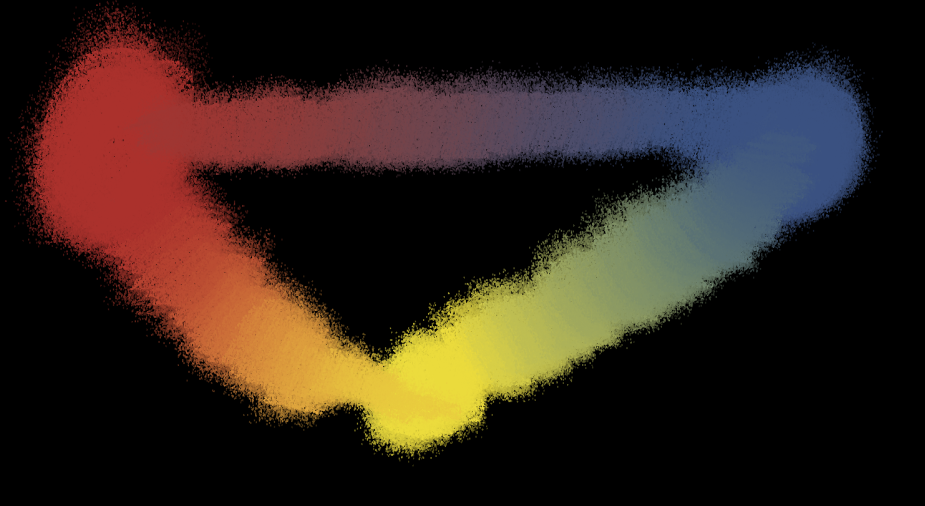
Likewise, you can press Shift+W to rotate the hue, and create a gradient like this where every hue has a similar value and saturation under the cool illuminant:
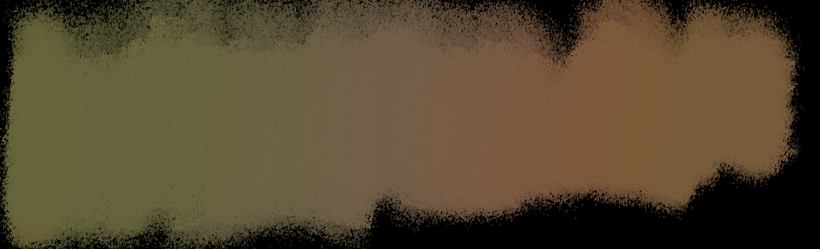
A warm illuminant will give a very different set of colors:

Pigment
With the tune_model set to "Pigment", the above applies, but tints, tones, and shades are created by mixing in white, grey, or black "paint" via a spectral model.
Mxing in "white" can avoid color shifts such as caused by the Abney effect
Rotating hue will eventually turn to mud, just like mixing in paint with too many colors:

You can still adjust the illuminant which will influence the colors just as it does in CIECAM. Warm illuminant will give you warm mud after many hue rotations:
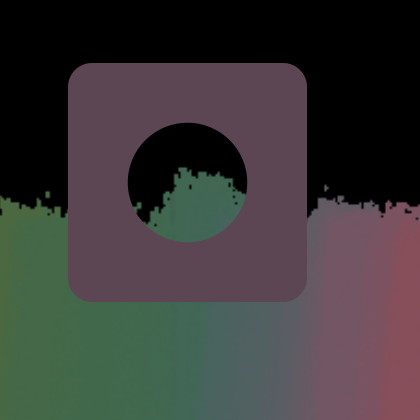
The color adjuster keyboard shortcuts will place a color "swatch" overlay on the image to show you the color in context with your painting. The hole will be centered on your cursor to give you the best comparison possible with any part of your painting:
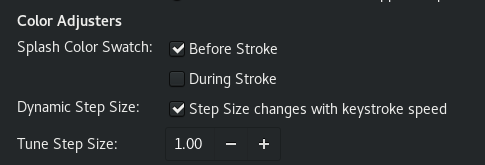
The "step size" used to increment the color dimension is dynamic and will vary based on how quickly the keys are pressed. This allows "fine tuning" towards a desired color by simply pressing the keys more slowly. This is adjustable:
The default adjuster shortcuts are Shift A/S for saturation, Shift D/F for value, and Shift Q/W for hue.
Canvas Pickers
Pressing "R" will do a normal color pick and make the brush color identical to the canvas color. We can also use special modes to pick individual CIECAM "channels" to apply to our brush color:
Alt+R = Pick the canvas "value" and apply that to the brush's existing hue and saturation
Shift+R = Pick the canvas "saturation" and apply that to the brush's existing hue and value
Ctrl+R = Pick the canvas "Hue" and apply that to the brush's existing value and saturation
These commands will let you "match" dissimilar colors to one or two dimensions.
Here are two colors that vary in value, saturation, and hue. Below each color is the same color after the corresponding match operations: value, saturation, and hue:

Illuminant Picker
CTRL+SHIFT+R
Instead of using the cT slider, you can pick an illuminant from the canvas. This gives you more control and lets you pick very extreme illuminants that can severely alter your color palette. Press Ctrl+Shift+R to pick and apply the illuminant from the canvas. A possible use would be to pick the illuminant from an actual light source in your painting, such as the sky. Or, pick an object to help you create reflected light effects. When you desaturate a color, the color becomes more like the illuminant. So, this is also a way to create gradients between the brush color and the illuminant color.
Pigment Blend Mode
CTRL+ALT+R
Another special picker mode allows you to blend the current brush color with the canvas color. Press and hold Ctrl+Alt+R and drag the cursor on the canvas. The brush color will blend with the canvas color in proportion to the distance you drag the cursor and a swatch will be placed at the point where the dragging began. Release the R key to stop blending and lock in that color and apply it to your brush. If you want a "50%" blend, drag the cursor to the edge of the inner circle. The outer edge of the box represents 100%. This makes it easier to create gradations. Keep in mind mixing paint is a non-linear model so 50% of black and white does NOT imply a 50% grey color.
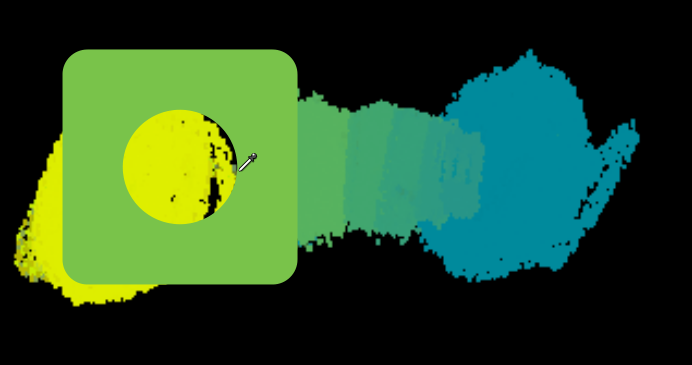
This blend operation uses a special subtractive mixing mode that simulates real pigments, so blue+yellow will create a green color instead of a grey color like normal additive light models.
Pigment Saturation Target
ALT+SHIFT+R
Another shortcut sets the color "target" that becomes the destination color for the "increase saturation" keyboard shortcut (Shift+S).
Example: Your brush color is blue, but you want to create a gradient towards the red spot on the canvas. So, you hover over the red spot, and press ALT+SHIFT+R. Your brush color is still blue, but when you press SHIFT+S it will slowly "mix in" the red color (using a spectral pigment model).