To study design aspects of development environment like Android, iOS.**
ANDROID STUDIO
Android is an open source and Linux-based Operating System for mobile devices such as smartphones and tablet computers. Android was developed by the Open Handset Alliance, led by Google, and other companies.

ANDROID STUDIO
To start coding an Android App, you need an Android development environment. Android Studio is an IDE dedicated to creating and maintaining Android apps Fortunately, Alex did a great job explaining the ins and outs of how it works. As a designer, you’re going to want to get comfortable working in the following files:
colors.xml
Much like Sass variables or CSS Custom Properties, you’re going to want to abstract as much of your code as possible. Regardless of coding language or medium, this kind of practice helps keep your code consistent, flexible, and easy to maintain.
In Android, colors.xml is used to specify all your app’s color values. For example, a color called sunset would described like this: #FA5A41.
After turning their palette into something Android-friendly, we can now use it in the various pieces that make up the app. Access the contents of colors.xml by first typing @color/, then the color’s name:
android:id="@+id/background"``
android:background="@color/grayLight"``
``
/>
dimens.xml
We want to abstract our measurements, much like with our color values. In Android, dimens.xml is where we place that code.
Density-independent pixels
Android has a unit called density-independent pixels (dp). It’s a technical solution that plays to the strengths of their many devices having different display sizes and densities. Unlike declaring a regular static pixel value, a device pixel declaration tells the Android operating system to draw the pixels making up a UI proportionately based on a device’s reported display properties.
Scale-independent pixels
Scale-independent pixels (sp) are much like density-independent pixels, only they are used for type. The main difference is that they scale along with a user’s font size preference. This is great for helping to make your app accessible for those who benefit from a larger type size.
Abstraction
The client’s design system used a suite of standardized spacing values (10px, 20px, 30px, etc.). Since Sketch pixels don’t directly translate to Android density-independent pixels, the trick is to abstract these Sketch measurements and codify them as a series of distances:
2dp
4dp
8dp
10dp
12dp
**
Start from the top
There’s a trick in web design where you consistently apply spacing to only the top or bottom of all your interface elements. The idea is it makes a consistent appearance easier, as you don’t have to constantly undo and redo your margin declarations and wreck the cascade. Personally, I prefer applying spacing from the top, as an infinite vertically-scrolling canvas means there’s always going to be more room below.
styles.xml
Styling components in Android is a highly declarative process. There isn’t a real cascade, like what you’d get with CSS, meaning that you’re going to spend a lot of time re-describing things like color and fonts between different interface components.
<style name="InputLabel" parent="Label"> ` ``@font/lato_bold``` ` ``@color/sunset``` ` ``true``` ` ``18sp``` </style>``This collection of styling instructions can then be via a declaration of style:
<TextView``
android:id="@+id/labelName"``
android:layout_marginTop="@dimen/spacing_small"``
style="@style/InputLabel"``
``
/>
strings.xml
strings.xml is used to contain the content of your app. If you’re picking up on a pattern here, it’s that this is yet another centralizing file that controls things. Strings are declared in a fashion similar to colors and measurement: Login as an admin.
They are declared by typing android:text="", then @string/ inside the double quotes, then the string’s name:
<Button``
android:id="@+id/button_login_as_admin"``
android:layout_marginTop="@dimen/spacing_largest"``
android:text="@string/login_as_admin"``
style="@style/ButtonPrimary"``
``
/>
Commenting and prefixing
Keeping your app code organized helps you quickly locate things and avoid writing duplicate code. This is especially important as the scope of your app grows.
As more code is added to the repo, what we can do is liberally apply comments to help break up the walls of code. I personally like to use multiline comments to separate the larger sections, to more quickly identify what’s what when scrolling through the page.
Get a phone
Sketch and Android Studio can’t directly communicate, meaning that there’s the opportunity for drift to occur between your design files and the actual implementation. Android studio has two tools to help combat this: a Design view and a virtual device emulator.
Design view and emulated Android devices
The Design view gives you an in-pane preview of the code you’re writing for a specific view. It’s good for a quick check, to see if the layout you coded appears properly. However, I’ve found that when it comes to reviewing fine details, Android Studio simply can’t hack it.
Physical hardware
As the saying goes, nothing beats the real thing. On a decent computer, the build time for compiling to an emulator or a physical device was basically the same.
Wrapping up
The client met their deadline, and thanks to Alex’s help, I got to learn some new skills. Excellent all around! If you’re a designer finding yourself undertaking a similar challenge, hopefully this advice can help you out as well.
IOS
IOS is a mobile operating system for Apple-manufactured devices. iOS runs on the iPhone, iPad, iPod Touch and Apple TV.IOS is best known for serving as the underlying software that allows iPhone users to interact with their phones using gestures such as swiping, tapping and pinching. These finger actions are typically performed on multitouch capacitive touch screen displays, which provide fast response and accept inputs from multiple fingers.

The iPhone X safe area
The iPhone X requires some special attention from designers. The width of the screen is the same as on the iPhone 6, 7 and 8, but it’s also 145pt taller. When designing apps for the iPhone X you have to be aware of the safe zone and layout margins to ensure your app user interface doesn’t get clipped by the device’s sensors or corners.
**Automatically applied effects
App icons assets are generally added to the application package as plain, squared PNG files in various dimensions. When rendered on a device, iOS applies various effects to app icons.
Rounded Corners
The old simple radii values for rounded corners are gone. Since iOS 7, app icons have been using the shape of a superellipse. When designing app icons for iOS, I recommend to use the official app icon templates provided by Apple.
Border stroke (in some situations)
If the app icon you are using has a white background, a 1 pixel gray border stroke will be applied to make it easier to recognize the edges of the icon. This is only done in the settings app (if your application is listed there) and the AppStore.
Legacy effects (iOS 6 and previous versions)
On older iOS versions, these effects are applied automatically: rounded corners (not the same shape as iOS 7+ icons are using), drop shadows on the home screen and a gloss effect that can be disabled.
Keyboards
There are various keyboard types available to provide the best possible keyboard for a specific text input. While it is possible to build your own completely custom keyboard, default keyboards cannot be customized in style or size.
Grid system
Apple developed a golden ratio grid system that can be used to size and align elements on your icon correctly. Nevertheless, even Apple designers are not following the grid system very strictly with the native apps’ icons. Feel free to break the rules if your icon simply works better without aligning all elements strictly to the grid.
Typography
The default system font on all iOS versions previous iOS 9 is Helvetica Neue. With the release of iOS 9, Apple introduced a brand new font called San Francisco, which replaced Helvetica Neue as the default font. San Francisco comes in two shapes: „SF UI Display“ and „SF UI Text“, while „Display“ is primarly used for UI components, „Text“ features a wider letter spacing and should be used for longer texts. You can download the San Francisco fonts here if you are a member of Apple’s Developer program. In addition to the default font, many alternative font faces are available to use. You can find a complete list of pre-installed typefaces here.
Toolbar
A toolbar contains a set of actions for managing or manipulating the content of the current view. On the iPhone, it will always appear aligned at the bottom edge of the screen, while on the iPad, it can also be displayed aligned at the top of the screen.
Similarly to the navigation bar, the background fill of toolbars can be modified, is translucent and blurs the underlaying content by default.
Search Bar
Search bars come in two different styles by default: prominent and minimal. Both versions do have the same functionality.
As long as no text was entered by the user, a placeholder text is shown inside the bar, and, optionally, a bookmarks icon that can be used to access recent or saved searches.
Once a search term is entered, the placeholder disappears, and a clear button to delete the entered value appears on the right edge.
Table View
Table views are used to display small to large amounts of list style information in a single or multiple columns and with the option to divide several rows into separate sections or to group them.
There are two basic table view types that should be used, depending on the type of data you are presenting.
Alerts
The purpose of alerts is to inform the user about critical information and optionally to force the user to make a decision about some action.
An alert view does always contain a title text, which should not be longer than one line and one (for pure informational alerts, e.g., „OK“) or two (for alerts that require a decision, e.g., „Send“ and „Cancel“) buttons.
**Modals
Modals are a useful view for tasks that require multiple commands or inputs by the user. They appear on top of everything else, and, while open, block interaction with any other interactive elements underneath.
The typical modal usually provides:
a title to describe the task;
a button to close the modal without saving or performing any other actions;
a button to save or submit any entered information
Practical -2
To setup Android studio2 and study its basic components.
Step – 1 : Head over to this link https://developer.android.com/studio/#downloads to get the Android Studio executable or zip file .
Step – 2 : Click on the download android studio button .

Click on the “I have read and agree with the above terms and conditions” checkbox followed by the download button.
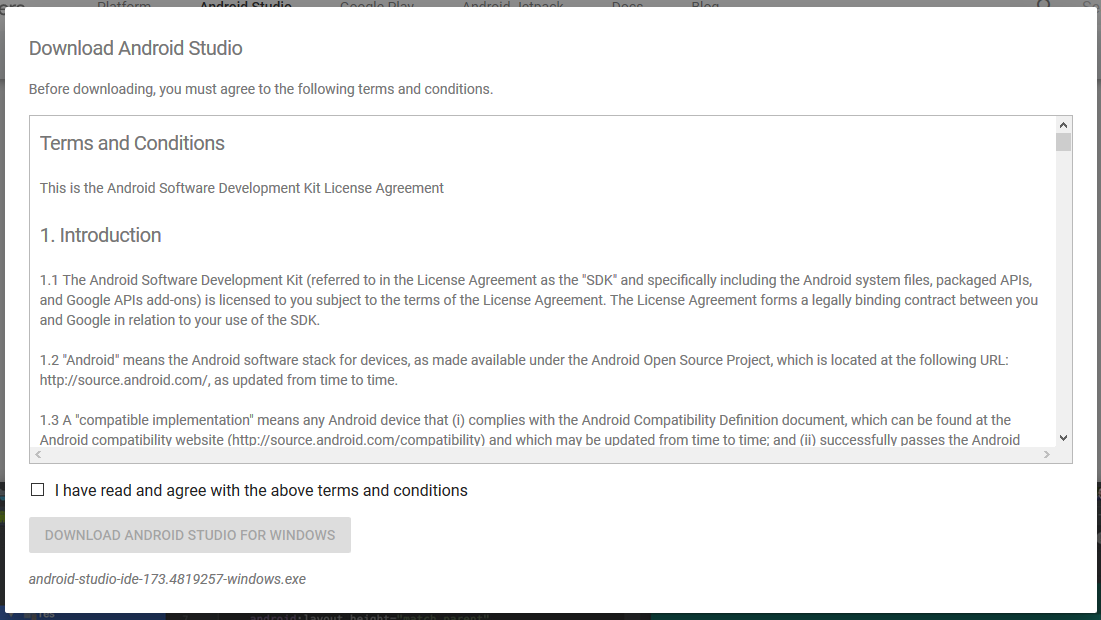
Click on Save file button in the appeared prompt box and the file will start downloading .
Step – 3: After the downloading has finished, open the file from downloads and run it . It will prompt the following dialogue box .
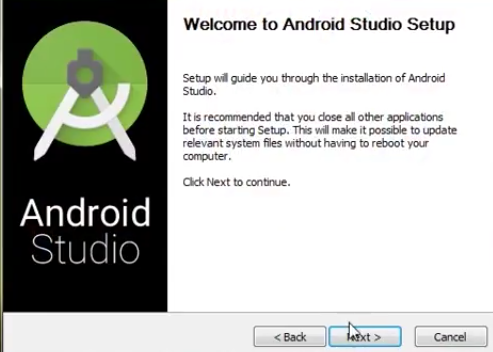
Click on next .
In the next prompt it’ll ask for a path for installation. Choose a path and hit next.
Note :The installation path should have the required minimum space.
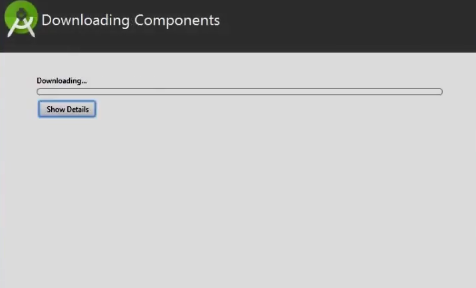
Step – 4 : It will start the installation, and once it is completed, it will be like the image shown below .
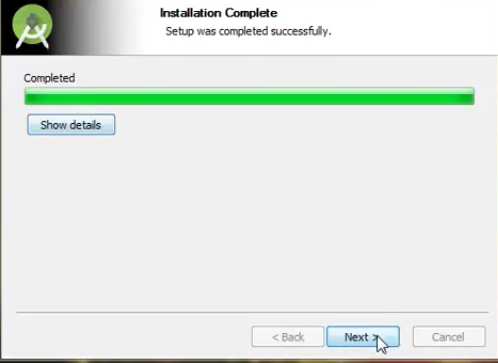
Click on next .
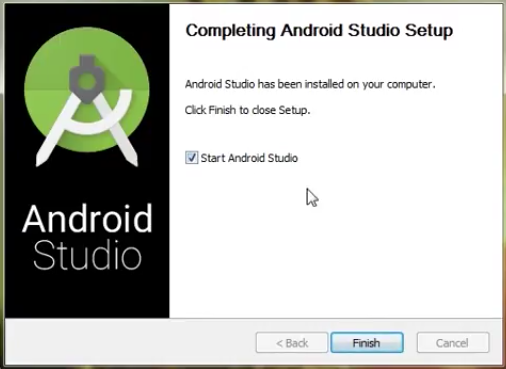
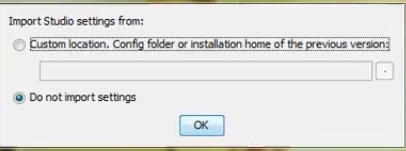
Step – 5 : Once “Finish” is clicked, it will ask whether the previous settings needs to be impoerted [if android studio had been installed earlier], or not. It is better to choose the ‘Don’t import Settings option’ .
Step – 6 :
This will start the Android Studio.


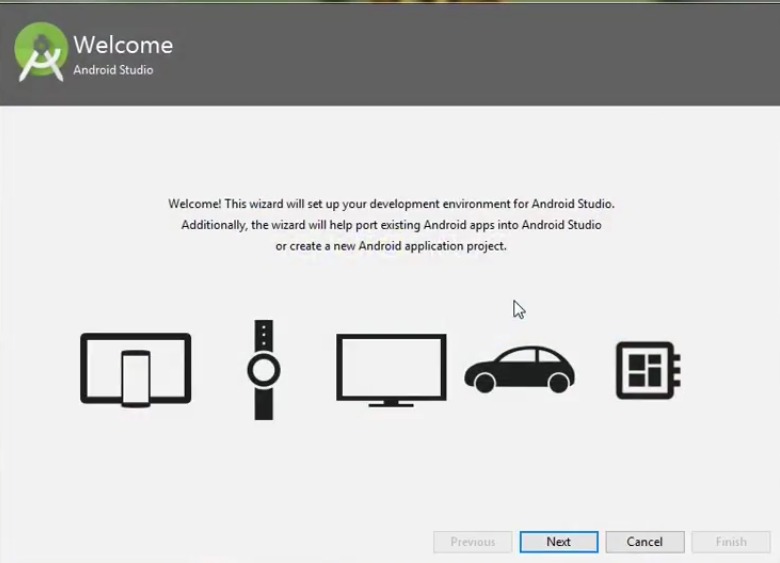
Step – 7: After it has found the SDK components, it will redirect to the Welcome dialog box .
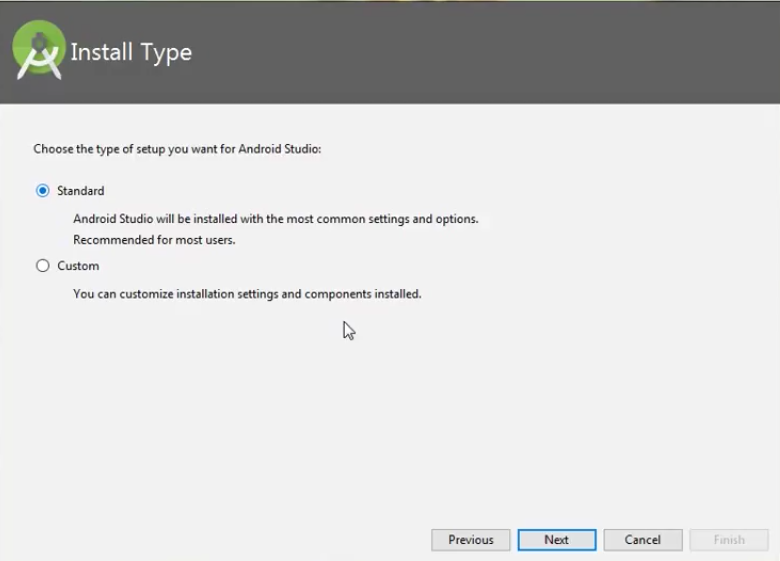
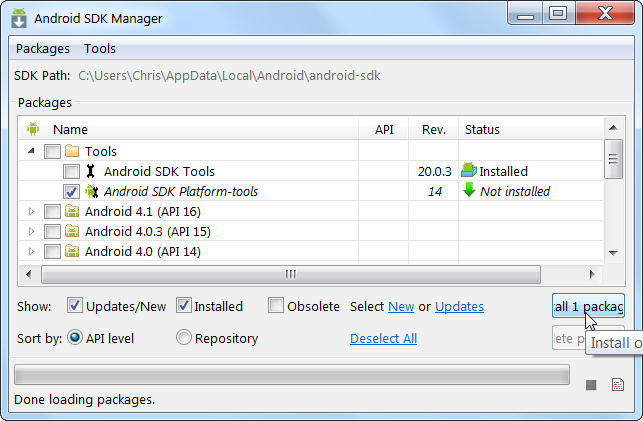
Step – 8 : Now it is time to download the SDK components .

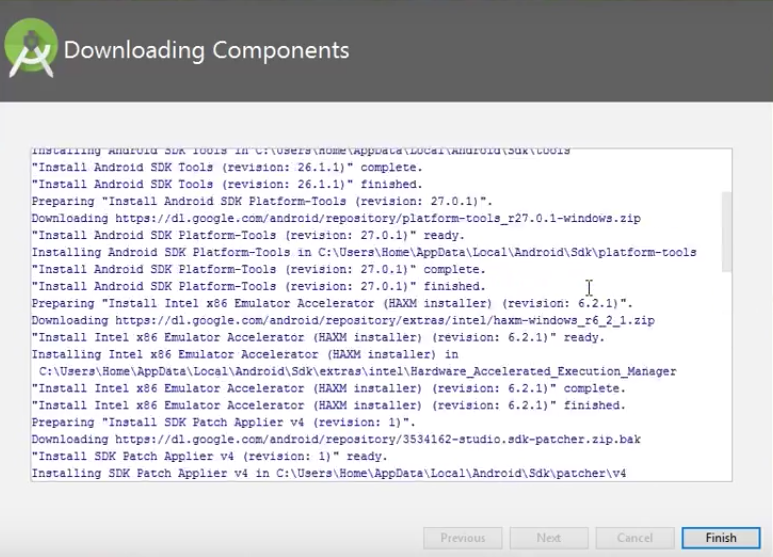
The Android Studio has been successfully configured. Now it’s time to launch and build apps.
Click on the Finish button to launch it.
Step – 9 : Click on ‘Start new android project’ to build a new app.
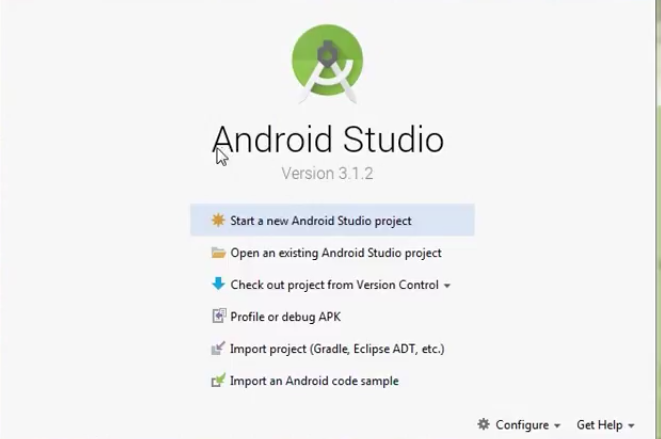
There are some necessary building blocks that an Android application consists of. These loosely coupled components are bound by the application manifest file which contains description of each component and how they interact. The manifest file also contains the app’s metadata, its hardware configuration and platform requirements, external libraries and required permissions.
There are the following main components of an android app:-
1 .Activities- Activities are said to be the presentation layer of our applications. The UI of our application is build around one or more extensions of the Activity class. By using Fragments and Views, activities set the layout and display the output and also respond to the users actions. An activity is implemented as a subclass of class Activity.
filter_none edit play_arrow
brightness_5 public class MainActivity extends Activity { }
2.Services- These are like invisible workers of our app. These components run at backend, updating your data sources and Activities, triggering Notification and also broadcast Intents. They also perform some tasks when applications are not active. A service can be used as a subclass of class Service:
filter_none edit play_arrow
brightness_5 public class ServiceName extends Service { }
3.Content Providers- It is used to manage and persist the application data also typically interact with SQL database. They are also responsible for sharing the data beyond the application boundaries. The Content Providers of a particular application can be configured to allow access from other applications, and the Content Providers exposed by other applications can also be configured. A content provider should be a sub class of the class ContentProvider.
filter_none edit play_arrow
brightness_5 public class contentProviderName extends ContentProvider { public void onCreate(){} }
4.Intents- It is a powerful inter-application message-passing framework. They are extensively used throughout Android. Intents can be used to start and stop Activities and Services, to broadcast messages system-wide or to an explicit Activity, Service or Broadcast Receiver or to request an action be performed on a particular piece of data.
5.Broadcast Receivers- They are known to be intent listeners as they enable your application to listen the Intents that satisfy the matching criteria specified by us. Broadcast Receivers make our application to react to any received Intent thereby making them perfect for creating event driven applications.
6.Widgets- These are the small visual application components that you can find on the home screen of the devices. They are special variation of Broadcast Receivers that allow us to create dynamic, interactive application components for users to embed on their Home Screen.
7.Notifications- Notifications are the application alerts that are used to draw user’s attention to some particular app event without stealing focus or interrupting the current Activity of the user. They are generally used to grab user’s attention when the application is not visible or active, particularly from within a Service or Broadcast Receiver. Examples: E-mail popups, Messenger popups etc.
XML stands for Extensible Markup Language. XML is a markup language much like HTML used to describe data. XML tags are not predefined in XML. We must define our own Tags. Xml as itself is well readable both by human and machine. Also, it is scalable and simple to develop. In Android we use xml for designing our layouts because xml is lightweight language so it doesn’t make our layout heavy.


are used to define the actual UI(User interface) of our application. It holds all the elements(views) or the tools that we want to use in our application. Like the TextView’s, Button’s and other UI elements.

This xml is used to define all the components of our application. It includes the names of our application packages, our Activities, receivers, services and the permissions that our application needs. For Example – Suppose we need to use internet in our app then we need to define Internet permission in this file.

This xml file is used to replace the Hard-coded strings with a single string. We define all the strings in this xml file and then access them in our app(Activity or in Layout XML files) from this file. This file enhance the reusability of the code.

This xml is used to define different styles and looks for the UI(User Interface) of application. We define our custom themes and styles in this file.

This file is used to define the color codes that we used in our app. We simply define the color’s in this file and used them in our app from this file.

The LinearLayout arranges views in a single column or a single row. Child views can be arranged either vertically or horizontally.

<xmlns:android="http://schemas.android.com/apk/res/android"
android:orientation="vertical"
android:layout_width="fill_parent"
android:layout_height="fill_parent"
>
<TextView
android:layout_width="fill_parent"
android:layout_height="wrap_content"
android:text="@string/hello"
/>
</LinearLayout>

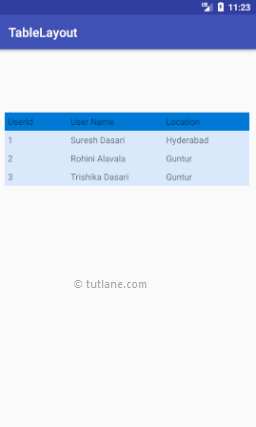
The TableLayout groups views into rows and columns. You use the element to designate a row in the table. Each row can contain one or more views. Each view you place within a row forms a cell. The width of each column is determined by the largest width of each cell in that column.

<TableLayout xmlns:android="http://schemas.android.com/apk/res/android"
    android:layout_width="match_parent"
    android:layout_height="match_parent"
    android:layout_marginTop="100dp"
    android:paddingLeft="10dp"
    android:paddingRight="10dp" >
    <TableRow android:background="#0079D6" android:padding="5dp">
        <TextView
            android:layout_width="wrap_content"
            android:layout_height="wrap_content"
            android:layout_weight="1"
            android:text="UserId" />
        <TextView
            android:layout_width="wrap_content"
            android:layout_height="wrap_content"
            android:layout_weight="1"
            android:text="User Name" />
        <TextView
            android:layout_width="wrap_content"
            android:layout_height="wrap_content"
            android:layout_weight="1"
            android:text="Location" />
    </TableRow>
    <TableRow android:background="#DAE8FC" android:padding="5dp">
        <TextView
            android:layout_width="wrap_content"
            android:layout_height="wrap_content"
            android:layout_weight="1"
            android:text="1" />
        <TextView
            android:layout_width="wrap_content"
            android:layout_height="wrap_content"
            android:layout_weight="1"
            android:text="Suresh Dasari" />
        <TextView
            android:layout_width="wrap_content"
            android:layout_height="wrap_content"
            android:layout_weight="1"
            android:text="Hyderabad" />
    </TableRow>
    <TableRow android:background="#DAE8FC" android:padding="5dp">
        <TextView
            android:layout_width="wrap_content"
            android:layout_height="wrap_content"
            android:layout_weight="1"
            android:text="2" />
        <TextView
            android:layout_width="wrap_content"
            android:layout_height="wrap_content"
            android:layout_weight="1"
            android:text="Rohini Alavala" />
        <TextView
            android:layout_width="wrap_content"
            android:layout_height="wrap_content"
            android:layout_weight="1"
            android:text="Guntur" />
    </TableRow>
    <TableRow android:background="#DAE8FC" android:padding="5dp">
        <TextView
            android:layout_width="wrap_content"
            android:layout_height="wrap_content"
            android:layout_weight="1"
            android:text="3" />
        <TextView
            android:layout_width="wrap_content"
            android:layout_height="wrap_content"
            android:layout_weight="1"
            android:text="Trishika Dasari" />
        <TextView
            android:layout_width="wrap_content"
            android:layout_height="wrap_content"
            android:layout_weight="1"
            android:text="Guntur" />
    </TableRow>
</TableLayout>
Once we are done with creation of layout, we need to load the XML layout resource from our activity onCreate() callback method, for that open main activity file MainActivity.java from \java\com.tutlane.tablelayout path and write the code like as shown below:
package com.tutlane.linearlayout;
import android.support.v7.app.AppCompatActivity;
import android.os.Bundle;

public class MainActivity extends AppCompatActivity {
    @Override
    protected void onCreate(Bundle savedInstanceState) {
        super.onCreate(savedInstanceState);
        setContentView(R.layout.activity_main);
    }
}
The RelativeLayout enables you to specify how child views are positioned relative to each other.

<RelativeLayout xmlns:android="http://schemas.android.com/apk/res/android"
   android:layout_width="match_parent"
   android:layout_height="match_parent"
   android:paddingLeft="10dp"
   android:paddingRight="10dp">
   <Button
       android:id="@+id/btn1"
       android:layout_width="wrap_content"
       android:layout_height="wrap_content"
       android:layout_alignParentLeft="true"
       android:text="Button1" />
   <Button
       android:id="@+id/btn2"
       android:layout_width="wrap_content"
       android:layout_height="wrap_content"
       android:layout_alignParentRight="true"
       android:layout_centerVertical="true"
       android:text="Button2" />
   <Button
       android:id="@+id/btn3"
       android:layout_width="wrap_content"
       android:layout_height="wrap_content"
       android:layout_alignParentLeft="true"
       android:layout_centerVertical="true"
       android:text="Button3" />

   <Button
       android:id="@+id/btn4"
       android:layout_width="match_parent"
       android:layout_height="wrap_content"
       android:layout_alignParentBottom="true"
       android:text="Button4" />
   <Button
       android:id="@+id/btn5"
       android:layout_width="wrap_content"
       android:layout_height="wrap_content"
       android:layout_alignBottom="@+id/btn2"
       android:layout_centerHorizontal="true"
       android:text="Button5" />
   <Button
       android:id="@+id/btn6"
       android:layout_width="wrap_content"
       android:layout_height="wrap_content"
       android:layout_above="@+id/btn4"
       android:layout_centerHorizontal="true"
       android:text="Button6" />
   <Button
       android:id="@+id/btn7"
       android:layout_width="wrap_content"
       android:layout_height="wrap_content"
       android:layout_toEndOf="@+id/btn1"
       android:layout_toRightOf="@+id/btn1"
       android:layout_alignParentRight="true"
       android:text="Button7" />
</RelativeLayout>
MainActivity.java
import android.support.v7.app.AppCompatActivity;
import android.os.Bundle;

public class MainActivity extends AppCompatActivity {
    @Override
    protected void onCreate(Bundle savedInstanceState) {
        super.onCreate(savedInstanceState);
        setContentView(R.layout.activity_main);
    }
}

PRATICAL NO:5
AIM: To incorporate element of interactivity using Android Fragment and Intent Class.
It is the message that is passed between components such as activities, content providers, broadcast receivers, services etc. It is generally used with startActivity() method to invoke activity, broadcast receivers etc. The LabeledIntent is the subclass of android.content.Intent class. Android intents are mainly used to: o Start the service o Launch an activity o Display a web page o Display a list of contacts o Broadcast a message o Dial a phone call etc.
Types of Android Intents There are two types of intents in android:
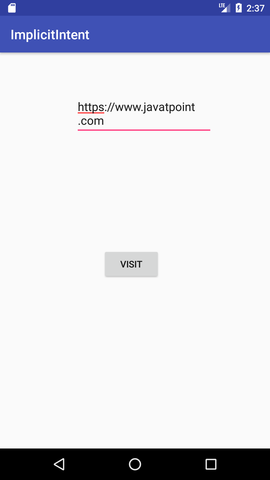
- Implicit Intent: Implicit Intent doesn't specify the component. In such case, intent provides information of available components provided by the system that is to be invoked.
Code:
Intent intent=new Intent(Intent.ACTION_VIEW);

intent.setData(Uri.parse("http://www.javatpoint.com"));

startActivity(intent);
OUTPUT:

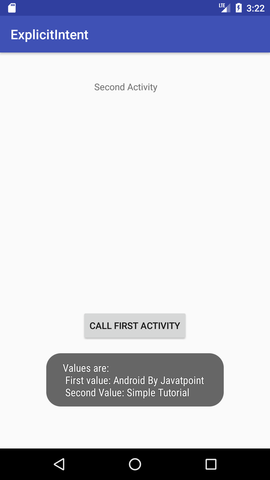
- Explicit Intent Explicit Intent specifies the component. In such case, intent provides the external class to be invoked. CODE:
Intent i = new Intent(getApplicationContext(), ActivityTwo.class);
startActivity(i);
OUTPUT:

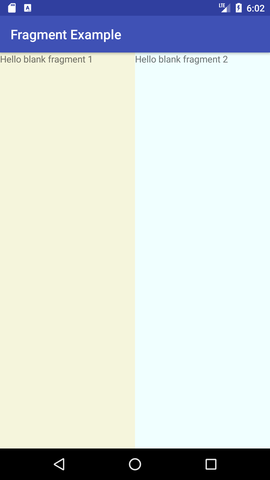
Android Fragment is the part of activity, it is also known as sub-activity. There can be more than one fragment in an activity. Fragments represent multiple screen inside one activity.
Android fragment lifecycle is affected by activity lifecycle because fragments are included in activity.
Each fragment has its own life cycle methods that is affected by activity life cycle because fragments are embedded in activity.
<?xml version="1.0" encoding="utf-8"?> <RelativeLayout xmlns:
android="http://schemas.android.com/apk/res/android"
xmlns:app="http://schemas.android.com/apk/res-auto" xmlns:tools="http://schemas.android.com/tools"
android:layout_width="match_parent" android:layout_height="match_parent"
tools:context="ty.practical6.MainActivity">
<Button android:id="@+id/btnSendEmail" android:layout_width="wrap_content"
android:layout_height="wrap_content"
android:layout_marginTop="92dp" android:onClick="sendEmail" android:text="Compose Email
android:layout_alignTop="@+id/txtMessage" android:layout_centerHorizontal="true" />
 <EditText android:id="@+id/txtMessage" android:layout_width="wrap_content"
 android:layout_height="wrap_content" android:ems="10" android:hint="Message"
 android:inputType="textMultiLine" android:singleLine="true"
 android:layout_marginTop="48dp" android:layout_below="@+id/txtSubject"
 android:layout_centerHorizontal="true" />

<EditText android:id="@+id/txtEmailTo" android:layout_width="wrap_content"
android:layout_height="wrap_content" android:ems="10" android:hint="To"
android:inputType="textEmailAddress" android:layout_marginTop="22dp"
android:layout_alignParentTop="true" android:layout_alignStart="@+id/txtSubject" />

<EditText android:id="@+id/txtSubject" android:layout_width="wrap_content"
android:layout_height="wrap_content" android:layout_alignStart="@+id/txtMessage"
android:layout_below="@+id/txtEmailTo" android:layout_marginTop="43dp" android:ems="10"
android:hint="Subject" android:inputType="text" />
</RelativeLayout>
package ty.practical6;
import android.content.Intent;
import android.net.Uri;
import android.os.Bundle;
import android.support.v7.app.AppCompatActivity;
import android.view.View;
import android.widget.EditText;
import android.widget.Toast;

public class MainActivity extends AppCompatActivity
{ @Override
protected void onCreate(Bundle savedInstanceState)
{
super.onCreate(savedInstanceState);
setContentView(R.layout.activity_main);
}
public void sendEmail(View v) {
EditText txtEmailTo = (EditText) findViewById(R.id.txtEmailTo);
EditText txtSubject = (EditText) findViewById(R.id.txtSubject);
EditText txtMessage = (EditText) findViewById(R.id.txtMessage);

String[] TO = {txtEmailTo.getText().toString()};
String[] CC = {""};
String subject = txtSubject.getText().toString();
String msg = txtMessage.getText().toString();

Intent emailIntent = new Intent(Intent.ACTION_SEND);

emailIntent.setData(Uri.parse("mailto:"));
emailIntent.setType("text/plain");
emailIntent.putExtra(Intent.EXTRA_EMAIL, TO);

emailIntent.putExtra(Intent.EXTRA_CC, CC);
emailIntent.putExtra(Intent.EXTRA_SUBJECT, subject);
emailIntent.putExtra(Intent.EXTRA_TEXT, msg);

try
{
startActivity(Intent.createChooser(emailIntent, "Send mail..."));
finish();
}
catch (android.content.ActivityNotFoundException ex)
   {
Toast.makeText(MainActivity.this, "No email client app installed.", Toast.LENGTH_SHORT).show();
}
}
}
On clicking COMPOSE EMAIL button a list of apps will be displayed select a relevant email client app e.g. Gmail and the contents given as input here will be passed to Gmail app’s email compose screen.

Practical-7: To implement the concept of multithreading using Android Service class.
Introduction: Multi-threading is defined as a feature through which we can run two or more concurrent threads of a process. In this a process, the common data is shared among all these threads also known as sub-processes exclusively. In android there are many ways through which multi-threading can be established in the application.
Objective:
- Understanding the basic concept of multithreading.
- Understanding of Handler class in android
- Understanding of Runnable Interface.
Multi-Threading In Android: Multi-Threading in Android is a unique feature through which more than one threads execute together without hindering the execution of other threads. Multi-Threading in Android is not different from conventional multi-Threading. A class can be thought of as a process having its method as it’s sub-processes or threads. All these methods can run concurrently by using feature of Multi-Threading. In android, multi-Threading can be achieved through the use of many in-built classes. Out of them, Handler class is most commonly used.
Handler Class In Android: Handler class come from the Package android.os.Handler package and is most commonly used for multi-threading in android. Handler class provide sending and receiving feature for messages between different threads and handle the thread execution which is associated with that instance of Handler class. In android class, every thread is associated with an instance of Handler class and it allows the thread to run along with other threads and communicate with them through messages.
Runnable Interface:
Runnable interface is used in multi-threading to be called in a loop when the thread starts. It is a type of thread that executes the statement in its body or calls other methods for a specified or infinite number of times.This runable interface is used by the Handler class to execute the multi-threading, i.e., to execute one or more thread in specified time.Runnable is an interface which is implemented by the class desired to support multithreading and that class must implements it’s abstract method public void run().Run() method is the core of multithreading as it includes the statement or calls to other methods that the thread needs to be made for multithreading.

Runnable interface can also be used by using adapter class as explained below:

Steps Involved in making project on Multi-Threading:
**Step 1: **
Make a new android project Multi-Threading in Eclipse and create a package named com.nkm.thread in it.
Step 2: Listing 1: Create an XML file main.xml if not already created in layout folder and paste the following code:


Step 3: Listing 2: Make a Java file named MultiThreadingActivity if not already created in com.nkm.thread package and paste the following code:


So, on the whole it creates a thread that executes in a loop until certain condition met.

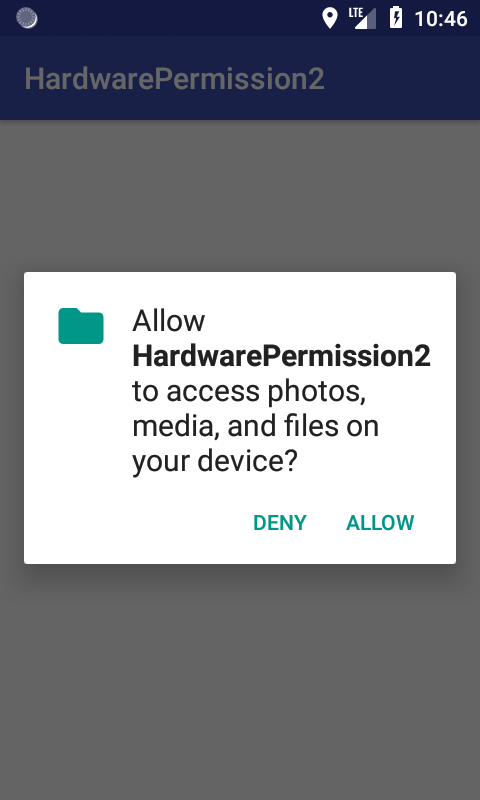
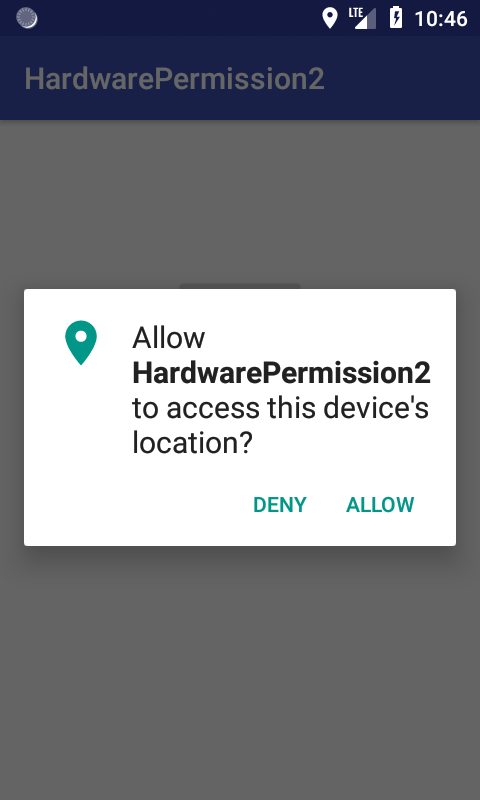
Practical 8 : To implement concept of permission and perform request for permission to access different hardware components of mobile.
Permissions : The purpose of a permission is to protect the privacy of an Android user. Android apps must request permission to access sensitive user data (such as contacts and SMS), as well as certain system features (such as camera and internet). Depending on the feature, the system might grant the permission automatically or might prompt the user to approve the request.
Permission approval : An app must publicize the permissions it requires by including tags in the app manifest. For example, an app that needs to access location would have this line in the manifest:
Example:
<uses-permission android:name="android.permission.ACCESS_COARSE_LOCATION" />

<application ...>
    ...
</application>
Code:
class MainActivity : AppCompatActivity() {
val STORAGE_CODE = 1
val GPS_CODE = 2
override fun onRequestPermissionsResult(requestCode: Int, permissions: Array<String>, grantResults: IntArray)
{
    super.onRequestPermissionsResult(requestCode, permissions, grantResults)


    if (requestCode == STORAGE_CODE)
    {
        if (grantResults.isNotEmpty() && grantResults[0] == PackageManager.PERMISSION_GRANTED)
        {
            Toast.makeText(this,"Storage Permission Granted",Toast.LENGTH_SHORT).show()
        }
    }

    if (requestCode == GPS_CODE)
    {
        if (grantResults.isNotEmpty() && grantResults[0] == PackageManager.PERMISSION_GRANTED)
        {
            Toast.makeText(this,"GPS Permission Granted",Toast.LENGTH_SHORT).show()
        }
    }


}

override fun onCreate(savedInstanceState: Bundle?)
{
    super.onCreate(savedInstanceState)
    setContentView(R.layout.activity_main)


        storageBtn.setOnClickListener { checkPermission(Manifest.permission.WRITE_EXTERNAL_STORAGE,STORAGE_CODE) }

        gpsBtn.setOnClickListener { checkPermission(Manifest.permission.ACCESS_COARSE_LOCATION,GPS_CODE) }

    }

fun checkPermission(permission:String,requestCode: Int)
{
    if (ContextCompat.checkSelfPermission(this, permission) == PackageManager.PERMISSION_DENIED)
    {
        ActivityCompat.requestPermissions(this, arrayOf(permission),requestCode)
    }else {
        Toast.makeText(this,"Permission already granted",Toast.LENGTH_SHORT).show()
    }
}
Output 1 :
Output 2 :
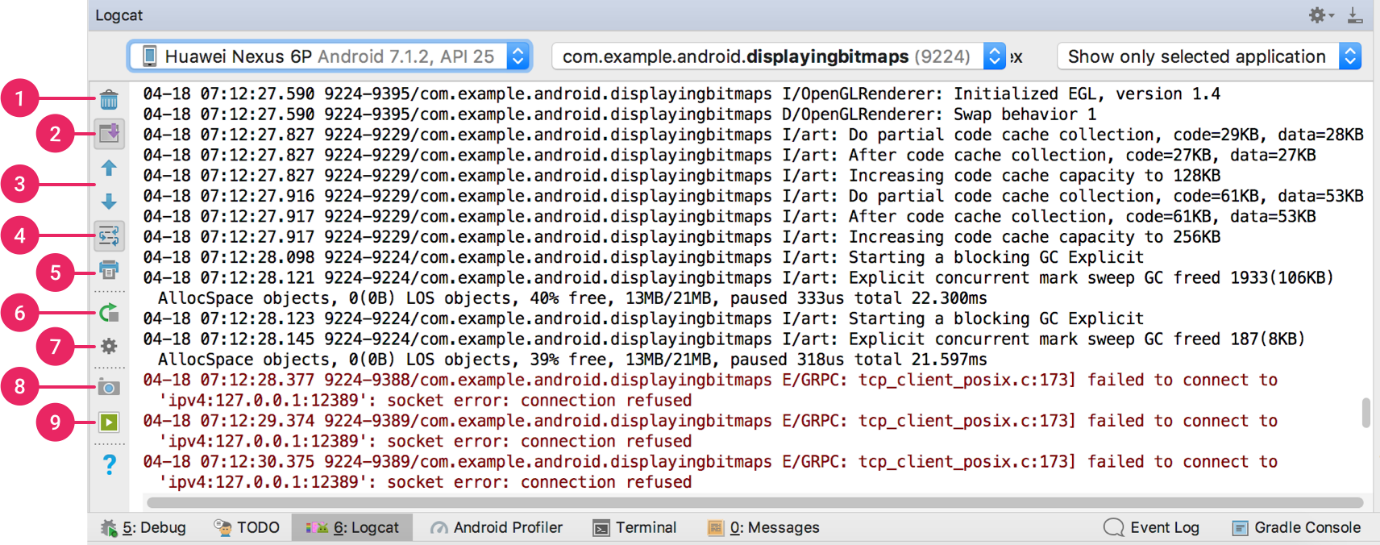
Practical 9: To perform debugging and testing of android app using tools like Logcat, Android debug bridge, DDMS.
Debugging is the process of finding and fixing errors (bugs) or unexpected behaviour in our code. All code has bugs, from incorrect behaviour in our app, to behaviour that excessively consumes memory or network resources, to actual app freezing or crashing.
Bugs can result for many reasons:
• Errors in design or implementation
• Android framework limitations (or bugs)
• Missing requirements or assumptions for how the app should work
• Device limitations (or bugs)
Use the debugging, testing, and profiling capabilities in Android Studio to help us reproduce, find, and resolve all of these problems. Those capabilities include:
• Logcat
• Android Debug Bridge
• DDMS (Dalvik Debug Monitor Server)
We can use log class to send messages to the Android system log, and view those messages in Android Studio in the Logcat pane. The Android SDK includes a useful logging utility class called android.util.Log. The class allows us to log messages categorized based severity; each type of logging message has its own message. Here is a listing of the message types, and their respective method calls, ordered from lowest to highest priority:
• The Log.v() method is used to log verbose messages.
• The Log.d() method is used to log debug messages.
• The Log.i() method is used to log informational messages.
• The Log.w() method is used to log warnings.
• The Log.e() method is used to log errors.
• The Log.wtf() method is used to log events that should never happen
(“wtf” being an abbreviation for “What a Terrible Failure”, of course).
We can think of this method as the equivalent of Java’s assert method.
Android Debug Bridge:
Android Debug Bridge (adb) is a versatile command-line tool that lets us communicate with a device. ADB is a part of Android SDK The adb command facilitates a variety of device actions, such as installing and debugging apps, and it provides access to a Unix shell that we can use to run a variety of commands on a device. It is a client-server program that includes three components:
• A client, which sends commands. The client runs on development machine. We can invoke a client from a
  command-line terminal by issuing an adb command.
• A daemon (adbd), which runs commands on a device. The daemon runs as a background process on each device.
• A server, which manages communication between the client and the daemon. The server runs as a background
process on your development machine.
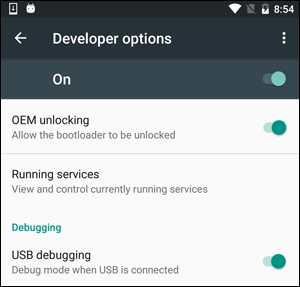
We have to use USB debugging under Developer Options for using adb with a device. We can now connect our device with USB. We can verify that our device is connected by executing adb devices from the android_sdk/platform-tools/ directory.
adb devices
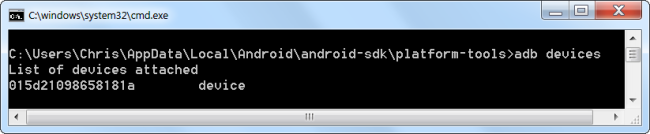
Now, we can run ADB commands to use the tool in console for both Debugging and Testing of the application.
Further details and guide to the ADB can be seen here.
DDMS (Dalvik Debug Monitor Server): The DDMS is a debugging tool used in the Android platform. The Dalvik Debug Monitor Service is downloaded as part of the Android SDK. Some of the services provided by the DDMS are port forwarding, on-device screen capture, on-device thread and heap monitoring, and radio state information. It allows developers to spot bugs in applications running on either an emulator or an actual Android device. Its feature, known as Emulator Control allows developers to simulate phone states and activities. For example, it can simulate different types of networks which can have different network characteristics such as speed and latency. This debugging tool can be integrated into the Eclipse IDE by adding the ADT (Android Development Tools) plug-in. Otherwise, it can be accessed from the command line and will automatically connect to any running emulator.
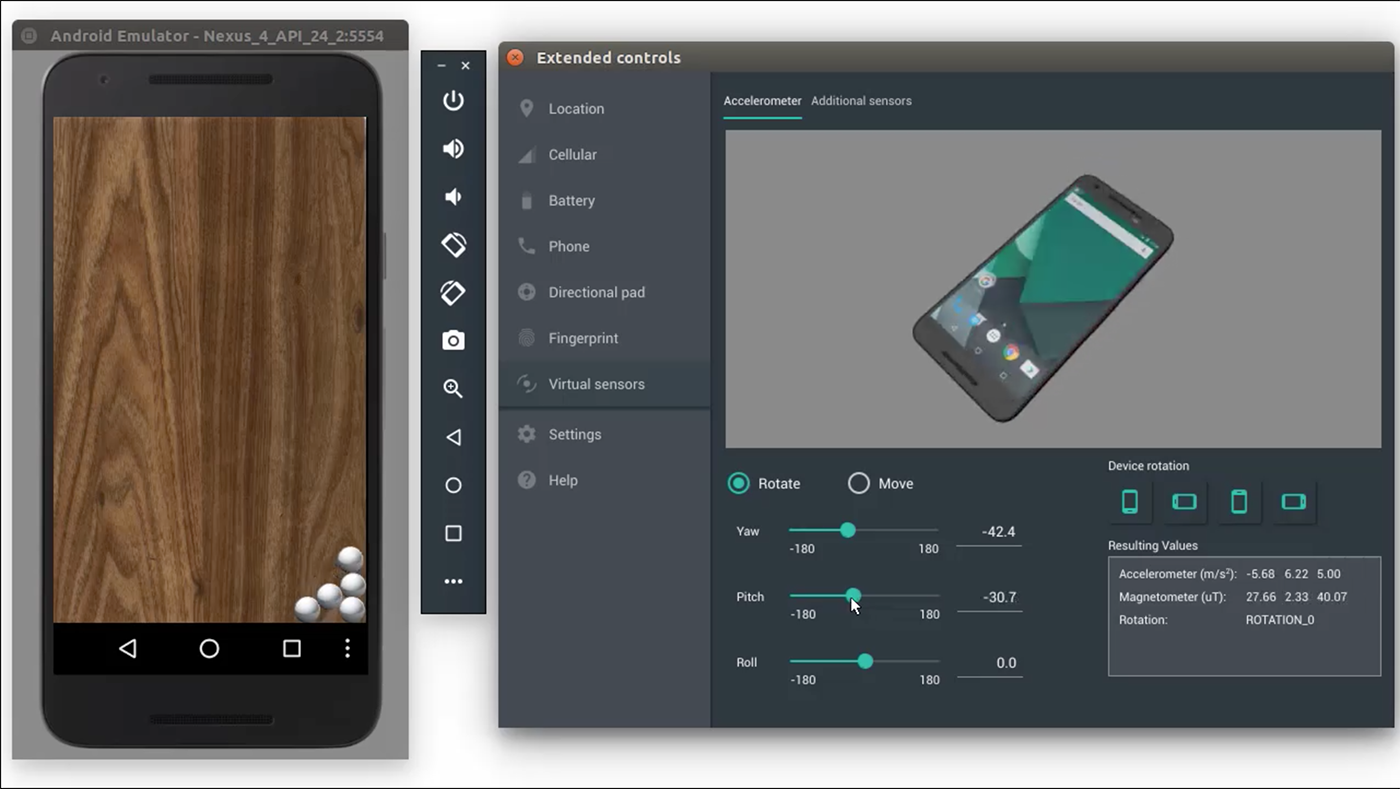
DDMS is deprecated. Its features have been replaced by other new features.
Instead of this, we use Android Profiler in Android Studio 3.0 and higher to profile
your app's CPU, memory, and network usage. To perform other debugging tasks, such as sending
commands to a connected device to set up port-forwarding, transfer files, or take screenshots,
then use the Android Debug Bridge (adb), Android Emulator, Device File Explorer, or Debugger window.
Practical 10
// XML file
<TextView android:id="@+id/txtDisplay"
    android:layout_width="match_parent"
    android:layout_height="90dp"
    android:maxLength="15"
    android:paddingLeft="10sp"
    android:fontFamily="cursive"
    android:textAppearance="@android:style/TextAppearance.DeviceDefault.Large"
    android:textSize="40sp" />

<LinearLayout
    android:layout_width="match_parent"
    android:layout_height="match_parent"
    android:orientation="vertical"
    android:layout_below="@+id/txtDisplay"
    android:layout_alignParentLeft="true"
    android:layout_alignParentStart="true"
    android:background="@color/colorPrimary">

<LinearLayout
    android:layout_width="match_parent"
    android:layout_height="wrap_content"
    android:orientation="horizontal"
    android:background="@color/colorPrimaryDark">

    <Button
        android:id="@+id/btnSeven"
        android:layout_width="90dp"
        android:layout_height="90dp"
        android:text="7"
        android:textSize="30dp"/>

    <Button
        android:id="@+id/btnEight"
        android:layout_width="90dp"
        android:layout_height="90dp"
        android:text="8"
        android:textSize="30dp"/>

    <Button
        android:id="@+id/btnNine"
        android:layout_width="90dp"
        android:layout_height="90dp"
        android:text="9"
        android:textSize="30dp"/>

    <Button
        android:id="@+id/btnDivide"
        android:layout_width="100dp"
        android:layout_height="80dp"
        android:text="/"
        android:layout_marginLeft="5dp"
        android:background="@drawable/mybutton"
        android:textSize="30dp"/>

</LinearLayout>

    <LinearLayout
        android:layout_width="match_parent"
        android:layout_height="wrap_content"
        android:orientation="horizontal"
        android:background="@color/colorPrimaryDark">

        <Button
            android:id="@+id/btnFour"
            android:layout_width="90dp"
            android:layout_height="90dp"
            android:text="4"
            android:textSize="30dp"/>

        <Button
            android:id="@+id/btnFive"
            android:layout_width="90dp"
            android:layout_height="90dp"
            android:text="5"
            android:textSize="30dp"/>

        <Button
            android:id="@+id/btnSix"
            android:layout_width="90dp"
            android:layout_height="90dp"
            android:text="6"
            android:textSize="30dp"/>

        <Button
            android:id="@+id/btnMultiply"
            android:layout_width="100dp"
            android:layout_height="80dp"
            android:text="*"
            android:textSize="30dp"
            android:layout_marginLeft="5dp"
            android:background="@drawable/mybutton"/>

    </LinearLayout>

    <LinearLayout
        android:layout_width="match_parent"
        android:layout_height="wrap_content"
        android:orientation="horizontal"
        android:background="@color/colorPrimaryDark">

        <Button
            android:id="@+id/btnOne"
            android:layout_width="90dp"
            android:layout_height="90dp"
            android:text="1"
            android:textSize="30dp"/>

        <Button
            android:id="@+id/btnTwo"
            android:layout_width="90dp"
            android:layout_height="90dp"
            android:text="2"
            android:textSize="30dp"/>

        <Button
            android:id="@+id/btnThree"
            android:layout_width="90dp"
            android:layout_height="90dp"
            android:text="3"
            android:textSize="30dp"/>


        <Button
            android:id="@+id/btnSub"
            android:layout_width="100dp"
            android:layout_height="80dp"
            android:text="-"
            android:textSize="30dp"
            android:layout_marginLeft="5dp"
            android:background="@drawable/mybutton"/>

    </LinearLayout>

    <LinearLayout
        android:layout_width="match_parent"
        android:layout_height="wrap_content"
        android:orientation="horizontal"
        android:background="@color/colorPrimaryDark">

        <Button
            android:id="@+id/btnZero"
            android:layout_width="90dp"
            android:layout_height="90dp"
            android:text="0"
            android:textSize="30dp"
            />

        <Button
            android:id="@+id/btnDot"
            android:layout_width="90dp"
            android:layout_height="90dp"
            android:text="."
            android:textSize="30dp"/>

        <Button
            android:id="@+id/btnEqual"
            android:layout_width="90dp"
            android:layout_height="90dp"
            android:text="="
            android:textSize="30dp"/>

        <Button
            android:id="@+id/btnAdd"
            android:layout_width="100dp"
            android:layout_height="80dp"
            android:text="+"
            android:textSize="30dp"
            android:layout_marginLeft="5dp"
            android:background="@drawable/mybutton"/>

    </LinearLayout>

    <LinearLayout
        android:layout_width="match_parent"
        android:layout_height="wrap_content"
        android:orientation="horizontal">

        <Button
            android:id="@+id/btnClear"
            android:layout_width="match_parent"
            android:layout_height="50dp"
            android:text="Clear All"
            android:textStyle="bold"
            android:textSize="20sp"
            android:fontFamily="casual"
            />
    </LinearLayout>
</LinearLayout>
// JAVA file package main.ravirajpurohit414.com.pandeycalculator;
import android.content.Context; import android.support.v7.app.AppCompatActivity; import android.os.Bundle; import android.view.Gravity; import android.view.View; import android.widget.Button; import android.widget.TextView; import android.widget.TextView; import android.widget.Toast;
import java.text.DecimalFormat;
public class MainActivity extends AppCompatActivity {
private double num1, num2, answer;
private char op;
private boolean hasDot; //Variable to know whether Dot(.) is pressed.


@Override
protected void onCreate(Bundle savedInstanceState) {

    Context context = getApplicationContext();
    CharSequence text = "Help Yourself!";
    int duration = Toast.LENGTH_SHORT;

    Toast toast = Toast.makeText(context, text, duration);
    toast.setGravity(Gravity.TOP|Gravity.CENTER_HORIZONTAL, 0, 0);
    toast.show();

    super.onCreate(savedInstanceState);
    setContentView(R.layout.activity_main);
    final Button btnOne = (Button) findViewById(R.id.btnOne);
    final Button btnTwo = (Button) findViewById(R.id.btnTwo);
    final Button btnThree = (Button) findViewById(R.id.btnThree);
    final Button btnFour = (Button) findViewById(R.id.btnFour);
    final Button btnFive = (Button) findViewById(R.id.btnFive);
    final Button btnSix = (Button) findViewById(R.id.btnSix);
    final Button btnSeven = (Button) findViewById(R.id.btnSeven);
    final Button btnEight = (Button) findViewById(R.id.btnEight);
    final Button btnNine = (Button) findViewById(R.id.btnNine);
    final Button btnZero = (Button) findViewById(R.id.btnZero);
    final Button btnAdd = (Button) findViewById(R.id.btnAdd);
    final Button btnSub = (Button) findViewById(R.id.btnSub);
    final Button btnMultiply = (Button) findViewById(R.id.btnMultiply);
    final Button btnDivide = (Button) findViewById(R.id.btnDivide);
    final Button btnDot = (Button) findViewById(R.id.btnDot);
    final Button btnEqual = (Button) findViewById(R.id.btnEqual);
    final Button btnClear = (Button) findViewById(R.id.btnClear);
    final TextView txtDisplay = (TextView) findViewById(R.id.txtDisplay);

    btnOne.setOnClickListener(new View.OnClickListener() {
        public void onClick(View v) {
            txtDisplay.append("1");
        }
    });

    btnTwo.setOnClickListener(new View.OnClickListener() {
        public void onClick(View v){
            txtDisplay.append("2");
        }
    });

    btnThree.setOnClickListener(new View.OnClickListener() {
        public void onClick(View v){
            txtDisplay.append("3");
        }
    });

    btnFour.setOnClickListener(new View.OnClickListener() {
        public void onClick(View v){
            txtDisplay.append("4");
        }
    });

    btnFive.setOnClickListener(new View.OnClickListener() {
        public void onClick(View v){
            txtDisplay.append("5");
        }
    });

    btnSix.setOnClickListener(new View.OnClickListener() {
        public void onClick(View v){
            txtDisplay.append("6");
        }
    });

    btnSeven.setOnClickListener(new View.OnClickListener() {
        public void onClick(View v){
            txtDisplay.append("7");
        }
    });

    btnEight.setOnClickListener(new View.OnClickListener() {
        public void onClick(View v){
            txtDisplay.append("8");
        }
    });

    btnNine.setOnClickListener(new View.OnClickListener() {
        public void onClick(View v){
            txtDisplay.append("9");
        }
    });

    btnZero.setOnClickListener(new View.OnClickListener() {
        public void onClick(View v){
            txtDisplay.append("0");
        }
    });

    btnDot.setOnClickListener(new View.OnClickListener() {
        public void onClick(View v){
            //if Dot(.) is pressed then set hasDot to true to restrict
            if(hasDot==false) {
                txtDisplay.append("."); hasDot = true; }
        }
    });

    btnAdd.setOnClickListener(new View.OnClickListener() {
        public void onClick(View v){
            num1 = Double.parseDouble(txtDisplay.getText().toString());
            op = '+';
            txtDisplay.setText("");
            hasDot = false; //set hasDot to false to use in the next operand.
        }
    });

    btnSub.setOnClickListener(new View.OnClickListener() {
        public void onClick(View v){
            num1 = Double.parseDouble(txtDisplay.getText().toString());
            op = '-';
            txtDisplay.setText("");
            hasDot = false; //set hasDot to false to use in the next operand.
        }
    });

    btnMultiply.setOnClickListener(new View.OnClickListener() {
        public void onClick(View v){
            num1 = Double.parseDouble(txtDisplay.getText().toString());
            op = '*';
            txtDisplay.setText("");
            hasDot = false; //set hasDot to false to use in the next operand.
        }
    });

    btnDivide.setOnClickListener(new View.OnClickListener() {
        public void onClick(View v){
            num1 = Double.parseDouble(txtDisplay.getText().toString());
            op = '/';
            txtDisplay.setText("");
            hasDot = false; //set hasDot to false to use in the next operand.
        }
    });

    btnEqual.setOnClickListener(new View.OnClickListener() {
        public void onClick(View v){
            num2 = Double.parseDouble(txtDisplay.getText().toString());
            switch (op) {
                case '+':
                    answer = num1 + num2;
                    break;
                case '-':
                    answer = num1 - num2;
                    break;

                case '*':
                    answer = num1 * num2;
                    break;

                case '/':
                    answer = num1 / num2;
                    break;

                default:
                    break;
            }

            DecimalFormat d = new DecimalFormat();
            String ans = d.format(answer);
            txtDisplay.setText(ans);
            hasDot = false; //set hasDot to false to use in new calculation.
        }
    });

    btnClear.setOnClickListener(new View.OnClickListener() {
        public void onClick(View v){
            txtDisplay.setText("");
            hasDot = false; //set hasDot to false to use in new calculation.
        }
    });
}
}
  <?xml version="1.0" encoding="utf-8"?>
  <menu xmlns:android="http://schemas.android.com/apk/res/android">
<item
    android:id="@+id/item1"
    android:title="FYCS" />
<item
    android:id="@+id/item2"
    android:title="SYCS" />
<item
    android:id="@+id/item3"
    android:title="TYCS" />
</menu>
package com.example.myapplication;

import androidx.appcompat.app.AppCompatActivity;

import android.os.Bundle;
import android.content.Intent;
import android.view.Menu;
import android.view.MenuInflater;
import android.view.MenuItem;


public class MainActivity extends AppCompatActivity
{

@Override
protected void onCreate(Bundle savedInstanceState)
{
    super.onCreate(savedInstanceState);
    setContentView(R.layout.activity_main);
}


@Override
public boolean onCreateOptionsMenu(Menu menu)
{
    //return super.onCreateOptionsMenu(menu);
    MenuInflater menuInflater = getMenuInflater();
    menuInflater.inflate(R.menu.main_menu, menu);

    return true;
}
@Override
public boolean onOptionsItemSelected(MenuItem item)
{
    switch(item.getItemId())
    {
        case R.id.item1:
            startActivity(new Intent(MainActivity.this, FYCS.class));
            return true;
        case R.id.item2:
            startActivity(new Intent(MainActivity.this, SYCS.class));
            return true;
        case R.id.item3:
            startActivity(new Intent(MainActivity.this, TYCS.class));
            return true;
        default:
            return super.onOptionsItemSelected(item);
    }
}
}
